Craving plant-based sweets that’ll blow your mind? These vegan dessert recipes transform simple ingredients into pure magic.
I’ll never forget the first time I bit into a truly spectacular vegan dessert. It was at my friend Sarah’s dinner party three years ago.
She served this incredible chocolate avocado mousse that completely changed my perspective.
Wait, let me back up. I was that person who rolled my eyes at “healthy desserts.” You know the type? I thought vegan treats were just sad substitutes for the real thing.
Boy, was I wrong.
That silky mousse didn’t taste like vegetables disguised as dessert. It tasted like… well, like heaven had crashed into my taste buds. The richness, the depth of flavor, the way it melted on my tongue.
I actually asked for seconds. Then thirds. Don’t judge me.
These eleven vegan dessert recipes aren’t just good “for vegan desserts.” They’re just plain good. Period.
Each one tells a story of flavor innovation, whether you’re exploring exotic ingredients like black sesame or rediscovering classics with a plant-based twist.
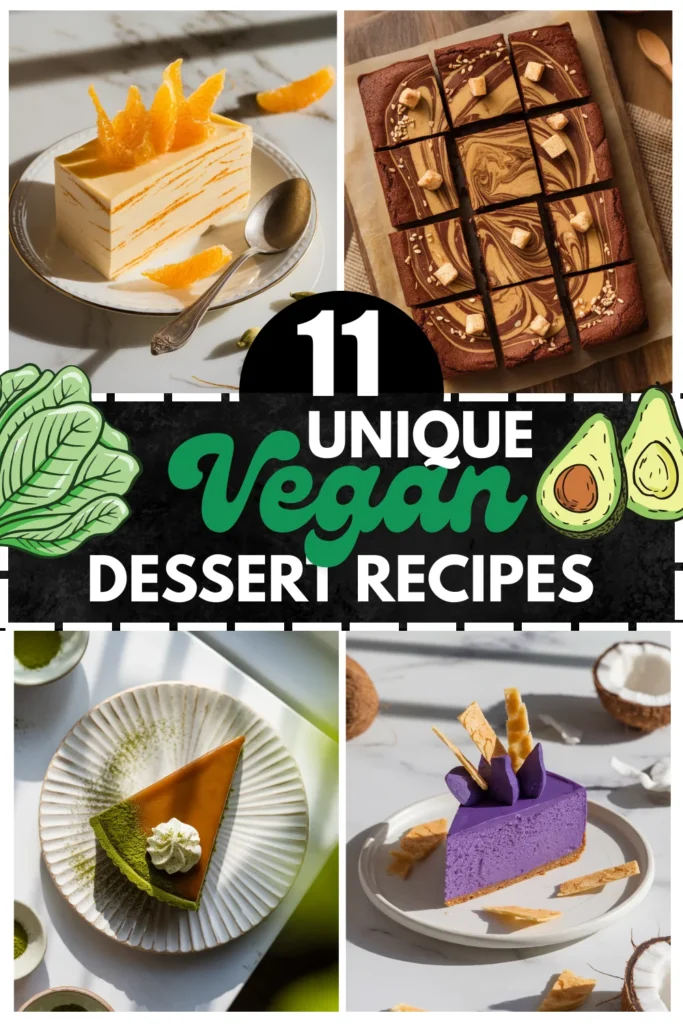
11 Vegan Dessert Recipes
Ready to surprise yourself? Let’s dive into desserts that’ll make everyone at your table beg for the recipes.
1. Black Sesame Mochi Ice Cream Sandwiches
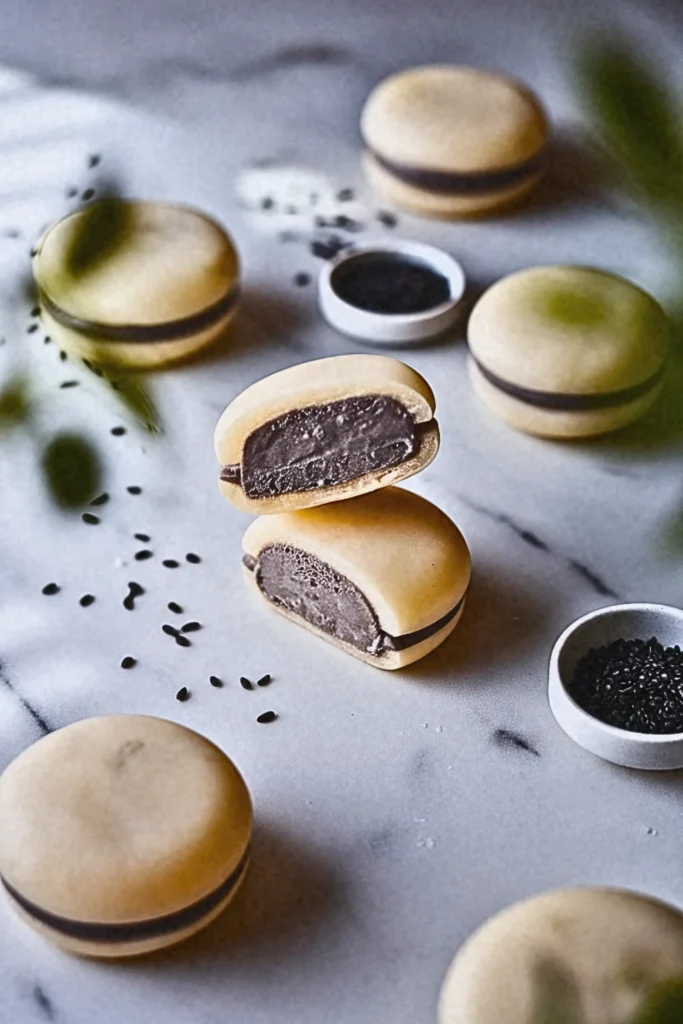
This dessert combines the nutty richness of black sesame with chewy homemade mochi wrappers, creating an elegant treat that balances Eastern flavors with Western presentation styles.
Recipe Highlights
✅ Prep Time: 45 minutes
✅ Cook Time: 15 minutes
✅ Total Time: 6 hours (including freezing)
✅ Servings: 8 sandwiches
✅ Estimated Cost: $18
✅ Calories per Serving: 285
✅ Dietary Info: Vegan, Gluten-Free, Refined Sugar-Free
Category
✅ Course: Dessert
✅ Cuisine: Japanese-American Fusion
Ingredients
For the Black Sesame Ice Cream:
- 1 cup full-fat coconut milk
- ½ cup cashew cream (soaked cashews blended with water)
- ⅓ cup black sesame paste
- ¼ cup maple syrup
- 2 tablespoons coconut oil, melted
- 1 teaspoon vanilla extract
- Pinch of sea salt
For the Mochi Wrapper:
- 1 cup glutinous rice flour (substitute: sweet rice flour)
- ¾ cup water
- ¼ cup coconut sugar (substitute: regular sugar)
- 1 tablespoon coconut oil
- Cornstarch for dusting
Equipment
- You will need an ice cream maker for the smoothest texture, though you can hand-churn if necessary.
- A steamer basket becomes essential for cooking the mochi properly. Keep a large mixing bowl, whisk, and rubber spatula handy for combining ingredients.
- Plastic wrap and a rolling pin will help shape your mochi, while ice cream scoops make portioning effortless.
Step-by-Step Instructions
Step 1: Begin creating your black sesame ice cream base by whisking together coconut milk, cashew cream, black sesame paste, maple syrup, melted coconut oil, vanilla extract, and sea salt in a large mixing bowl. The key here is achieving complete smoothness, so whisk vigorously until no lumps of sesame paste remain visible. The mixture should taste intensely nutty and pleasantly sweet.
Step 2: Transfer your ice cream mixture to your ice cream maker and churn according to the manufacturer’s instructions, which typically takes twenty to twenty-five minutes. The finished ice cream should have a soft-serve consistency when done churning.
Step 3: Move the churned ice cream into a freezer-safe container and freeze for at least four hours, or until completely firm. This step is crucial because you need the ice cream to be solid enough to scoop and shape without melting immediately.
Step 4: While the ice cream freezes, prepare your mochi wrapper by combining glutinous rice flour, water, coconut sugar, and coconut oil in a large microwave-safe bowl. Mix these ingredients thoroughly before heating.
Step 5: Microwave the mochi mixture in thirty-second intervals, stirring vigorously between each heating session. Continue this process for approximately two to three minutes total, until the mixture transforms from a cloudy liquid into a translucent, stretchy dough.
Step 6: Allow the hot mochi dough to cool for about five minutes until it’s comfortable to handle, then divide it into eight equal portions while it remains pliable and warm.
Step 7: Dust your work surface generously with cornstarch to prevent sticking, then roll each mochi portion into a thin circle approximately four inches in diameter. Work quickly during this step since mochi becomes difficult to manipulate as it cools.
Step 8: Scoop rounded portions of frozen ice cream onto four mochi circles, then cover each with the remaining circles. Press the edges together gently but firmly to create a complete seal around the ice cream.
Step 9: Return the assembled sandwiches to the freezer immediately for at least one hour before serving to ensure they hold their shape properly.
Final Notes
- Success depends on timing and temperature control. Keep ice cream properly frozen and work with warm, pliable mochi. Store finished sandwiches wrapped individually for up to two weeks.
2. Lavender-Lemon Panna Cotta with Bee Pollen Dust
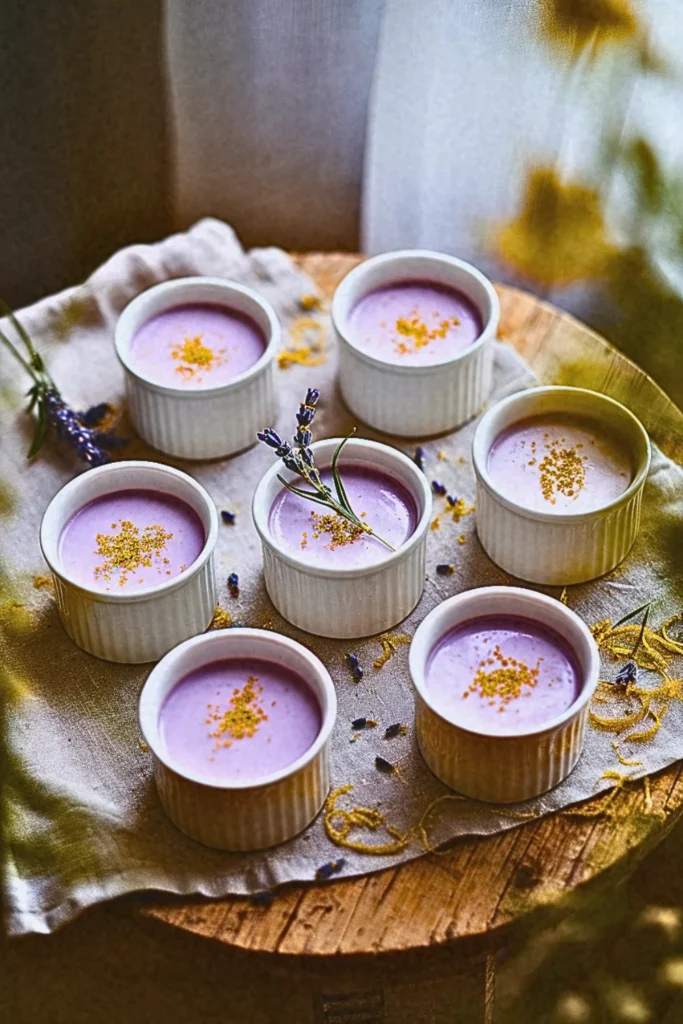
Using agar-agar as the setting agent, this dessert captures the floral essence of lavender while the bee pollen (technically vegan as it’s collected, not produced by bees) adds visual appeal and subtle honey-like notes.
Recipe Highlights
✅ Prep Time: 20 minutes
✅ Cook Time: 10 minutes
✅ Total Time: 4 hours 30 minutes (including chilling)
✅ Servings: 6 individual portions
✅ Estimated Cost: $14
✅ Calories per Serving: 195
✅ Dietary Info: Vegan, Gluten-Free, Refined Sugar-Free
Category
✅ Course: Dessert
✅ Cuisine: French-Inspired Mediterranean
Ingredients
For the Panna Cotta Base:
- 1½ cups full-fat coconut milk
- ½ cup cashew cream (soaked cashews blended smooth)
- ¼ cup agave syrup (substitute: maple syrup)
- 2 teaspoons agar powder (substitute: 2 tablespoons agar flakes)
- 1 teaspoon dried culinary lavender buds
- Zest of 2 large lemons
- 3 tablespoons fresh lemon juice
- 1 teaspoon vanilla extract
- Pinch of sea salt
For the Bee Pollen Dust:
- 2 tablespoons bee pollen granules
- 1 tablespoon coconut sugar
- Fresh lavender sprigs for garnish
Equipment
- Understanding the right tools makes this elegant dessert achievable for home cooks. You will need a fine mesh strainer to remove lavender bits, ensuring silky texture.
- A small saucepan allows gentle heating without scorching delicate ingredients. Six individual ramekins or glasses create perfect portion sizes, while a high-speed blender transforms cashews into velvety cream.
- Keep measuring cups, a whisk, and a small spice grinder or mortar and pestle ready for the bee pollen dust preparation.
Step-by-Step Instructions
Step 1: Begin by creating your cashew cream base, soaking raw cashews in hot water for fifteen minutes, then blending with minimal water until completely smooth and creamy. This foundation provides the rich mouthfeel traditional panna cotta requires without dairy.
Step 2: Combine coconut milk, cashew cream, agave syrup, and dried lavender buds in your saucepan over medium-low heat. Gently warm this mixture for five minutes, allowing the lavender to infuse without boiling, which would create bitterness.
Step 3: Sprinkle agar powder over the warm mixture while whisking continuously to prevent clumping. Agar acts differently than gelatin, requiring complete dissolution through gentle heating for proper setting.
Step 4: Strain the mixture through your fine mesh strainer into a clean bowl, pressing the lavender buds to extract maximum flavor while removing the plant matter that would create unpleasant texture.
Step 5: Whisk in lemon zest, lemon juice, vanilla extract, and sea salt while the mixture remains warm. The citrus brightens the floral lavender while vanilla rounds out the flavor profile.
Step 6: Divide the mixture evenly among your six ramekins, then refrigerate for at least four hours until completely set. Agar sets faster than gelatin but benefits from extended chilling time.
Step 7: Create your bee pollen dust by combining bee pollen granules with coconut sugar in a spice grinder, pulsing until you achieve a fine powder consistency.
Step 8: Just before serving, dust each panna cotta with the bee pollen mixture and garnish with fresh lavender sprigs for visual appeal.
Final Notes
- Success depends on proper agar dissolution and temperature control. Taste your lavender beforehand since potency varies between sources. Store covered in refrigerator for up to three days, though texture is optimal within twenty-four hours.
3. Cardamom-Rose Kulfi Popsicles with Pistachio Crumble
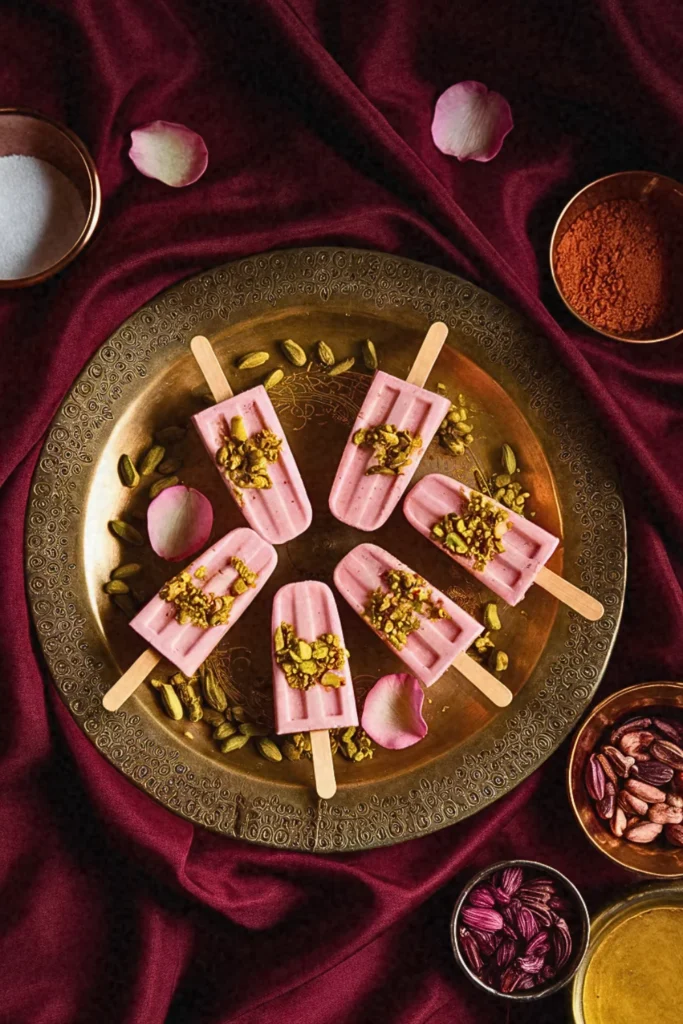
Drawing from traditional Indian frozen desserts, these popsicles use coconut cream and cashew milk to achieve the characteristic dense texture of kulfi while incorporating aromatic spices.
Recipe Highlights
✅ Prep Time: 25 minutes
✅ Cook Time: 15 minutes
✅ Total Time: 6 hours 40 minutes (including freezing)
✅ Servings: 8 popsicles
✅ Estimated Cost: $16
✅ Calories per Serving: 220
✅ Dietary Info: Vegan, Gluten-Free, Naturally Sweetened
Category
✅ Course: Dessert
✅ Cuisine: Indian-Inspired
Ingredients
For the Kulfi Base:
- 2 cups full-fat coconut milk
- 1 cup cashew cream (soaked cashews blended with ½ cup water)
- ⅓ cup condensed coconut milk (substitute: additional ¼ cup coconut cream with 2 tablespoons maple syrup)
- ¼ cup jaggery or coconut sugar (substitute: maple syrup)
- 1 teaspoon ground cardamom
- 2 tablespoons rose water (substitute: 1 teaspoon rose extract)
- ½ teaspoon vanilla extract
- Pinch of saffron threads
- ¼ teaspoon sea salt
For the Pistachio Crumble:
- ½ cup shelled pistachios, roughly chopped
- 2 tablespoons coconut sugar
- 1 tablespoon coconut oil, melted
- Pinch of cardamom
Equipment
Popsicle molds, high-speed blender, medium saucepan, fine mesh strainer, measuring cups and spoons, wooden popsicle sticks, small mixing bowl, baking sheet
Step-by-Step Instructions
Step 1: Understanding the foundation of great kulfi begins with creating an intensely rich base that mimics the traditional slow-reduced milk texture. Start by soaking your cashews in hot water for twenty minutes, then blend them with fresh water until you achieve a completely smooth, cream-like consistency without any grittiness.
Step 2: Combine the coconut milk, cashew cream, and condensed coconut milk in your medium saucepan over medium-low heat. This combination creates the characteristic dense richness that distinguishes kulfi from regular ice cream, as traditional kulfi gets its texture from milk that has been reduced by nearly half.
Step 3: Add the jaggery or coconut sugar to your warming mixture, stirring constantly until completely dissolved. Jaggery provides a deeper, more complex sweetness than refined sugar, contributing to the authentic flavor profile that makes kulfi so distinctive from Western frozen desserts.
Step 4: Infuse your mixture with the ground cardamom and saffron threads, allowing these precious spices to bloom in the warm liquid for five minutes. Cardamom should taste prominently floral and slightly citrusy, while saffron adds both color and a subtle honey-like complexity.
Step 5: Remove the mixture from heat and stir in the rose water, vanilla extract, and sea salt. Rose water can vary significantly in strength between brands, so start with less and taste as you go to avoid an overpowering perfume-like flavor.
Step 6: Strain the entire mixture through your fine mesh strainer to remove any undissolved spice particles or cashew bits that might create texture issues in your finished popsicles.
Step 7: Allow the mixture to cool to room temperature before dividing it among your popsicle molds, filling each about three-quarters full to leave room for expansion during freezing.
Step 8: Insert wooden sticks and freeze for at least six hours or overnight until completely solid throughout.
Step 9: Prepare your pistachio crumble by tossing chopped pistachios with coconut sugar, melted coconut oil, and cardamom, then spreading on a baking sheet to set.
Step 10: When ready to serve, dip the bottom of each mold briefly in warm water to release the popsicles, then immediately roll them in the pistachio crumble.
Final Notes
- Success depends on achieving the right consistency through proper blending and temperature control. Store finished popsicles wrapped individually for up to one month.
4. Miso Caramel Tart with Matcha Crust
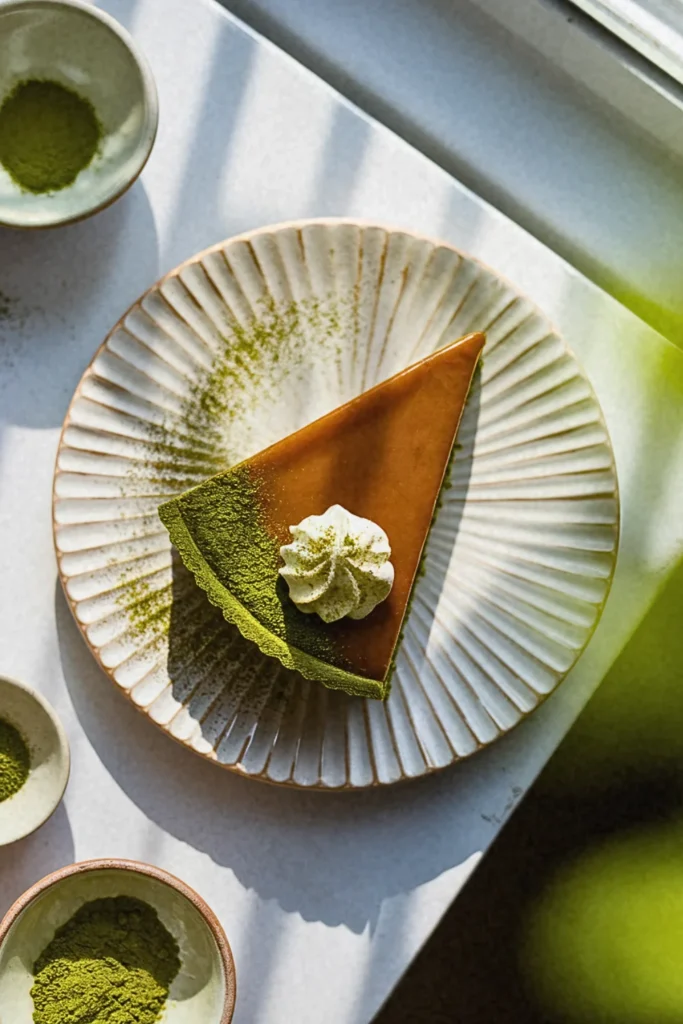
This dessert explores the umami-sweet balance by incorporating white miso into a rich caramel filling, housed in a delicate matcha-infused pastry shell that adds earthiness and visual contrast.
Recipe Highlights
✅ Prep Time: 35 minutes
✅ Cook Time: 45 minutes
✅ Total Time: 4 hours 20 minutes (including chilling)
✅ Servings: 8 slices
✅ Estimated Cost: $22
✅ Calories per Serving: 315
✅ Dietary Info: Vegan, Refined Sugar-Free, Contains Gluten
Category
✅ Course: Dessert
✅ Cuisine: Japanese-French Fusion
Ingredients
For the Matcha Crust:
- 1½ cups all-purpose flour (substitute: gluten-free flour blend)
- 2 tablespoons ceremonial-grade matcha powder
- ⅓ cup coconut sugar
- ½ teaspoon sea salt
- ½ cup vegan butter, cold and cubed
- 3-4 tablespoons ice water
For the Miso Caramel Filling:
- 1 cup coconut sugar
- ¼ cup water
- ½ cup full-fat coconut milk
- 3 tablespoons white miso paste (substitute: chickpea miso for soy-free)
- 3 tablespoons vegan butter
- 2 tablespoons cornstarch
- 1 teaspoon vanilla extract
- ¼ teaspoon sea salt
Equipment
9-inch tart pan with removable bottom, food processor, rolling pin, parchment paper, pie weights or dried beans, medium heavy-bottomed saucepan, whisk, fine mesh strainer, measuring cups and spoons, mixing bowls
Step-by-Step Instructions
Step 1: Understanding the foundation of this sophisticated tart begins with creating a delicate matcha crust that balances earthy bitterness with subtle sweetness. Combine flour, matcha powder, coconut sugar, and salt in your food processor, pulsing briefly to distribute the vibrant green matcha evenly throughout the dry ingredients without overworking the mixture.
Step 2: Add cold, cubed vegan butter to your dry ingredients and pulse in short bursts until the mixture resembles coarse breadcrumbs with some larger butter pieces still visible. These butter pieces will create the flaky texture that makes pastry irresistible, so resist the urge to over-process.
Step 3: Gradually add ice water one tablespoon at a time while pulsing, stopping as soon as the dough begins to come together when squeezed in your hand. The dough should feel slightly tacky but not wet, and different flours may require varying amounts of liquid.
Step 4: Turn the dough onto a lightly floured surface and gently gather it into a disk, wrap in plastic wrap, then refrigerate for at least thirty minutes to allow the gluten to relax and the butter to firm up again.
Step 5: Roll the chilled dough between parchment paper sheets to prevent sticking and maintain the beautiful green color, aiming for a circle slightly larger than your tart pan to account for the sides and any shrinkage during baking.
Step 6: Press the dough into your tart pan, trim excess edges, and prick the bottom all over with a fork to prevent puffing. Line with parchment paper and fill with pie weights, then blind bake at 350°F for fifteen minutes.
Step 7: Remove weights and parchment, then continue baking for another ten minutes until the edges are lightly golden and the bottom appears set but not deeply colored.
Step 8: Create your revolutionary miso caramel by heating coconut sugar and water in your heavy-bottomed saucepan over medium heat, swirling occasionally without stirring until it reaches a deep amber color.
Step 9: Carefully whisk in coconut milk, then remove from heat and whisk in miso paste, vegan butter, cornstarch, vanilla, and salt until completely smooth. The miso adds incredible depth and complexity that transforms ordinary caramel into something extraordinary.
Step 10: Strain the caramel through your fine mesh strainer directly into the cooled tart shell, then refrigerate for at least three hours until completely set and sliceable.
Final Notes
- Quality ingredients make the difference here. Use ceremonial-grade matcha for the best color and flavor, and choose white miso for its milder, sweeter profile that complements rather than overwhelms the caramel.
5. Hibiscus-Pomegranate Sorbet Spheres
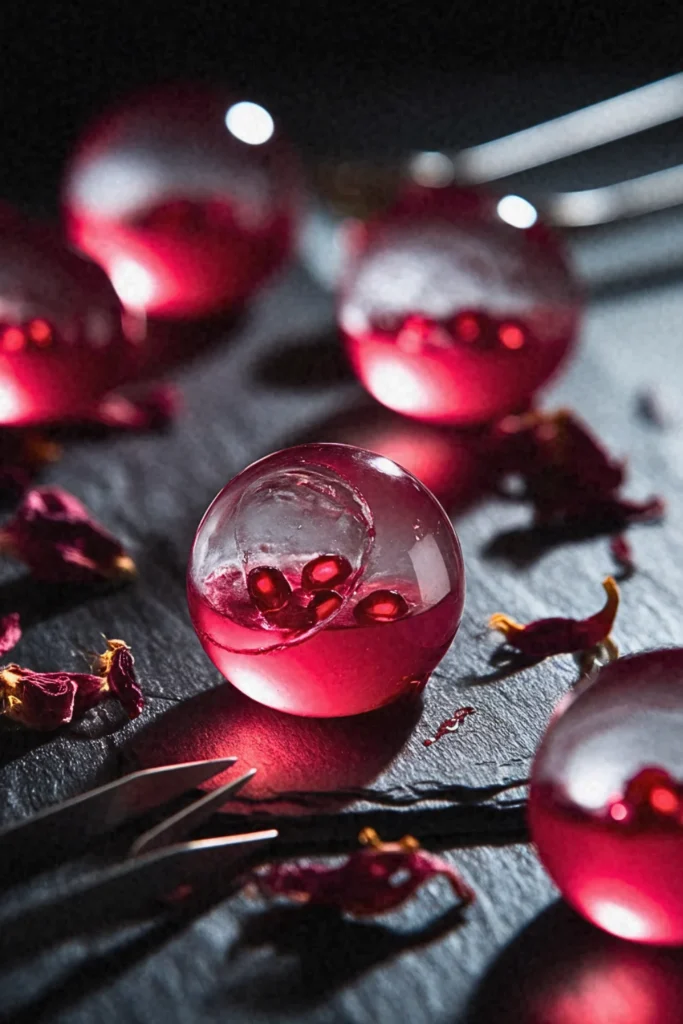
Using molecular gastronomy techniques, these dessert spheres burst with tart hibiscus-pomegranate flavor and are served alongside complementary garnishes like candied ginger or mint oil.
Recipe Highlights
✅ Prep Time: 1 hour 30 minutes
✅ Cook Time: 20 minutes
✅ Total Time: 8 hours (including freezing and setting)
✅ Servings: 12 spheres
✅ Estimated Cost: $28
✅ Calories per Serving: 45
✅ Dietary Info: Vegan, Gluten-Free, Low-Calorie, Naturally Colored
Category
✅ Course: Dessert
✅ Cuisine: Molecular Gastronomy
Ingredients
For the Hibiscus-Pomegranate Sorbet:
- 2 cups water
- ½ cup dried hibiscus flowers (substitute: 6 hibiscus tea bags)
- 1 cup pure pomegranate juice (substitute: cranberry-pomegranate blend)
- ⅓ cup agave nectar (substitute: maple syrup)
- 2 tablespoons fresh lime juice
- Pinch of sea salt
For the Spherification:
- 2 grams sodium alginate
- 1000 grams distilled water
- 5 grams calcium lactate (substitute: calcium chloride)
- Additional distilled water for rinsing
Equipment
- Immersion blender, 2. Digital scale (essential for precise measurements), 3. Fine mesh strainer, 4. Large mixing bowls, 5. Hemisphere silicone molds, 6. Slotted spoon, 7. Medium saucepan, 8. Measuring cups and spoons, 9. pH strips (optional but recommended), 10. Freezer space
Step-by-Step Instructions
Step 1: Begin by understanding that spherification is a culinary technique that creates liquid-filled spheres with gel-like membranes, mimicking caviar or egg yolks in texture. Start your hibiscus infusion by bringing two cups of water to a rolling boil in your medium saucepan, then remove from heat and steep the dried hibiscus flowers for fifteen minutes to extract maximum color and tartness.
Step 2: Strain your hibiscus tea through the fine mesh strainer, pressing the flowers to extract every drop of that gorgeous ruby-red liquid that will give your spheres their stunning visual appeal. Combine this concentrated hibiscus tea with pomegranate juice, agave nectar, lime juice, and sea salt, whisking until the sweetener completely dissolves.
Step 3: Pour this mixture into your hemisphere silicone molds and freeze for at least six hours until completely solid. This traditional sorbet base will become the liquid center of your spheres, providing that burst of intense flavor when bitten.
Step 4: Prepare your sodium alginate bath by using your digital scale to measure exactly two grams of sodium alginate powder and one thousand grams of distilled water. The precision here cannot be overstated because molecular gastronomy relies on exact chemical ratios to achieve the proper gel formation.
Step 5: Blend the alginate and water using your immersion blender for at least two minutes until completely dissolved and no clumps remain visible. Allow this mixture to rest for twenty-four hours to eliminate air bubbles, though you can speed this process by using a vacuum chamber if available.
Step 6: Create your calcium lactate solution by dissolving five grams of calcium lactate in five hundred milliliters of distilled water, stirring until completely clear. This solution will react with the alginate to form the flexible gel membrane around each sorbet sphere.
Step 7: Remove your frozen sorbet hemispheres from the molds and quickly dip each one into the calcium lactate solution for exactly thirty seconds. The calcium ions will immediately begin forming a gel skin with the alginate bath.
Step 8: Transfer each coated sphere directly into the alginate bath using your slotted spoon, allowing them to rest for two minutes while the membrane continues forming and strengthening around the melting sorbet core.
Step 9: Carefully remove the spheres and rinse them gently in clean distilled water to remove excess alginate solution, which can taste slightly salty if not properly cleaned.
Step 10: Serve immediately while the centers remain liquid, presenting these remarkable spheres on chilled spoons or small dishes that showcase their jewel-like appearance.
Final Notes
- Success requires precise measurements and timing. Practice the technique with water first to understand the process before using your precious hibiscus-pomegranate mixture.
6. Tahini Swirl Brownies with Halva Crumble
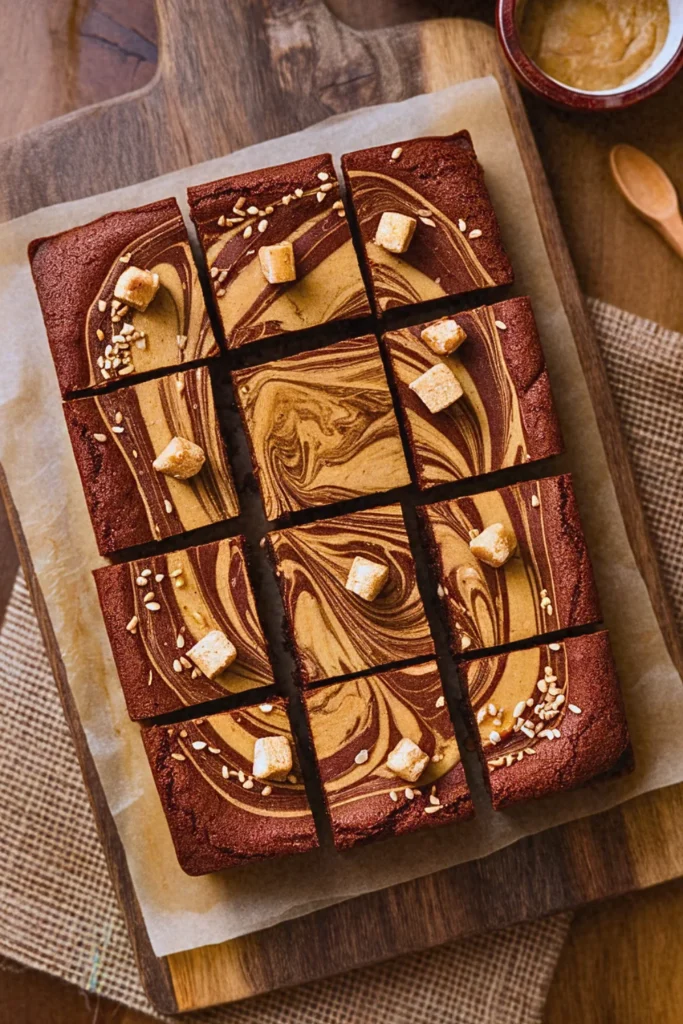
These fudgy brownies incorporate the sesame richness of tahini in both the batter and as decorative swirls, topped with homemade halva pieces for textural interest.
Recipe Highlights
✅ Prep Time: 25 minutes
✅ Cook Time: 35 minutes
✅ Total Time: 1 hour 30 minutes (including cooling)
✅ Servings: 16 brownies
✅ Estimated Cost: $18
✅ Calories per Serving: 285
✅ Dietary Info: Vegan, High-Protein, Contains Gluten and Sesame
Category
✅ Course: Dessert
✅ Cuisine: Middle Eastern-American Fusion
Ingredients
For the Brownie Base:
- 1½ cups all-purpose flour (substitute: oat flour for gluten-free option)
- ¾ cup unsweetened cocoa powder
- 1 cup coconut sugar (substitute: brown sugar)
- 1 teaspoon baking powder
- ½ teaspoon sea salt
- ⅔ cup unsweetened applesauce
- ½ cup melted coconut oil
- ¼ cup plant milk (almond or oat work best)
- 2 tablespoons ground flaxseed mixed with 6 tablespoons water
- 1 teaspoon vanilla extract
For the Tahini Swirl:
- ½ cup tahini (substitute: sunflower seed butter for nut-free)
- ¼ cup maple syrup
- 2 tablespoons coconut oil, melted
- ½ teaspoon vanilla extract
- Pinch of salt
For the Halva Crumble:
- ½ cup store-bought halva, crumbled (substitute: homemade sesame brittle)
- 2 tablespoons sesame seeds
Equipment
- 8×8 inch baking pan, 2. Parchment paper, 3. Large mixing bowl, 4. Medium mixing bowl, 5. Whisk, 6. Rubber spatula, 7. Measuring cups and spoons, 8. Kitchen knife for crumbling halva, 9. Small bowl for flax eggs, 10. Wire cooling rack
Step-by-Step Instructions
Step 1: Understanding the science behind vegan brownies begins with proper preparation, so preheat your oven to 350°F and line your baking pan with parchment paper, leaving overhang for easy removal. This step prevents sticking while allowing you to lift the entire batch out cleanly once cooled, which makes cutting much easier and more precise.
Step 2: Create your flax eggs by combining ground flaxseed with water in a small bowl, whisking thoroughly and allowing the mixture to sit for ten minutes until it becomes gel-like. This binding agent replaces traditional eggs by providing structure and moisture, while the omega-3 fatty acids add nutritional value that regular eggs cannot match.
Step 3: Combine all dry brownie ingredients in your large mixing bowl, whisking together flour, cocoa powder, coconut sugar, baking powder, and salt until no lumps remain visible. The key here is ensuring even distribution of leavening agents and cocoa powder, which prevents pockets of bitter or overly sweet areas in your finished brownies.
Step 4: Mix your wet ingredients in the medium bowl, combining applesauce, melted coconut oil, plant milk, prepared flax eggs, and vanilla extract. The applesauce provides moisture and helps bind ingredients while keeping the brownies fudgy rather than cake-like, which is essential for achieving that perfect brownie texture we all crave.
Step 5: Pour the wet mixture into the dry ingredients and fold together gently with your rubber spatula, mixing just until combined and no dry flour streaks remain visible. Overmixing develops gluten too much, resulting in tough rather than tender brownies, so resist the urge to stir beyond necessity.
Step 6: Prepare your tahini swirl by whisking together tahini, maple syrup, melted coconut oil, vanilla, and salt in a clean bowl until smooth and flowing. This mixture should be pourable but not too thin, creating those beautiful marbled patterns when swirled through the chocolate batter.
Step 7: Pour the brownie batter into your prepared pan, spreading evenly with the spatula. Drop spoonfuls of tahini mixture across the surface, then use a knife to create swirl patterns by dragging through both batters in figure-eight motions, creating that signature marbled appearance.
Step 8: Sprinkle crumbled halva and sesame seeds over the entire surface, pressing gently so they adhere but do not sink completely into the batter. The halva will soften slightly during baking while maintaining some texture contrast.
Step 9: Bake for thirty to thirty-five minutes until a toothpick inserted in the center comes out with a few moist crumbs attached, not completely clean. This ensures fudgy rather than dry brownies.
Step 10: Cool completely in the pan before lifting out and cutting, as warm brownies will fall apart and lose their clean edges.
Final Notes
- Quality tahini makes an enormous difference in flavor, so choose brands that taste creamy rather than bitter. Store covered at room temperature for up to five days.
7. Coconut Pandan Custard Buns
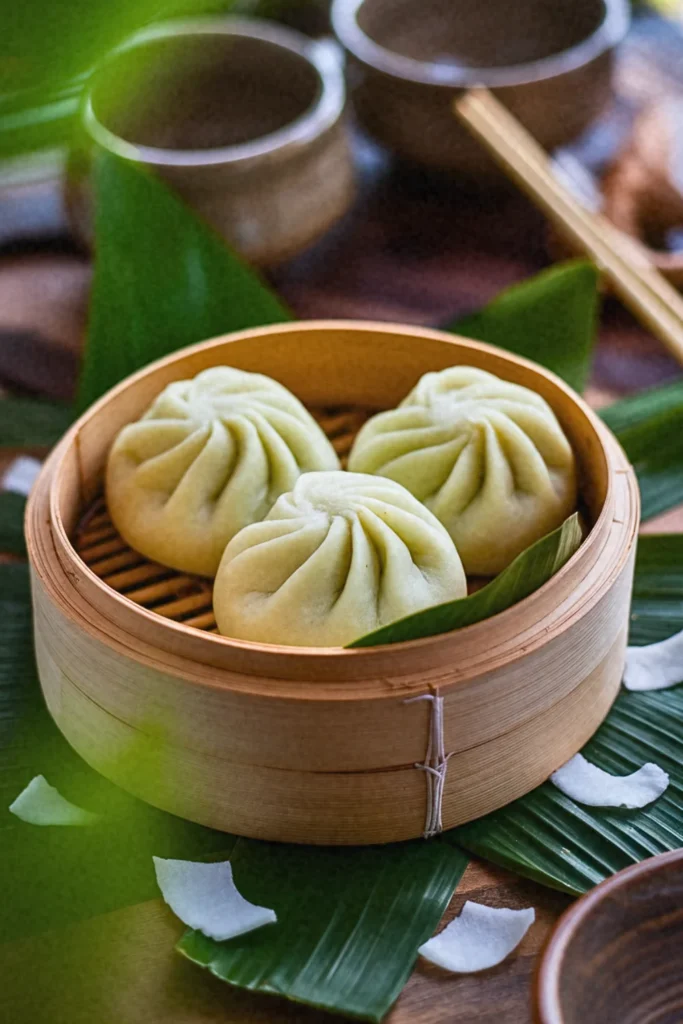
Soft steamed buns filled with a creamy pandan-flavored custard made from coconut milk, showcasing the distinctive green color and vanilla-like aroma of this Southeast Asian ingredient.
Recipe Highlights
✅ Prep Time: 2 hours 30 minutes
✅ Cook Time: 20 minutes
✅ Total Time: 3 hours 15 minutes (including rising)
✅ Servings: 12 buns
✅ Estimated Cost: $15
✅ Calories per Serving: 195
✅ Dietary Info: Vegan, Contains Gluten, Naturally Colored
Category
✅ Course: Dessert or Dim Sum
✅ Cuisine: Southeast Asian
Ingredients
For the Bun Dough:
- 3 cups bread flour (substitute: all-purpose flour with 1 tablespoon vital wheat gluten)
- 2 teaspoons instant yeast
- ¼ cup coconut sugar
- 1 teaspoon salt
- ¾ cup warm plant milk
- 3 tablespoons coconut oil, melted
- 1 tablespoon pandan extract (substitute: 2 drops green food coloring with ½ teaspoon vanilla)
For the Coconut Pandan Custard:
- 1 cup coconut milk
- ⅓ cup coconut sugar
- 3 tablespoons cornstarch
- 2 tablespoons pandan extract
- ½ teaspoon vanilla extract
- Pinch of salt
Equipment
- Stand mixer with dough hook, 2. Large mixing bowl, 3. Medium saucepan, 4. Whisk, 5. Fine mesh strainer, 6. Bamboo steamer or regular steamer basket, 7. Parchment paper squares, 8. Kitchen scale, 9. Bench scraper, 10. Clean kitchen towels
Step-by-Step Instructions
Step 1: Understanding the essence of these traditional Southeast Asian treats begins with creating the perfect custard filling. In your medium saucepan, whisk together coconut milk, coconut sugar, cornstarch, pandan extract, vanilla, and salt until completely smooth. The cornstarch must be fully dissolved to prevent lumps in your finished custard.
Step 2: Cook this custard mixture over medium heat while whisking constantly, watching for the transformation from liquid to thick, glossy custard that coats your whisk heavily. This process typically takes five to seven minutes, and the mixture will suddenly thicken dramatically once the cornstarch activates properly.
Step 3: Strain the hot custard through your fine mesh strainer to ensure silky smoothness, then press plastic wrap directly onto the surface to prevent skin formation. Refrigerate while you prepare the dough, allowing the custard to cool completely and firm up for easier handling.
Step 4: Create your bun dough by combining flour, instant yeast, coconut sugar, and salt in your mixer bowl, whisking to distribute evenly. The success of steamed buns depends heavily on proper gluten development, which creates that characteristic soft, pillowy texture that makes these buns so irresistible.
Step 5: Mix the warm plant milk, melted coconut oil, and pandan extract together, ensuring the liquid feels comfortably warm but not hot enough to kill the yeast. Pour this mixture into your dry ingredients and knead with the dough hook for eight to ten minutes until the dough becomes smooth and elastic.
Step 6: Place the kneaded dough in a lightly oiled bowl, cover with a damp towel, and let rise in a warm place for approximately one hour until doubled in size. This first rise develops flavor while creating the light texture that distinguishes properly made steamed buns from dense, heavy alternatives.
Step 7: Punch down the risen dough and divide it into twelve equal portions using your kitchen scale for consistency. Roll each portion into a circle about four inches in diameter, keeping the centers slightly thicker than the edges to prevent the filling from breaking through during steaming.
Step 8: Place a generous tablespoon of chilled custard in the center of each circle, then gather the edges and twist to seal completely. Place each filled bun seam-side down on individual parchment squares, which prevents sticking while allowing easy transfer to your steamer.
Step 9: Allow the shaped buns to rise again for thirty minutes until slightly puffed, then steam over boiling water for fifteen minutes. Avoid opening the steamer during cooking, as temperature fluctuations can cause the buns to collapse.
Step 10: Turn off heat and let buns rest in the closed steamer for five minutes before removing, which prevents sudden temperature changes that could deflate your perfectly steamed creations.
Final Notes
- Pandan extract intensity varies between brands, so adjust accordingly. Fresh pandan leaves can be blended with water and strained if extract is unavailable.
8. Aquafaba Chocolate Mousse with Coffee Caviar
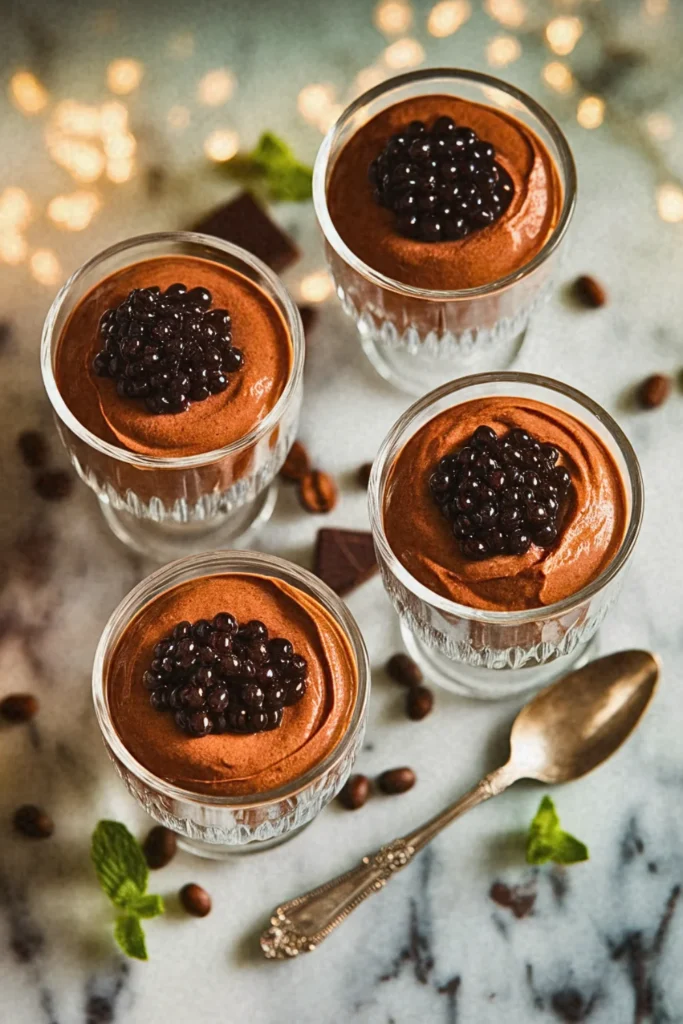
This dessert demonstrates advanced vegan techniques by using whipped aquafaba for the mousse base while coffee caviar pearls (made through spherification) provide bursts of espresso flavor.
Recipe Highlights (Quick Glance)
✅ Prep Time: 25 min
✅ Cook Time: 15 min
✅ Total Time: 40 min (plus 2 hours chilling)
✅ Servings: 4
✅ Estimated Cost: $8
✅ Calories per Serving: 185
✅ Dietary Info: Vegan, Gluten-Free, Refined Sugar-Free
Category
✅ Course: Dessert
✅ Cuisine: Modern French-Inspired
Ingredients
For Chocolate Mousse:
- 1/2 cup aquafaba (liquid from 1 can chickpeas)
- 1/4 cup coconut cream (thick part from refrigerated can)
- 3 oz dark chocolate (70% cocoa), melted
- 2 tablespoons maple syrup
- 1 teaspoon vanilla extract
- Pinch of sea salt
For Coffee Caviar:
- 1/2 cup strong brewed coffee, cooled
- 2 tablespoons agar powder
- 1 tablespoon coconut oil
- 1 teaspoon agave nectar
Substitutions: Replace aquafaba with silken tofu blended smooth, swap maple syrup for date syrup, use carob chips instead of chocolate for caffeine-free version.
Equipment
- Stand mixer or hand mixer, 2. Medium saucepan, 3. Double boiler or microwave-safe bowl, 4. Fine-mesh strainer, 5. Whisk, 6. Measuring cups and spoons, 7. Small syringe or dropper, 8. Serving glasses or bowls, 9. Refrigerator space for chilling
Step-by-Step Instructions
Step 1: Begin by understanding that aquafaba acts as our egg white replacement because its proteins create similar foaming properties when whipped. Chill your aquafaba and mixing bowl in the refrigerator for 30 minutes before starting, as cold temperatures help achieve better volume.
Step 2: Melt the dark chocolate using a double boiler method, stirring gently until smooth. This gentle heating prevents the chocolate from seizing, which would create a grainy texture in our mousse. Set aside to cool slightly.
Step 3: Pour the chilled aquafaba into your mixing bowl and whip on high speed for 8-10 minutes until stiff peaks form. The transformation happens gradually, so be patient as the liquid becomes increasingly foamy and voluminous.
Step 4: While maintaining the mixer on medium speed, slowly drizzle in the melted chocolate, followed by coconut cream, maple syrup, vanilla, and salt. This gradual incorporation prevents the mixture from deflating.
Step 5: For the coffee caviar, heat coffee in a small saucepan over medium heat. Whisk in agar powder thoroughly to avoid clumps, then add coconut oil and agave. Simmer for 2 minutes until agar dissolves completely.
Step 6: Using a syringe or dropper, drop the hot coffee mixture into cold oil to create spherical caviar pearls. The contrast in temperature causes immediate gelification, forming perfect little spheres.
Step 7: Divide mousse among serving glasses and refrigerate for at least 2 hours. The chilling time allows the mousse to set properly while maintaining its airy texture.
Step 8: Before serving, strain the coffee caviar and garnish each mousse portion. The caviar bursts with coffee flavor, creating a delightful textural contrast.
Final Notes
- Temperature control is crucial for success in this recipe. Room temperature ingredients blend more easily, but cold aquafaba whips better.
- The coffee caviar can be made a day ahead and stored in the refrigerator. If your mousse doesn’t set properly, it likely means the aquafaba wasn’t whipped to full volume or the chocolate was too warm when incorporated.
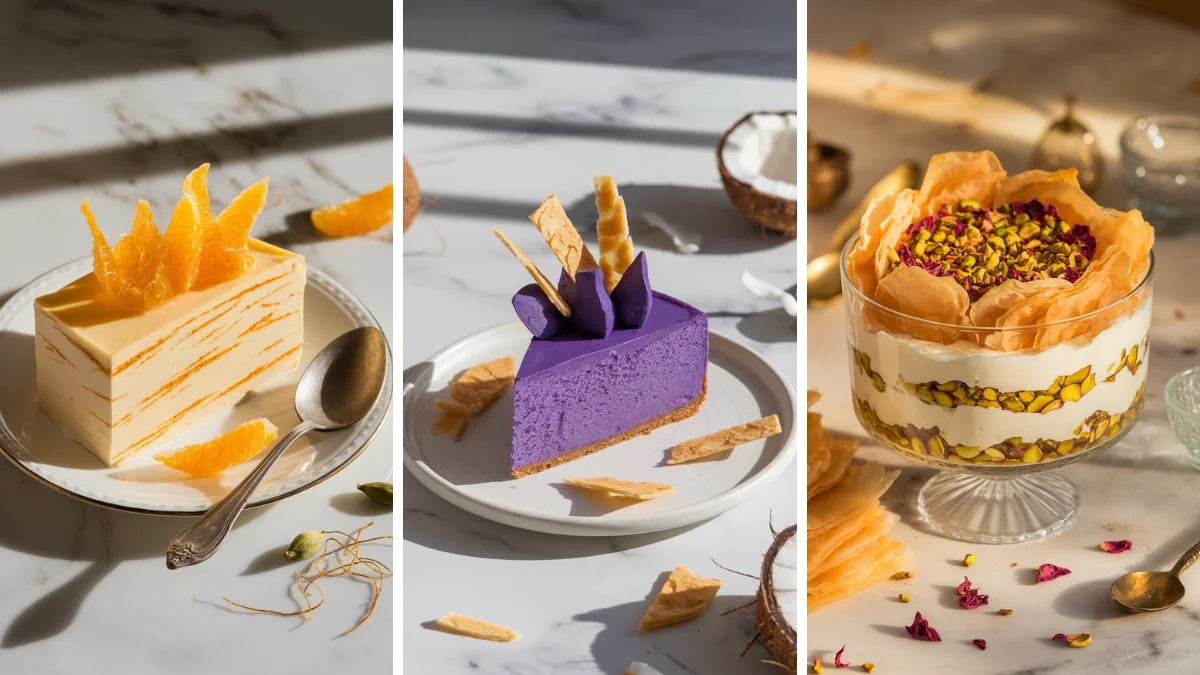
9. Saffron-Cardamom Semifreddo with Candied Orange
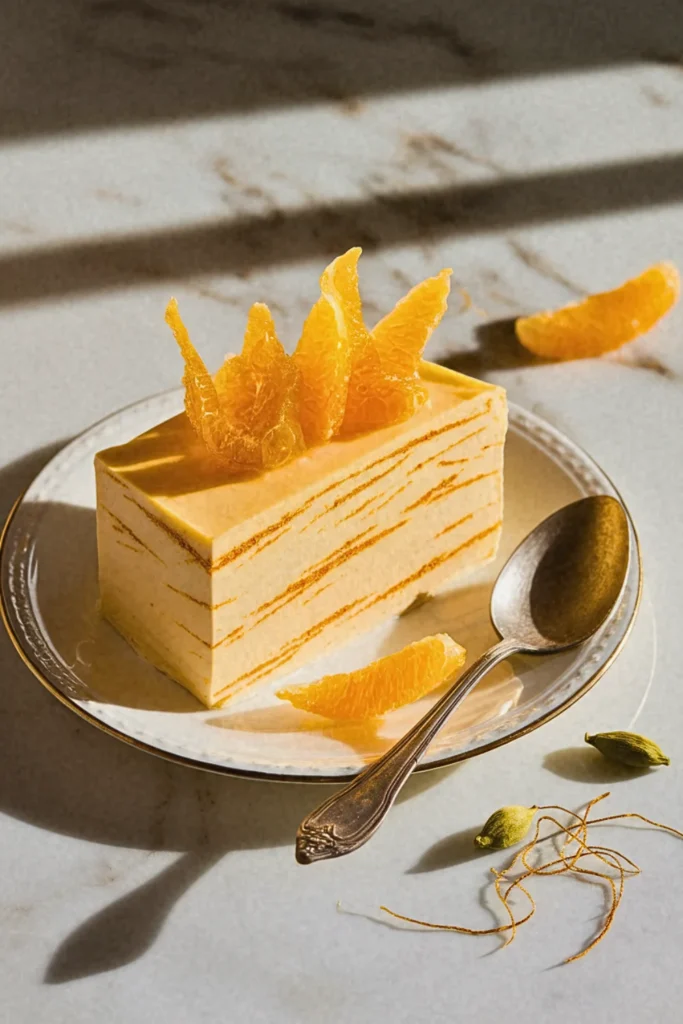
This partially frozen dessert captures Mediterranean and Middle Eastern flavors, using cashew cream as the base and incorporating the luxury of saffron with warm cardamom spices.
Recipe Highlights
✅ Prep Time: 25 min
✅ Cook Time: 10 min
✅ Total Time: 35 min (plus 4 hours freezing)
✅ Servings: 6
✅ Estimated Cost: $18
✅ Calories per Serving: 285
✅ Dietary Info: Vegan, Gluten-Free, Refined Sugar-Free
Category
✅ Course: Dessert
✅ Cuisine: Mediterranean-inspired
Ingredients
- 400ml full-fat coconut milk, chilled overnight
- 150ml cashew cream (or silken tofu for lighter option)
- 80ml maple syrup
- 1/4 tsp saffron threads
- 1 tsp ground cardamom (or 8 pods, ground)
- 1 tsp vanilla extract
- Pinch of sea salt
- 2 medium oranges, zested and peeled
- 60ml agave nectar (for candying)
Equipment
- Stand mixer or hand mixer, 2. Large mixing bowl, 3. Fine-mesh strainer, 4. Small saucepan, 5. Loaf pan or semifreddo mold, 6. Parchment paper, 7. Sharp knife, 8. Measuring cups and spoons
Step-by-Step Instructions
Step 1: Bloom the saffron by steeping threads in 2 tablespoons warm water for 15 minutes until deeply golden. This crucial step releases the saffron’s complex flavor compounds and vibrant color.
Step 2: Separate the thick coconut cream from the chilled can (reserve liquid for smoothies). Whip the solid cream until light and fluffy, about 3-4 minutes.
Step 3: Gently fold cashew cream, maple syrup, saffron mixture, cardamom, vanilla, and salt into whipped coconut cream. The key here is maintaining airiness while ensuring even distribution.
Step 4: Line your mold with parchment and pour mixture in. Freeze for at least 4 hours until firm but not rock-hard.
Step 5: Meanwhile, create candied orange by simmering thin orange strips with agave nectar for 8-10 minutes until translucent and glossy.
Step 6: Slice semifreddo with a warm knife and garnish with candied orange strips and fresh orange zest.
Final Notes
- The magic of semifreddo lies in its creamy texture that’s softer than ice cream yet firmer than mousse.
- Saffron and cardamom create an exotic flavor profile reminiscent of Persian and Indian desserts, while coconut provides richness without dairy.
- For best results, let semifreddo sit at room temperature for 5 minutes before serving to achieve the perfect creamy consistency.
10. Ube Cheesecake with Coconut Tuile
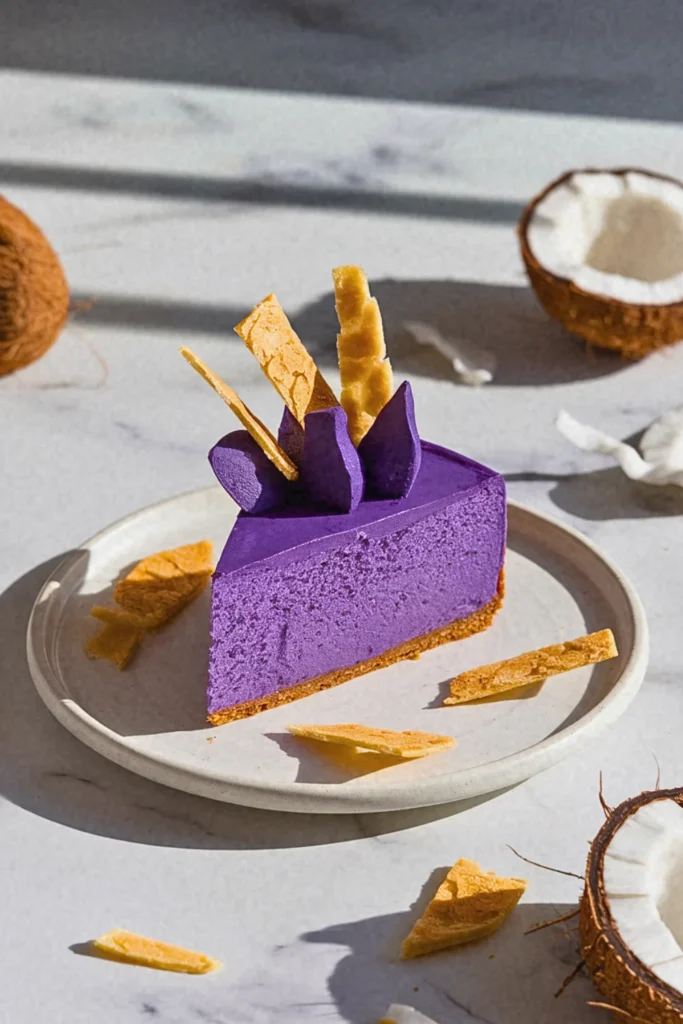
Featuring the purple yam beloved in Filipino cuisine, this no-bake cheesecake uses soaked cashews and coconut cream for richness, accompanied by delicate coconut wafer cookies.
Recipe Highlights
✅ Prep Time: 30 min
✅ Cook Time: 45 min
✅ Total Time: 75 min (plus 4 hours chilling)
✅ Servings: 8
✅ Estimated Cost: $22
✅ Calories per Serving: 340
✅ Dietary Info: Vegan, Gluten-Free Option Available
Category
✅ Course: Dessert
✅ Cuisine: Filipino-inspired
Ingredients
For Crust:
- 200g graham crackers, crushed (use gluten-free for GF option)
- 80g vegan butter, melted
- 2 tbsp coconut sugar
For Filling:
- 450g cashews, soaked 4 hours (or silken tofu for nut-free)
- 400ml coconut cream
- 150g ube paste (or 100g frozen ube, thawed)
- 120ml maple syrup
- 2 tbsp agar powder (essential binding agent)
- 1 tsp vanilla extract
- Pinch of salt
For Coconut Tuile:
- 60g shredded coconut
- 40ml agave syrup
- 1 tbsp coconut flour
Equipment
- 9-inch springform pan, 2. Food processor, 3. High-speed blender, 4. Medium saucepan, 5. Silicone baking mat, 6. Fine-mesh strainer, 7. Measuring cups and spoons, 8. Mixing bowls
Step-by-Step Instructions
Step 1: Create the crust foundation by combining crushed graham crackers with melted vegan butter and coconut sugar. Press firmly into your springform pan, creating an even layer that extends slightly up the sides. This compression step is crucial for structural integrity.
Step 2: Prepare the filling by draining soaked cashews and blending them with coconut cream until completely smooth. The cashews provide the rich, creamy base that mimics traditional cream cheese while adding healthy fats and protein.
Step 3: Heat one-third of the cashew mixture in a saucepan and whisk in agar powder thoroughly. This step activates the agar’s gelling properties, which will set the cheesecake without eggs or gelatin.
Step 4: Blend the heated mixture back with remaining cashew cream, ube paste, maple syrup, vanilla, and salt. Ube’s natural earthy sweetness and striking purple color create the signature Filipino flavor profile.
Step 5: Pour filling over crust and refrigerate for at least 4 hours. The agar needs this time to fully set and achieve that perfect cheesecake texture.
Step 6: Make tuiles by mixing coconut, agave, and coconut flour. Spread thinly on silicone mat and bake at 325°F for 8-10 minutes until golden. Break into artistic shards when cooled.
Final Notes
- Understanding ube is key to this recipe’s success. This purple yam from the Philippines offers a subtle, nutty-vanilla flavor that’s less sweet than American purple sweet potatoes.
- The agar powder acts as our vegan setting agent, creating firm slices without the dense texture of traditional baked cheesecakes.
- Soaking cashews properly ensures silky smoothness, while coconut cream adds richness. The tuile provides textural contrast with its delicate crunch against the creamy filling.
11. Rosewater Baklava Trifle
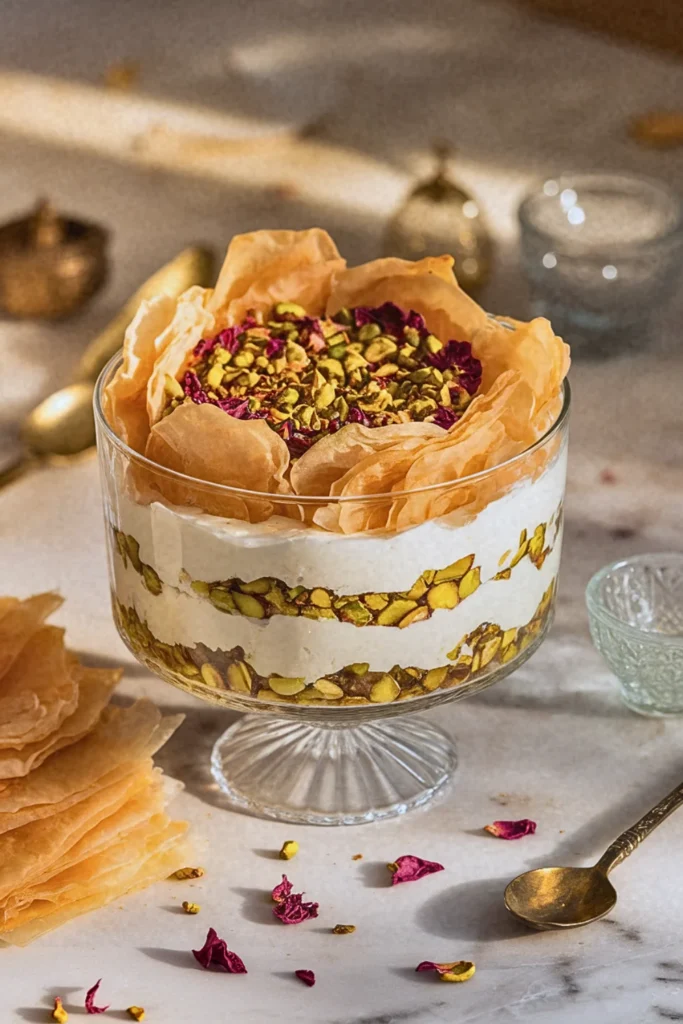
Deconstructing the classic Middle Eastern pastry into a layered trifle format, this dessert combines phyllo crisps, rosewater-scented cream, and honeyed nuts in an elegant glass presentation.
Recipe Highlights
✅ Prep Time: 35 min
✅ Cook Time: 20 min
✅ Total Time: 55 min (plus 2 hours chilling)
✅ Servings: 8
✅ Estimated Cost: $25
✅ Calories per Serving: 295
✅ Dietary Info: Vegan, Contains Nuts
Category
✅ Course: Dessert
✅ Cuisine: Middle Eastern-inspired
Ingredients
For Phyllo Crisps:
- 6 sheets phyllo pastry, thawed
- 60ml olive oil or melted vegan butter
- 2 tbsp coconut sugar
- 1 tsp ground cinnamon
For Nut Mixture:
- 150g pistachios, roughly chopped
- 100g walnuts, chopped (or almonds for variation)
- 2 tbsp maple syrup
- 1/2 tsp ground cardamom
For Rosewater Cream:
- 400ml coconut cream, chilled overnight
- 200ml cashew cream (or thick coconut yogurt)
- 80ml agave nectar
- 2 tsp rosewater (start with 1 tsp, adjust to taste)
- 1 tsp vanilla extract
- Pinch of sea salt
For Assembly:
- 60ml honey-style agave syrup
- Dried rose petals for garnish
- Extra chopped pistachios
Equipment
- Large baking sheet, 2. Pastry brush, 3. Sharp knife, 4. Stand mixer or hand mixer, 5. Large glass trifle bowl, 6. Medium mixing bowls, 7. Fine-mesh strainer, 8. Measuring cups and spoons
Step-by-Step Instructions
Step 1: Transform the phyllo into golden, crispy layers by brushing each sheet with olive oil and sprinkling with coconut sugar and cinnamon. This technique mimics traditional baklava’s buttery, flaky texture while keeping the recipe plant-based. Bake at 375°F for 8-10 minutes until golden and crackling.
Step 2: Create the signature baklava nut mixture by combining chopped pistachios and walnuts with maple syrup and cardamom. The cardamom adds the aromatic complexity that distinguishes Middle Eastern desserts from simple nut mixtures, while the maple syrup provides just enough sweetness to bind the nuts together.
Step 3: Prepare the rosewater cream by whipping chilled coconut cream until light and fluffy, then gently folding in cashew cream, agave nectar, rosewater, vanilla, and salt. The key here is understanding that rosewater is incredibly potent, so start with less than you think you need. The floral notes should enhance rather than overpower the other flavors.
Step 4: Break the cooled phyllo into irregular, bite-sized pieces. This rustic approach creates interesting textural variation and makes each spoonful unique, unlike uniform cake layers that can become monotonous.
Step 5: Begin the layering process in your trifle bowl with a foundation of phyllo crisps, followed by a generous spread of rosewater cream, then a sprinkle of the spiced nut mixture. Repeat these layers twice more, creating visual drama and ensuring every serving contains all the essential baklava elements.
Step 6: Finish with a final drizzle of agave syrup and garnish with dried rose petals and extra pistachios. Chill for at least 2 hours to allow the flavors to meld and the phyllo to soften slightly while maintaining some crunch.
Final Notes
- Understanding the balance of flavors in Middle Eastern desserts is crucial for this recipe’s success. Rosewater can quickly overwhelm, so taste as you go and remember that the floral notes will intensify as the trifle chills.
- The phyllo should retain some crispness even after chilling, creating the textural contrast that makes baklava so appealing.
- This deconstructed approach allows you to enjoy baklava’s complex flavors without the technical challenges of traditional layered pastry construction.

Hi, I’m Aldvin Gomes, a passionate vegan and foodie on a mission to make plant-based eating effortless and exciting. I share new vegan recipes every day, so you never have to stress about what to cook. Whether you’re a longtime vegan or just exploring plant-based meals, my goal is to keep your plate full of delicious, wholesome, and easy-to-make dishes. I’m here to help you enjoy every bite. Join me in exploring the endless possibilities of vegan cooking, one delicious recipe at a time!