No sugar vegan desserts don’t have to taste like cardboard. Trust me. I’ve eaten enough “Healthy” treats to know the difference between delicious and just plain disappointing.
I’ll be honest with you. My journey to finding truly satisfying no refined sugar desserts was rough. Really rough. I tried every rubbery date ball and chalky protein bar out there.
But here’s what I discovered: clean eating desserts can actually make your taste buds dance.
You don’t need refined sugar to create something magical. Natural sweetness from fruits? That’s where the real flavor lives.
And the best part? These healthy treats won’t send your blood sugar on a roller coaster ride.
I’ve spent years experimenting in my kitchen, creating easy recipes that actually work. Some are gluten free. All of them are completely plant-based. And none of them require you to be a professional pastry chef.
These eleven no sugar vegan desserts changed how I think about sweet treats entirely. They’re rich, they’re indulgent, and they prove that free-from doesn’t mean flavor-from.
Must-Try: Thanksgiving Vegan Dessert Recipes.
11 No Sugar Vegan Desserts

Low sugar living never tasted this good. Want to know my secrets? Let me show you how simple this can be.
Here are eleven unique no sugar vegan dessert ideas that balance health with indulgence:
1. Frozen Banana Nice Cream with Cacao Nibs
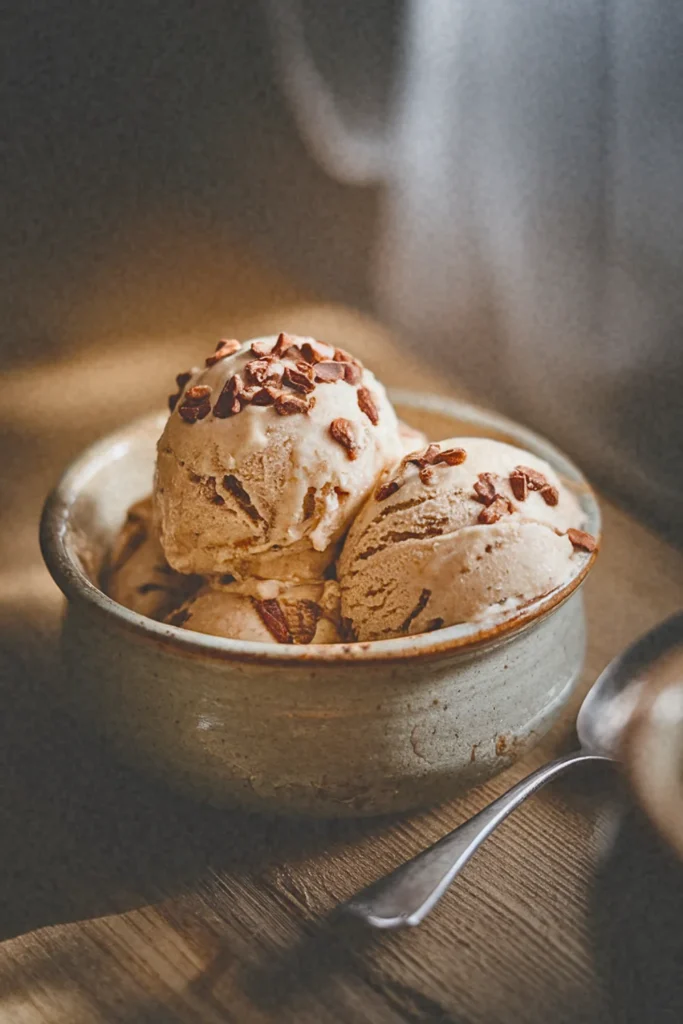
This one’s my go-to when I need something quick. Just frozen bananas blended smooth with rich cacao nibs for crunch.
Recipe Highlights
✅ Prep Time: 5 minutes (plus 4 hours freezing)
✅ Cook Time: 0 minutes
✅ Total Time: 5 minutes active
✅ Servings: 2
✅ Estimated Cost: $4
✅ Calories per Serving: 180
✅ Dietary Info: Vegan, Gluten-Free, Refined Sugar-Free, Dairy-Free
Category
✅ Courses: Dessert, Snacks
✅ Cuisines: American, Contemporary
Ingredients
• 3 large ripe bananas, peeled, sliced, and frozen (substitute: frozen mango for tropical variation)
• 2 tablespoons plant-based milk (almond, oat, or coconut; add more if needed for blending)
• 1 teaspoon pure vanilla extract (substitute: almond extract)
• 2 tablespoons cacao nibs (substitute: dark chocolate chips or chopped nuts)
• Optional: 1 tablespoon maple syrup for extra sweetness
Equipment
- High-powered blender or food processor, 2. Sharp knife, 3. Cutting board, 4. Freezer-safe container or bag, 5. Serving bowls, 6. Spatula
Step-by-Step Instructions
Step 1: Slice your ripe bananas into uniform coins about half-inch thick and arrange them on a parchment-lined tray, ensuring they don’t touch. Freeze for at least four hours or overnight until completely solid.
Step 2: Remove frozen banana slices from the freezer and let them sit at room temperature for two minutes to slightly soften, which makes blending easier and protects your blender motor.
Step 3: Add frozen bananas to your high-powered blender or food processor along with plant-based milk and vanilla extract. Begin processing on low speed, gradually increasing to high.
Step 4: Stop and scrape down the sides every thirty seconds. The mixture will transition from crumbly to creamy as the bananas break down—this takes approximately three to five minutes of blending.
Step 5: Once you achieve a smooth, soft-serve consistency, fold in half the cacao nibs using a spatula, reserving the rest for topping.
Step 6: Serve immediately for soft-serve texture, or transfer to a freezer-safe container and freeze for one hour for firmer scoopable ice cream. Top with remaining cacao nibs before serving.
Final Notes
• This naturally sweet treat showcases how frozen bananas transform into creamy perfection without any dairy, offering essential potassium and antioxidant-rich cacao nibs that provide a delightful chocolatey crunch and subtle bitterness.
2. Coconut Chia Pudding Parfait
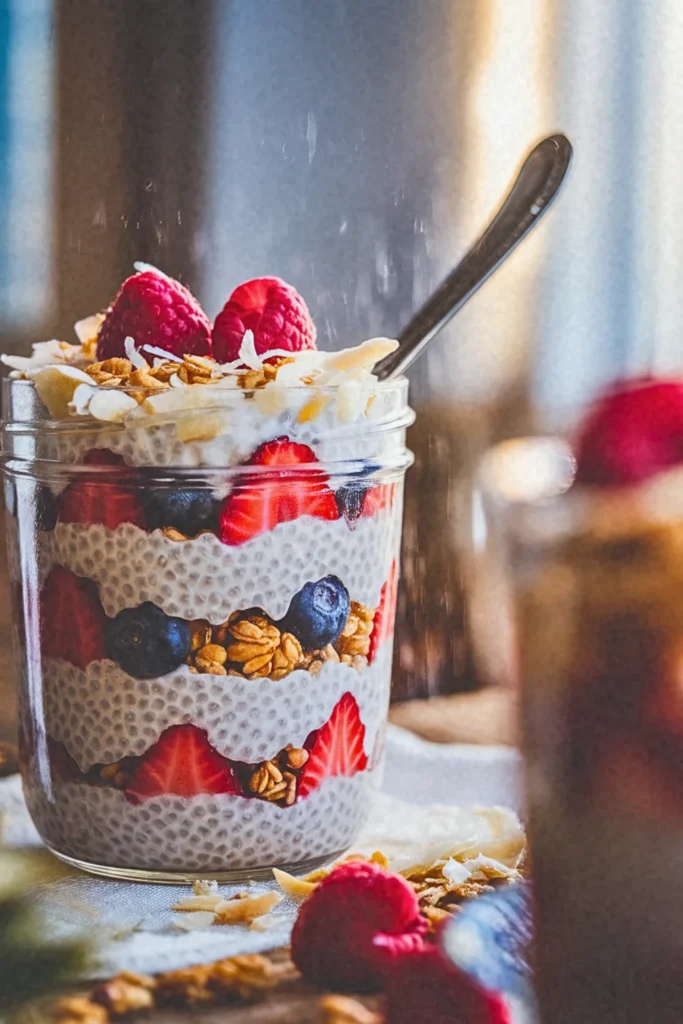
Creamy coconut milk meets chia seeds overnight. Layer it with fresh berries in the morning. Simple magic.
Recipe Highlights
✅ Prep Time: 10 minutes (plus 4 hours chilling)
✅ Cook Time: 0 minutes
✅ Total Time: 10 minutes active
✅ Servings: 2
✅ Estimated Cost: $6
✅ Calories per Serving: 285
✅ Dietary Info: Vegan, Gluten-Free, Dairy-Free, High-Fiber, Omega-3 Rich
Category
✅ Courses: Breakfast, Dessert, Snacks
✅ Cuisines: American, Tropical Fusion
Ingredients
• 1/4 cup chia seeds (substitute: ground flaxseed, though texture will differ)
• 1 cup full-fat coconut milk from can (substitute: any plant-based milk, but coconut provides richest flavor)
• 2 tablespoons maple syrup (substitute: agave nectar or date syrup)
• 1/2 teaspoon vanilla extract
• 1/4 teaspoon ground cinnamon
• 1 cup fresh mixed berries (strawberries, blueberries, raspberries; substitute: frozen berries, thawed)
• 1/4 cup granola (substitute: toasted coconut flakes or chopped nuts)
• 2 tablespoons shredded unsweetened coconut
Equipment
- Medium mixing bowl, 2. Whisk or fork, 3. Measuring cups and spoons, 4. Two glass jars or parfait glasses, 5. Spoon, 6. Plastic wrap or jar lids
Step-by-Step Instructions
Step 1: Combine chia seeds, coconut milk, maple syrup, vanilla extract, and cinnamon in your mixing bowl. Whisk vigorously for two minutes to prevent clumping and ensure even distribution throughout the mixture.
Step 2: Let the mixture rest for five minutes, then whisk again thoroughly. This second whisking breaks up any chia seed clusters that formed during the initial rest period, guaranteeing a smooth, uniform pudding texture.
Step 3: Cover your bowl with plastic wrap and refrigerate for at least four hours or overnight. The chia seeds will absorb the liquid and expand to create a thick, creamy pudding consistency similar to tapioca.
Step 4: After chilling, stir the pudding well to redistribute any settled seeds. If the consistency seems too thick, add one to two tablespoons of coconut milk and mix until you reach your desired creaminess.
Step 5: Begin layering your parfaits by spooning a quarter of the chia pudding into each glass, followed by a layer of fresh berries, then granola. Repeat this layering process once more to create beautiful, distinct strata.
Step 6: Top each parfait with remaining berries, a sprinkle of shredded coconut, and extra granola for textural contrast and visual appeal.
Final Notes
• This nutrient-dense parfait delivers exceptional omega-3 fatty acids and fiber from chia seeds while coconut milk provides healthy fats, making it a satisfying breakfast that stabilizes blood sugar and keeps you energized throughout your morning.
3. Baked Cinnamon Apple Slices with Almond Butter Drizzle
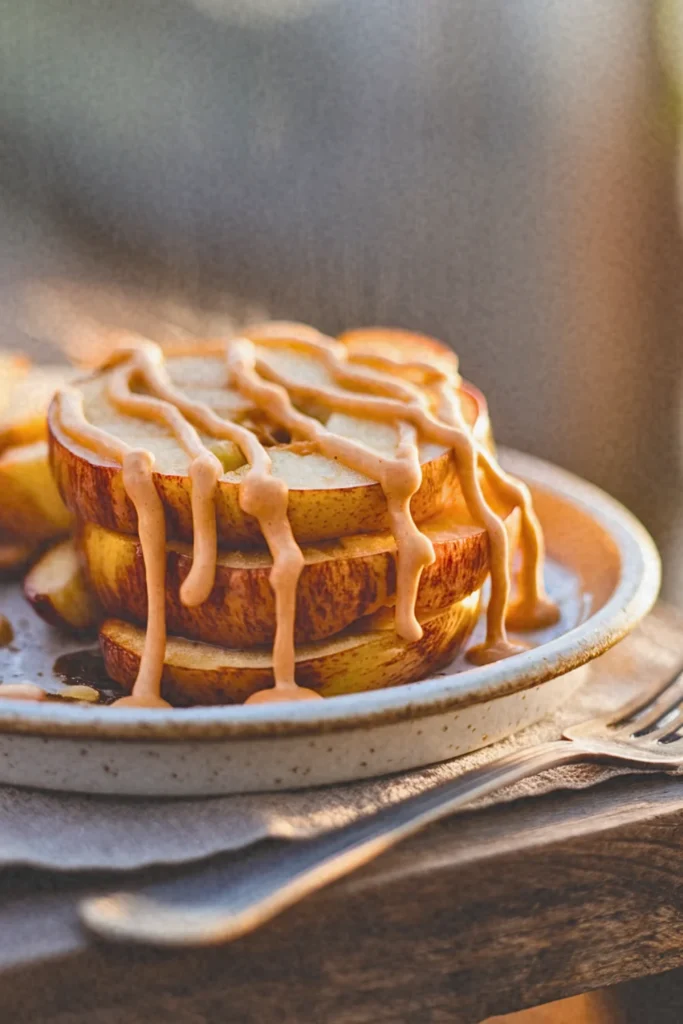
Warm, tender apples with cinnamon. Then that almond butter on top? Heaven. Takes ten minutes.
Recipe Highlights
✅ Prep Time: 10 minutes
✅ Cook Time: 20 minutes
✅ Total Time: 30 minutes
✅ Servings: 2
✅ Estimated Cost: $5
✅ Calories per Serving: 220
✅ Dietary Info: Vegan, Gluten-Free, Oil-Free, Refined Sugar-Free
Category
✅ Courses: Dessert, Snacks, Breakfast
✅ Cuisines: American, Contemporary
Ingredients
• 2 large crisp apples, preferably Honeycrisp or Granny Smith (substitute: pears for different sweetness profile)
• 1 tablespoon maple syrup (substitute: date syrup or agave nectar)
• 1 teaspoon ground cinnamon
• 1/4 teaspoon ground nutmeg (substitute: pumpkin pie spice)
• Pinch of sea salt
• 3 tablespoons creamy almond butter (substitute: cashew butter or peanut butter)
• 1 tablespoon plant-based milk for thinning
• Optional: 1 tablespoon chopped walnuts for topping
Equipment
- Baking sheet, 2. Parchment paper, 3. Sharp knife, 4. Cutting board, 5. Small mixing bowl, 6. Measuring spoons, 7. Small microwave-safe bowl or saucepan, 8. Spoon for drizzling
Step-by-Step Instructions
Step 1: Preheat your oven to 350°F and line your baking sheet with parchment paper to prevent sticking and ensure easy cleanup after baking your apple slices.
Step 2: Core your apples using a sharp knife, then slice them into quarter-inch thick rounds to create beautiful circular shapes with the natural star pattern visible in the center where seeds were removed.
Step 3: Arrange apple slices in a single layer on your prepared baking sheet, ensuring they don’t overlap so each slice caramelizes evenly and develops those delicious concentrated flavors during roasting.
Step 4: Combine maple syrup, cinnamon, nutmeg, and sea salt in your small mixing bowl, then brush or drizzle this spiced mixture generously over each apple slice, coating both sides for maximum flavor penetration.
Step 5: Bake for twenty minutes until the apples become tender with slightly caramelized edges and your kitchen fills with that irresistible warm cinnamon aroma that makes this recipe so comforting and inviting.
Step 6: While apples bake, prepare your almond butter drizzle by warming the almond butter with plant-based milk in the microwave for fifteen seconds or on the stovetop, stirring until smooth and pourable.
Step 7: Remove baked apples from the oven and transfer to serving plates. Drizzle the thinned almond butter artistically over the warm slices and sprinkle with chopped walnuts if desired.
Final Notes
• This wholesome treat transforms simple apples into a sophisticated dessert that satisfies sweet cravings while providing fiber, antioxidants, and healthy fats, making it perfect for guilt-free indulgence any time of day.
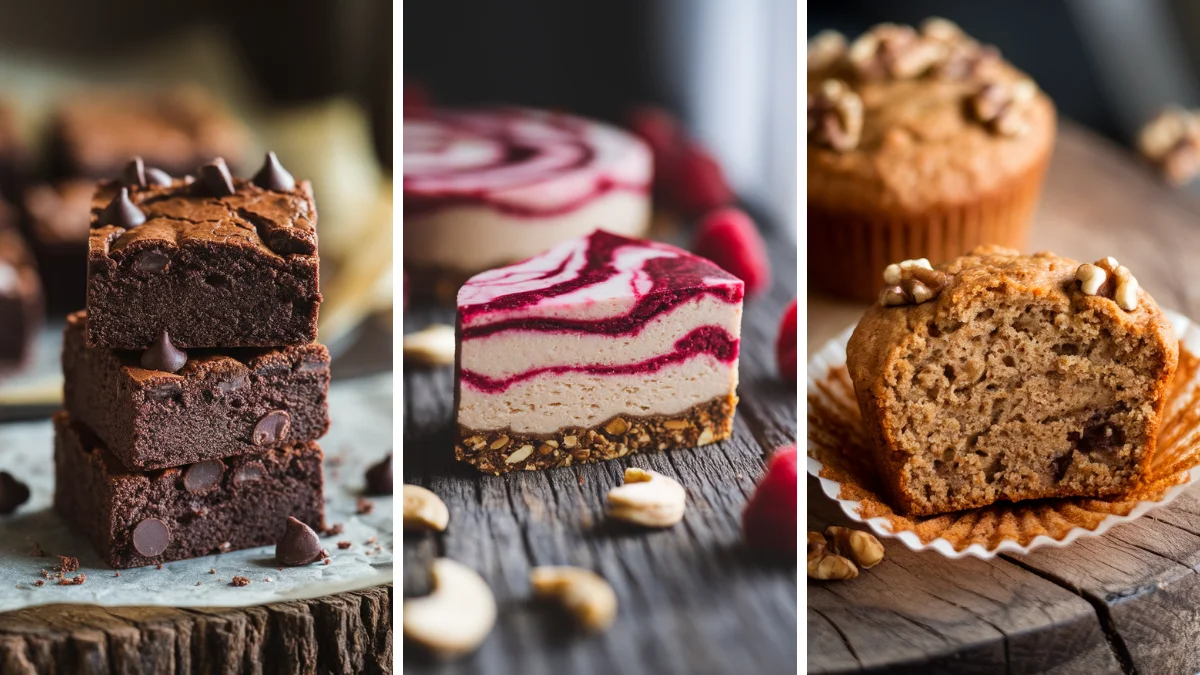
4. Raw Cashew Cheesecake Bites with Raspberry Swirl
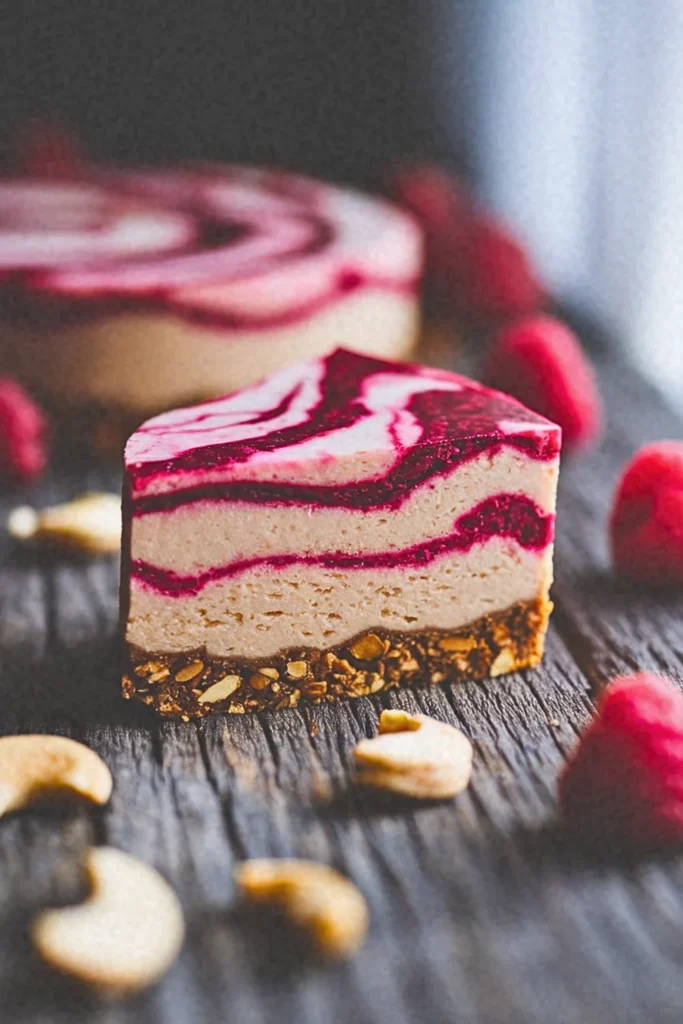
These little gems fool everyone. Soaked cashews create that creamy texture. The raspberry swirl makes them look fancy.
Recipe Highlights
✅ Prep Time: 20 min
✅ Cook Time: 0 min (freezing time: 2 hours)
✅ Total Time: 2 hours 20 min
✅ Servings: 12 bites
✅ Estimated Cost: $18
✅ Calories per Serving: 145
✅ Dietary Info: Vegan, Gluten-Free, Refined Sugar-Free, Raw
Category
✅ Courses: Dessert, Snacks
✅ Cuisines: American, Modern Plant-Based
Ingredients
For the Crust:
• 1 cup raw almonds
• 1 cup Medjool dates, pitted (about 8-10 dates)
• 2 tablespoons coconut oil, melted
• Pinch of sea salt
For the Cashew Filling:
• 2 cups raw cashews, soaked 4 hours and drained
• ½ cup full-fat coconut cream
• ⅓ cup maple syrup (substitute: agave nectar)
• ¼ cup coconut oil, melted
• 2 tablespoons lemon juice
• 1 teaspoon vanilla extract
For the Raspberry Swirl:
• ½ cup fresh raspberries
• 1 tablespoon maple syrup
Equipment
- High-speed blender or food processor, 2. Mini muffin tin, 3. Paper liners, 4. Mixing bowls, 5. Measuring cups and spoons, 6. Toothpick or skewer for swirling
Step-by-Step Instructions
Step 1: Process almonds in your food processor until they become coarse crumbs. Add pitted dates, melted coconut oil, and salt, then pulse until the mixture sticks together when pressed between your fingers.
Step 2: Line your mini muffin tin with paper liners. Press approximately one tablespoon of crust mixture firmly into each liner, creating an even base layer.
Step 3: Blend soaked cashews, coconut cream, maple syrup, melted coconut oil, lemon juice, and vanilla in your high-speed blender until completely smooth and creamy, scraping down sides as needed.
Step 4: Mash raspberries with maple syrup until you achieve a sauce-like consistency.
Step 5: Pour cashew filling over each crust, filling almost to the top. Drop small amounts of raspberry mixture onto each bite, then use a toothpick to create beautiful swirl patterns.
Step 6: Freeze for at least two hours until completely firm. Let sit at room temperature for five minutes before enjoying for optimal creamy texture.
Final Notes
• These decadent bites demonstrate how raw vegan desserts can deliver incredible creaminess through soaked cashews, which create a luxurious cheesecake texture without any dairy, while the date-almond crust provides satisfying crunch and natural sweetness that perfectly complements the tangy raspberry swirl.
5. Avocado Chocolate Mousse
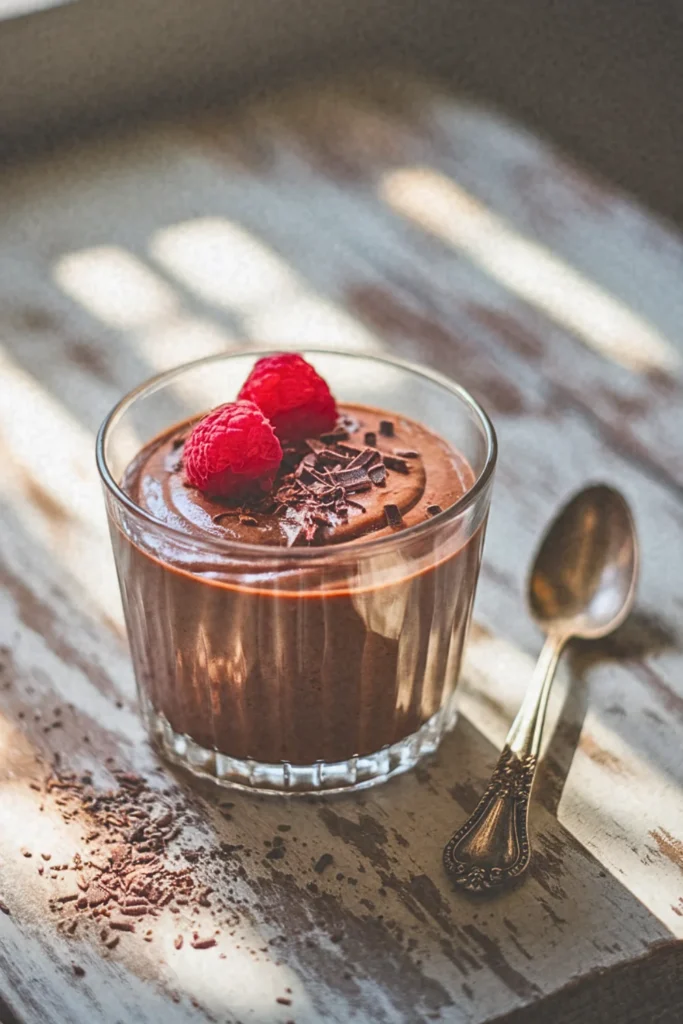
I know it sounds weird. But avocado makes this mousse ridiculously silky. The cacao powder brings serious chocolate vibes.
Recipe Highlights
✅ Prep Time: 10 min
✅ Cook Time: 0 min (chilling time: 1 hour)
✅ Total Time: 1 hour 10 min
✅ Servings: 4
✅ Estimated Cost: $8
✅ Calories per Serving: 220
✅ Dietary Info: Vegan, Gluten-Free, Refined Sugar-Free, Raw, Paleo-Friendly
Category
✅ Courses: Dessert, Snacks
✅ Cuisines: French-Inspired, Modern Plant-Based
Ingredients
For the Mousse:
• 2 large ripe avocados, peeled and pitted
• ¼ cup unsweetened cocoa powder (substitute: cacao powder for raw version)
• ¼ cup maple syrup (substitute: agave nectar or date syrup)
• ¼ cup almond milk (substitute: any plant milk)
• 2 teaspoons vanilla extract
• Pinch of sea salt
• Optional: 1 tablespoon coconut cream for extra richness
For Topping:
• Fresh raspberries or strawberries
• Shaved dark chocolate
• Chopped pistachios or almonds
• Fresh mint leaves
Equipment
- High-speed blender or food processor, 2. Rubber spatula, 3. Measuring cups and spoons, 4. Serving glasses or bowls, 5. Mixing spoon
Step-by-Step Instructions
Step 1: Ensure your avocados are perfectly ripe by checking that they yield to gentle pressure. Scoop the flesh into your blender, discarding the pits and skins completely.
Step 2: Add cocoa powder, maple syrup, almond milk, vanilla extract, and sea salt to the blender with your avocado. If you’re using coconut cream for added decadence, include it now.
Step 3: Blend on high speed for one to two minutes, stopping occasionally to scrape down the sides with your rubber spatula, until the mixture becomes completely smooth and silky with no visible avocado chunks remaining.
Step 4: Taste your mousse and adjust sweetness if needed by adding more maple syrup, or deepen the chocolate flavor with additional cocoa powder, blending briefly after any additions.
Step 5: Divide the mousse evenly among four serving glasses or small bowls, using your spatula to create smooth, elegant swirls on top.
Step 6: Cover and refrigerate for at least one hour to allow the mousse to firm up and the flavors to meld together beautifully. Before serving, garnish with your choice of fresh berries, chocolate shavings, nuts, or mint.
Final Notes
• This revolutionary dessert showcases how avocado’s naturally creamy texture and neutral flavor create an incredibly luxurious mousse base that perfectly carries rich chocolate notes, while providing heart-healthy fats and making this indulgent treat surprisingly nutritious without compromising on taste.
6. Date-Sweetened Peanut Butter Energy Balls
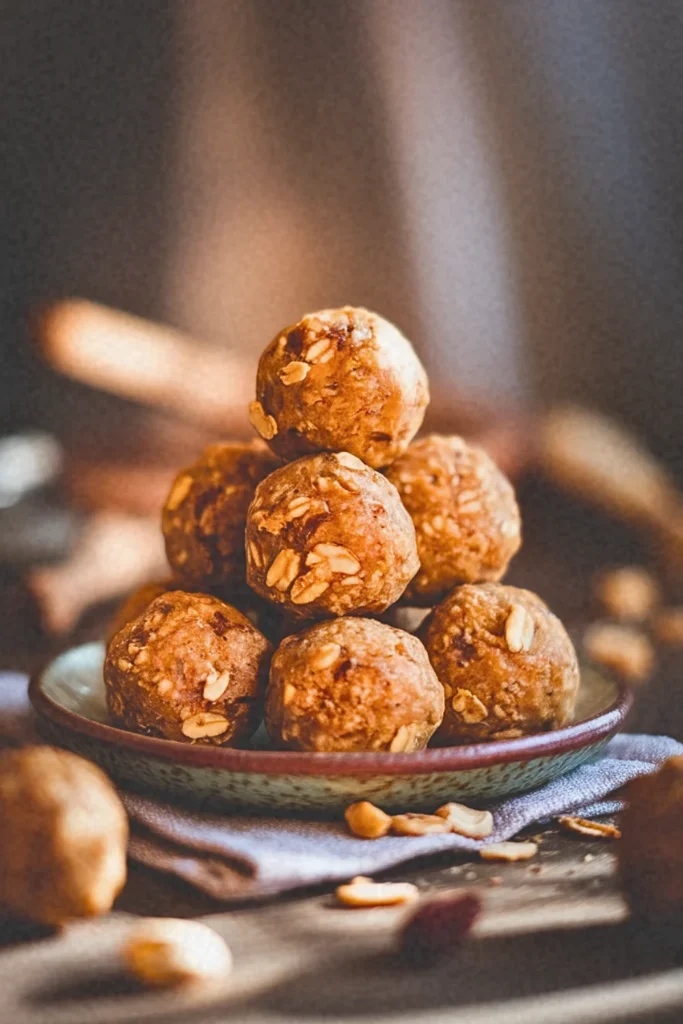
Roll these up on Sunday. Grab them all week. Dates bind everything together naturally. No baking required.
Recipe Highlights
✅ Prep Time: 15 min
✅ Cook Time: 0 min (chilling time: 30 min)
✅ Total Time: 45 min
✅ Servings: 16 balls
✅ Estimated Cost: $10
✅ Calories per Serving: 110
✅ Dietary Info: Vegan, Gluten-Free, Refined Sugar-Free, No-Bake
Category
✅ Courses: Snacks, Breakfast, Dessert
✅ Cuisines: American, Health-Focused Plant-Based
Ingredients
For the Energy Balls:
• 1½ cups Medjool dates, pitted (about 12-15 dates)
• ½ cup natural peanut butter (substitute: almond or cashew butter)
• 1 cup rolled oats (use certified gluten-free if needed)
• 2 tablespoons ground flaxseed
• 2 tablespoons chia seeds
• 1 teaspoon vanilla extract
• ¼ teaspoon sea salt
• 2 tablespoons mini dairy-free chocolate chips (optional)
For Rolling (Optional):
• Unsweetened shredded coconut
• Crushed peanuts
• Extra cocoa powder
Equipment
- Food processor, 2. Measuring cups and spoons, 3. Mixing bowl, 4. Cookie scoop or tablespoon, 5. Airtight storage container, 6. Parchment-lined plate or tray
Step-by-Step Instructions
Step 1: Place your pitted dates into the food processor and pulse until they break down into small pieces that start clumping together into a sticky mass, forming the natural binding agent for your energy balls.
Step 2: Add peanut butter, rolled oats, ground flaxseed, chia seeds, vanilla extract, and sea salt to the processed dates in your food processor bowl.
Step 3: Process everything together for about thirty to forty-five seconds, stopping to scrape down the sides as needed, until the mixture forms a cohesive dough that holds together when pinched between your fingers.
Step 4: Transfer the mixture to a bowl and fold in chocolate chips if you’re using them, distributing them evenly throughout the dough for balanced sweetness in every bite.
Step 5: Using slightly dampened hands to prevent sticking, scoop approximately one tablespoon of mixture and roll it between your palms to form smooth, compact balls about one inch in diameter.
Step 6: If desired, roll each ball in shredded coconut, crushed peanuts, or cocoa powder for added texture and visual appeal. Arrange on your parchment-lined plate and refrigerate for thirty minutes to firm up before enjoying.
Final Notes
• These nutrient-dense energy balls brilliantly demonstrate how whole food ingredients like dates provide natural sweetness and binding properties while delivering fiber, while the combination of peanut butter, oats, and seeds creates sustained energy through healthy fats and plant-based protein.
7. Grilled Peaches with Coconut Whipped Cream
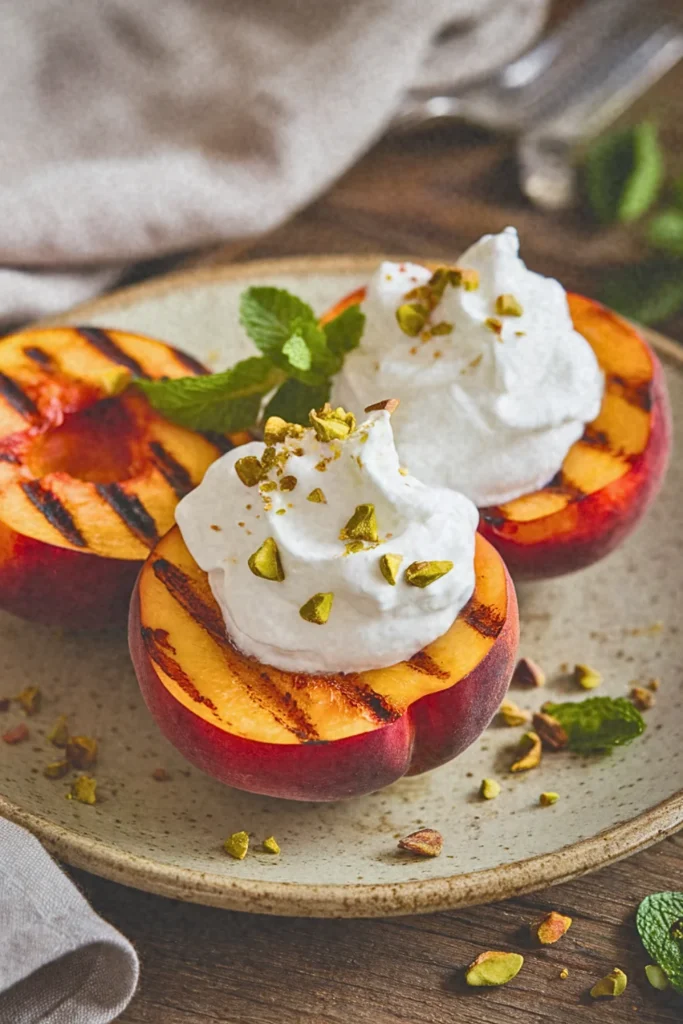
Summer in a bowl. The grill caramelizes those natural sugars. Coconut cream on top feels decadent.
Recipe Highlights
✅ Prep Time: 15 min
✅ Cook Time: 10 min
✅ Total Time: 25 min
✅ Servings: 4
✅ Estimated Cost: $14
✅ Calories per Serving: 245
✅ Dietary Info: Vegan, Gluten-Free, Refined Sugar-Free
Category
✅ Courses: Dessert
✅ Cuisines: American
Ingredients
For the Grilled Peaches:
• 4 large ripe peaches, halved and pitted
• 2 tablespoons coconut oil, melted (substitute: olive oil)
• 2 tablespoons maple syrup (substitute: agave nectar)
• 1 teaspoon vanilla extract • ¼ teaspoon cinnamon
For the Coconut Whipped Cream:
• 1 can (14 oz) full-fat coconut cream, refrigerated overnight
• 2 tablespoons powdered sugar (substitute: 1 tablespoon maple syrup)
• ½ teaspoon vanilla extract
Optional Toppings:
• Chopped pistachios or pecans
• Fresh mint leaves
• Drizzle of balsamic reduction
Equipments
- Grill or grill pan, 2. Mixing bowls, 3. Electric mixer or whisk, 4. Pastry brush, 5. Serving platter
Step-by-Step Instructions
Step 1: Begin by removing your coconut cream from the refrigerator. Open the can carefully and scoop only the thick, solidified cream into a chilled mixing bowl, leaving the watery liquid behind.
Step 2: Preheat your grill to medium-high heat, around 400°F. While heating, combine melted coconut oil, maple syrup, vanilla extract, and cinnamon in a small bowl to create your peach glaze.
Step 3: Brush the cut sides of your peach halves generously with the glaze mixture, ensuring even coverage for optimal caramelization.
Step 4: Place peaches cut-side down on the grill and cook for 4-5 minutes until beautiful grill marks appear and the fruit begins to soften. Flip and grill for another 3-4 minutes.
Step 5: While peaches are grilling, whip your coconut cream using an electric mixer on high speed. Add powdered sugar and vanilla, continuing to beat for 2-3 minutes until light, fluffy peaks form.
Step 6: Arrange warm grilled peaches on your serving platter, add a generous dollop of coconut whipped cream to each half, and finish with your chosen toppings.
Final Notes
• The secret to perfect coconut whipped cream lies in overnight refrigeration—this separates the cream from liquid, creating that luxurious, stable texture that holds beautifully atop warm fruit.
8. Mango Turmeric Sorbet
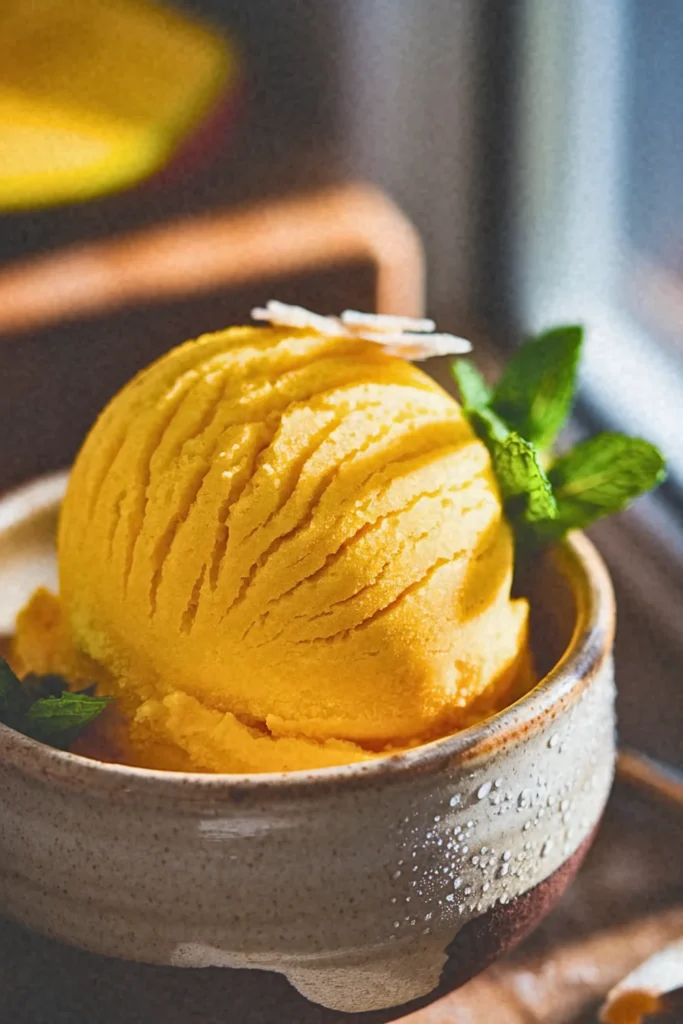
Bright, tropical, and anti-inflammatory. Just frozen mango and a pinch of turmeric. Refreshing doesn’t begin to cover it.
Recipe Highlights
✅ Prep Time: 15 min
✅ Cook Time: 0 min
✅ Total Time: 4 hours 15 min (includes freezing)
✅ Servings: 6
✅ Estimated Cost: $10
✅ Calories per Serving: 135
✅ Dietary Info: Vegan, Gluten-Free, Refined Sugar-Free, Anti-Inflammatory
Category
✅ Courses: Dessert, Snacks
✅ Cuisines: Fusion (Indian-American)
Ingredients
For the Sorbet Base:
• 4 cups fresh or frozen mango chunks (about 3 large mangoes, substitute: frozen peaches)
• ½ cup coconut water (substitute: filtered water or orange juice)
• ⅓ cup maple syrup or agave nectar (adjust to taste)
• 2 tablespoons fresh lime juice
• 1 teaspoon ground turmeric (or 1 tablespoon fresh turmeric, grated)
• ¼ teaspoon ground ginger (substitute: ½ teaspoon fresh grated ginger)
• Pinch of black pepper (enhances turmeric absorption) • Pinch of sea salt
Optional Garnish:
• Fresh mint leaves
• Toasted coconut flakes
• Lime zest
Equipments
- High-powered blender or food processor, 2. Freezer-safe container with lid, 3. Measuring cups and spoons, 4. Ice cream scoop, 5. Spatula
Step-by-Step Instructions
Step 1: If using fresh mangoes, peel and cube them, then freeze for at least 2 hours until completely solid. This creates the ideal texture foundation for your sorbet without requiring an ice cream maker.
Step 2: Add your frozen mango chunks to the blender along with coconut water, maple syrup, lime juice, turmeric, ginger, black pepper, and sea salt. The black pepper is crucial—it contains piperine, which increases turmeric’s bioavailability by up to 2000%.
Step 3: Blend on high speed for 2-3 minutes, stopping to scrape down the sides as needed. You’re aiming for an ultra-smooth, vibrant golden-orange consistency. The mixture should be thick yet pourable.
Step 4: Taste and adjust sweetness or tartness by adding more maple syrup or lime juice. Remember that frozen desserts taste less sweet once fully frozen, so it should taste slightly sweeter now.
Step 5: Transfer the sorbet mixture into your freezer-safe container, smoothing the top with a spatula. Cover tightly and freeze for at least 4 hours or overnight for optimal scoopability.
Step 6: Before serving, let the sorbet sit at room temperature for 5-10 minutes to soften slightly. Scoop into chilled bowls and garnish with mint, coconut flakes, or lime zest.
Final Notes
• This anti-inflammatory dessert combines mango’s vitamin C with turmeric’s curcumin, creating not just a refreshing treat but a functional food that supports joint health and digestion while satisfying your sweet cravings naturally.
9. Black Bean Brownies
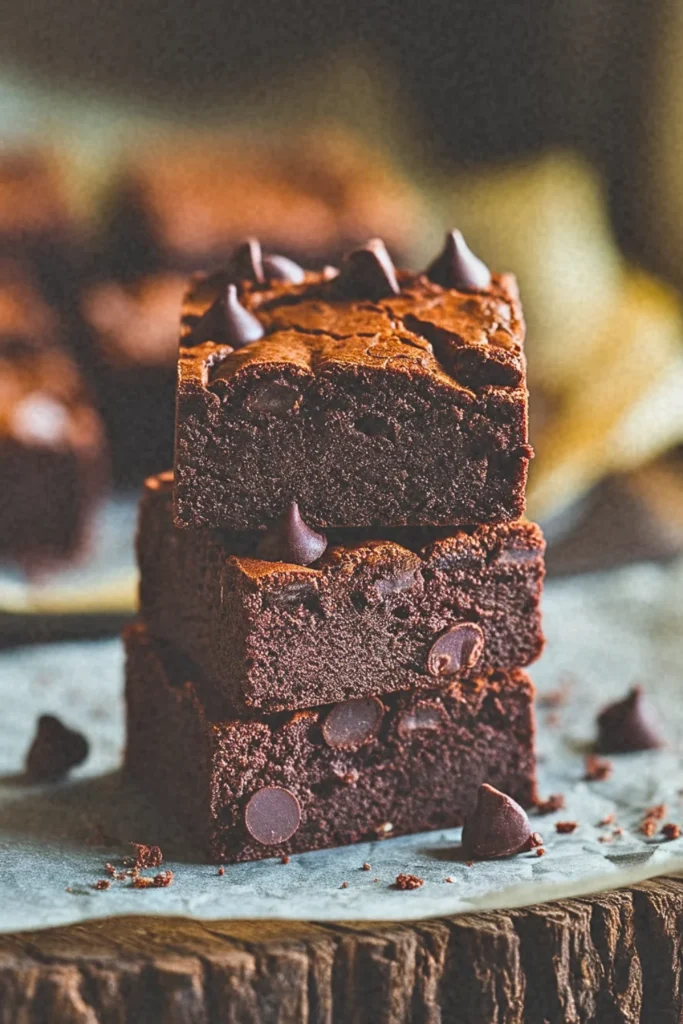
Yes, black beans. No, you can’t taste them. These are fudgy and rich. Date paste does the sweetening work.
Recipe Highlights
✅ Prep Time: 15 min
✅ Cook Time: 25 min
✅ Total Time: 40 min
✅ Servings: 16 brownies
✅ Estimated Cost: $8
✅ Calories per Serving: 120
✅ Dietary Info: Vegan, Gluten-Free, High-Protein, High-Fiber
Category
✅ Courses: Dessert, Snacks
✅ Cuisines: American
Ingredients
For the Brownies:
• 1 can (15 oz) black beans, drained and rinsed thoroughly (substitute: chickpeas)
• 3 tablespoons ground flaxseed mixed with 9 tablespoons water (flax eggs, substitute: chia eggs)
• ½ cup cocoa powder, unsweetened
• ⅔ cup maple syrup (substitute: agave nectar or date syrup)
• ¼ cup coconut oil, melted (substitute: any neutral oil)
• 2 teaspoons vanilla extract
• ½ teaspoon baking powder
• ¼ teaspoon sea salt
• ½ cup vegan chocolate chips (optional but recommended)
Equipments
- Food processor or high-powered blender, 2. 8×8-inch baking pan, 3. Parchment paper, 4. Measuring cups and spoons, 5. Mixing bowl, 6. Spatula
Step-by-Step Instructions
Step 1: Preheat your oven to 350°F and line your baking pan with parchment paper, leaving overhang on the sides for easy removal. In a small bowl, mix ground flaxseed with water and set aside for 5 minutes to thicken into a gel-like consistency.
Step 2: Add drained black beans to your food processor along with the prepared flax eggs. Pulse until completely smooth with no visible bean chunks—this is crucial for achieving that fudgy brownie texture rather than a bean-forward flavor.
Step 3: Add cocoa powder, maple syrup, melted coconut oil, vanilla extract, baking powder, and salt to the processor. Blend for 2-3 minutes, scraping down sides as needed, until the batter becomes silky and resembles traditional brownie batter.
Step 4: Transfer the batter to your mixing bowl and fold in chocolate chips if using, reserving a handful to sprinkle on top for visual appeal and extra chocolate hits.
Step 5: Pour the batter into your prepared pan, spreading evenly with a spatula. Tap the pan gently on the counter to release air bubbles, then sprinkle remaining chocolate chips across the surface.
Step 6: Bake for 23-25 minutes until the edges appear set but the center remains slightly soft when gently pressed. A toothpick inserted should come out with a few moist crumbs—overbaking creates dry brownies, so watch carefully during the final minutes.
Step 7: Cool completely in the pan for at least 30 minutes before lifting out using parchment overhangs and cutting into 16 squares.
Final Notes
• These protein-packed brownies prove that beans belong in desserts—providing 4 grams of protein and 3 grams of fiber per serving while delivering genuine chocolate satisfaction without refined flour or eggs.
10. Tahini Banana Bread Muffins
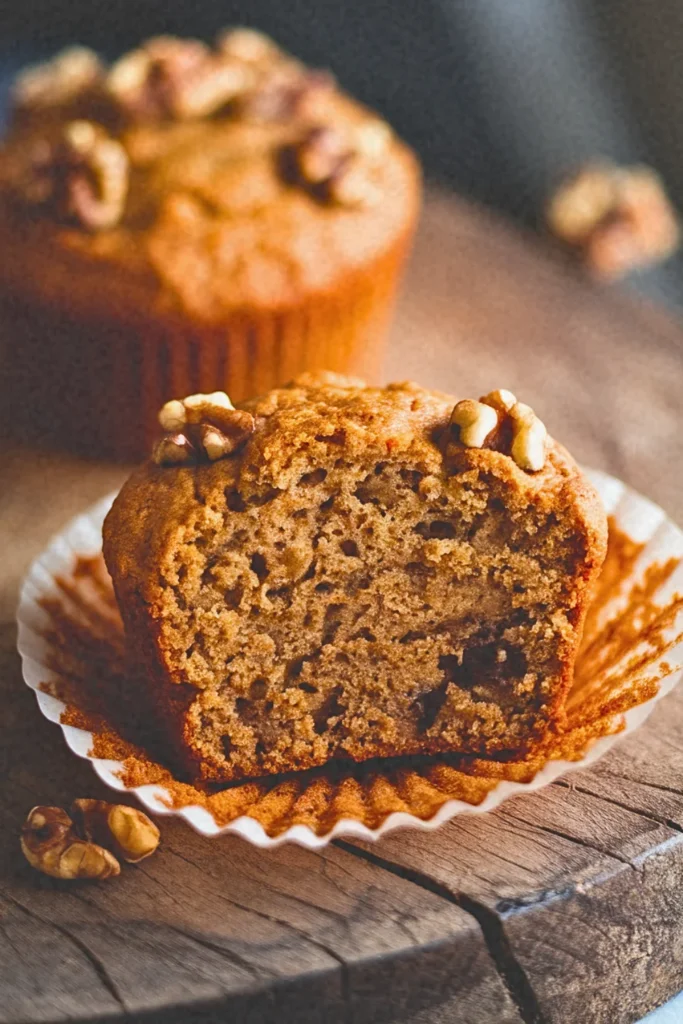
Tahini adds this nutty depth that regular banana bread misses. Naturally sweet from overripe bananas. Gluten-free option works beautifully.
Recipe Highlights
✅ Prep Time: 10 min
✅ Cook Time: 22 min
✅ Total Time: 32 min
✅ Servings: 12 muffins
✅ Estimated Cost: $8
✅ Calories per Serving: 185
✅ Dietary Info: Vegan, Dairy-Free, Refined Sugar-Free
Category
✅ Courses: Breakfast, Snack, Dessert
✅ Cuisines: American, Middle Eastern Fusion
Ingredients
• 3 ripe bananas, mashed (about 1½ cups)
• ⅓ cup tahini (substitute: almond butter or sunflower seed butter)
• ¼ cup maple syrup (substitute: agave nectar or date syrup)
• ¼ cup plant-based milk (substitute: any non-dairy milk)
• 1 teaspoon vanilla extract
• 1¾ cups whole wheat flour (substitute: all-purpose or gluten-free flour blend)
• 1 teaspoon baking soda
• ½ teaspoon baking powder
• ½ teaspoon cinnamon
• ¼ teaspoon salt
• ⅓ cup chopped walnuts, optional (substitute: pecans or chocolate chips)
Equipments
- Mixing bowls (2), 2. Muffin tin (12-cup), 3. Muffin liners or cooking spray, 4. Fork or potato masher, 5. Whisk, 6. Measuring cups and spoons, 7. Spatula
Step-by-Step Instructions
Step 1: Preheat your oven to 350°F (175°C) and prepare your muffin tin by lining it with paper liners or lightly greasing each cup with oil.
Step 2: In a large mixing bowl, mash the ripe bananas thoroughly until smooth with minimal lumps, then add the tahini, maple syrup, plant-based milk, and vanilla extract, whisking everything together until well combined.
Step 3: In your second bowl, whisk together the flour, baking soda, baking powder, cinnamon, and salt to ensure the leavening agents distribute evenly.
Step 4: Pour the dry ingredients into the wet mixture and gently fold together using a spatula until just combined—avoid overmixing as this creates dense muffins. Fold in walnuts if using.
Step 5: Divide the batter evenly among the 12 muffin cups, filling each about three-quarters full.
Step 6: Bake for 20-22 minutes until a toothpick inserted in the center comes out clean and the tops are golden brown.
Step 7: Allow muffins to cool in the pan for 5 minutes before transferring to a wire rack.
Final Notes
• These tahini banana bread muffins stay fresh at room temperature for three days or refrigerated for one week. The tahini adds rich, nutty depth while creating incredibly moist texture, and you can enhance them with additions like dried fruit or seeds for nutritional variety.
11. Coconut Macaroons with Dark Chocolate Dip
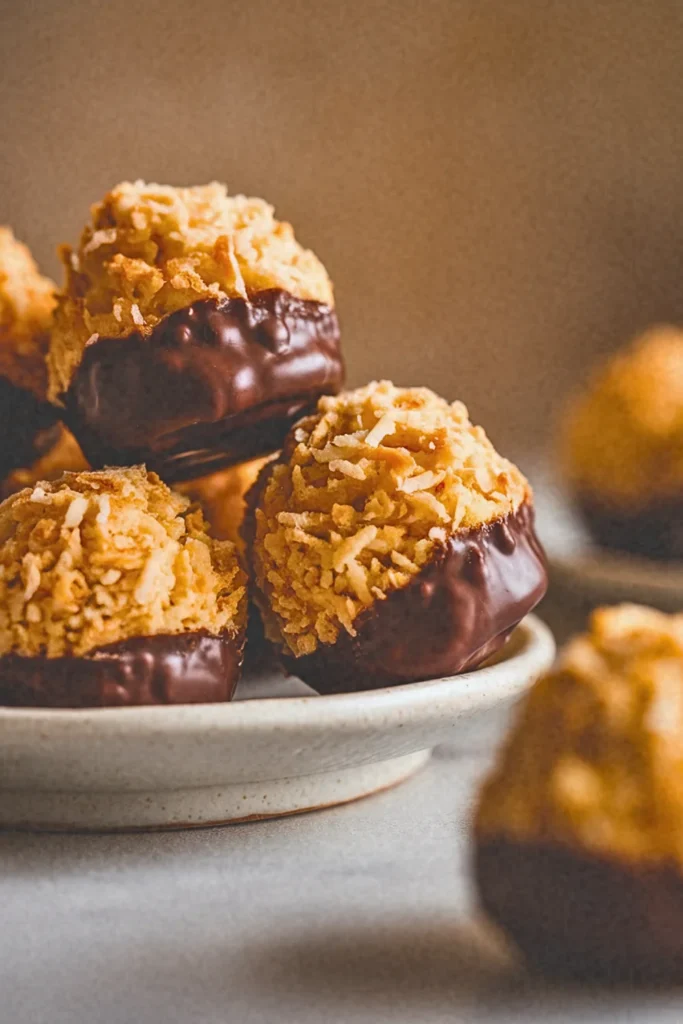
Chewy coconut clouds. Dipped in sugar-free dark chocolate. They taste like you spent hours making them.
Recipe Highlights
✅ Prep Time: 15 min
✅ Cook Time: 18 min
✅ Total Time: 33 min
✅ Servings: 18 macaroons
✅ Estimated Cost: $10
✅ Calories per Serving: 120
✅ Dietary Info: Vegan, Gluten-Free, Refined Sugar-Free
Category
✅ Courses: Dessert, Snack
✅ Cuisines: American, French-Inspired
Ingredients
• 3 cups unsweetened shredded coconut
• ½ cup maple syrup (substitute: agave nectar or coconut nectar)
• ¼ cup coconut oil, melted (substitute: vegan butter)
• ¼ cup aquafaba (chickpea brine from canned chickpeas)
• 1 teaspoon vanilla extract
• ¼ teaspoon almond extract (substitute: additional vanilla)
• ⅛ teaspoon salt
• 1 cup dark chocolate chips, dairy-free (substitute: vegan semi-sweet chocolate)
• 1 tablespoon coconut oil for chocolate dip
Equipments
- Baking sheet, 2. Parchment paper, 3. Large mixing bowl, 4. Small microwave-safe bowl or double boiler, 5. Measuring cups and spoons, 6. Spoon or cookie scoop, 7. Cooling rack
Step-by-Step Instructions
Step 1: Preheat your oven to 325°F (165°C) and line a baking sheet with parchment paper to prevent sticking.
Step 2: In your large mixing bowl, combine the shredded coconut, maple syrup, melted coconut oil, aquafaba, vanilla extract, almond extract, and salt, stirring thoroughly until the mixture becomes sticky and cohesive.
Step 3: Using a spoon or cookie scoop, form the mixture into small mounds about two tablespoons each, placing them on the prepared baking sheet with about one inch spacing between each macaroon.
Step 4: Bake for 16-18 minutes until the edges turn golden brown and the tops develop a light toast color, then remove from the oven and let cool completely on the baking sheet.
Step 5: While macaroons cool, melt the dark chocolate chips with one tablespoon coconut oil using either a microwave in 30-second intervals or a double boiler, stirring until smooth and glossy.
Step 6: Once macaroons are completely cooled, dip the bottom half of each one into the melted chocolate, allowing excess to drip off.
Step 7: Place chocolate-dipped macaroons on parchment paper and refrigerate for 10 minutes until chocolate sets firm.
Final Notes
• Store these coconut macaroons in an airtight container at room temperature for five days or refrigerate for two weeks. The aquafaba acts as an egg replacer, binding the coconut beautifully while keeping them chewy inside and crispy outside, perfect for elegant entertaining.
Must-Try: No Bake Vegan Dessert Recipes.

Hi, I’m Aldvin Gomes, a passionate vegan and foodie on a mission to make plant-based eating effortless and exciting. I share new vegan recipes every day, so you never have to stress about what to cook. Whether you’re a longtime vegan or just exploring plant-based meals, my goal is to keep your plate full of delicious, wholesome, and easy-to-make dishes. I’m here to help you enjoy every bite. Join me in exploring the endless possibilities of vegan cooking, one delicious recipe at a time!