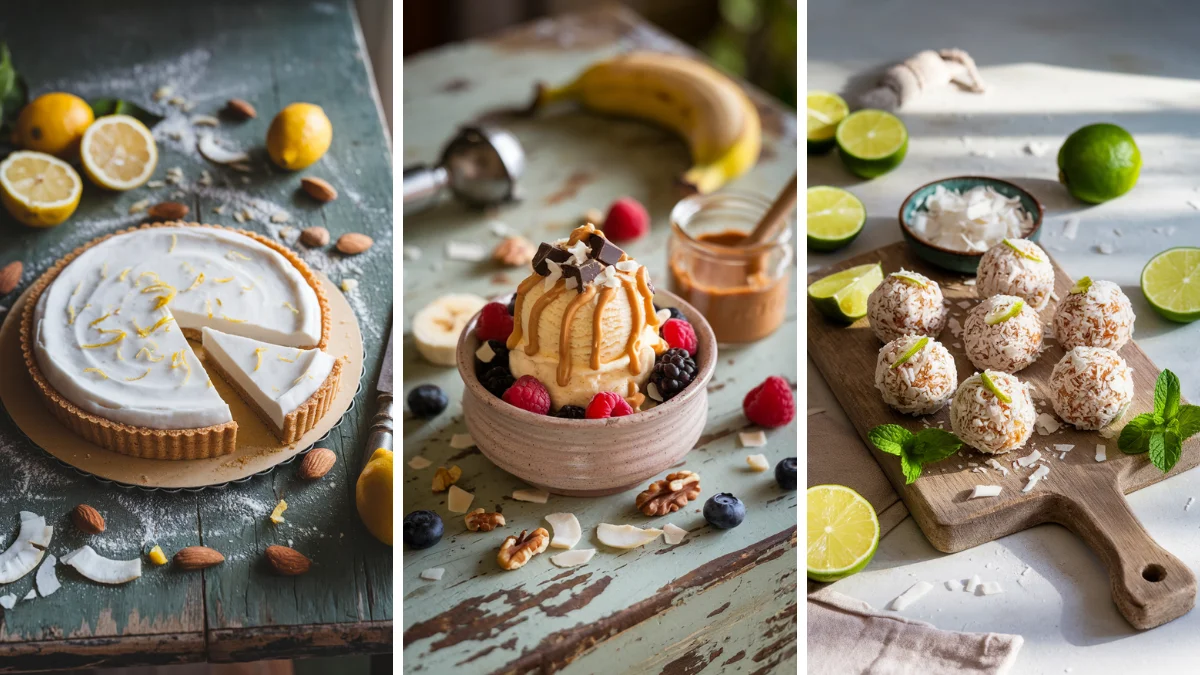
Healthy vegan desserts prove you don’t need dairy or eggs to create mind-blowing sweet treats that satisfy every craving imaginable.
I’ll be honest – I used to think vegan desserts were just sad fruit salads masquerading as real sweets.
Boy, was I wrong! My journey into plant-based baking started three years ago when my lactose-intolerant sister challenged me to make her birthday cake.
That first attempt? Let’s just say the chocolate avocado mousse looked more like baby food than dessert.
But here’s what I discovered: vegan desserts aren’t about replacing ingredients – they’re about reimagining what dessert can be.
Raw cashew cheesecakes that melt on your tongue. Simple three-ingredient brownies that bake in twenty minutes. Quick energy balls that taste like cookie dough but fuel your afternoon workout.
The best part? These clean eating treats often pack more nutrients than their traditional counterparts.
We’re talking antioxidant-rich cacao, fiber-loaded oats, and healthy fats from nuts and seeds. Many recipes are naturally gluten-free too, making them accessible for almost everyone.
Must-See: 11 Easy Vegan Desserts.
11 Healthy Vegan Desserts
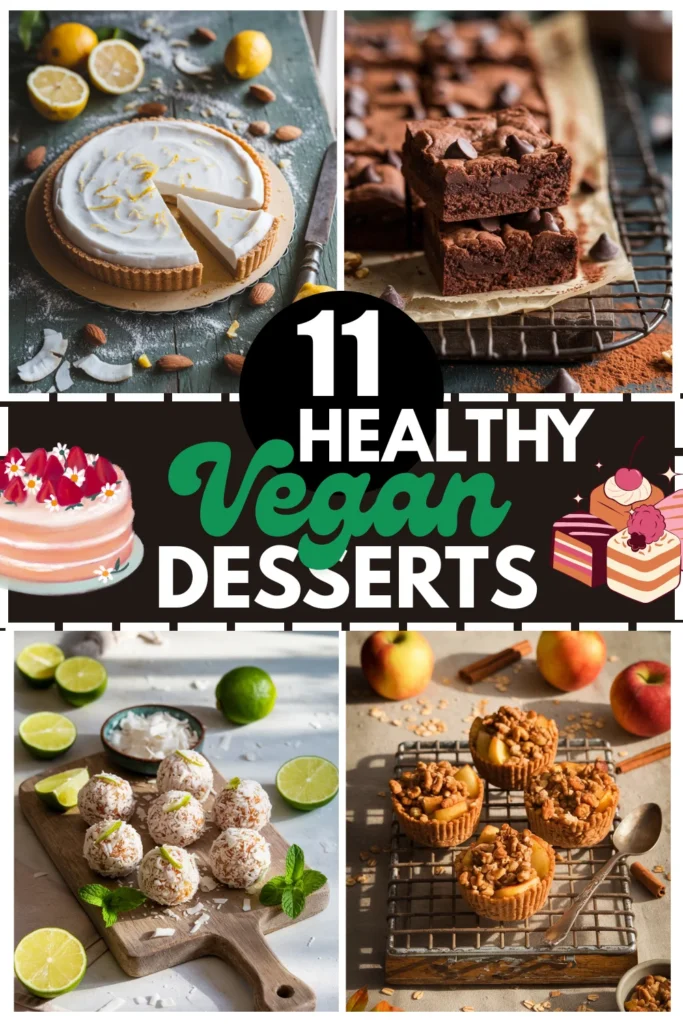
Whether you’re a seasoned vegan or just curious about healthier alternatives, these eleven easy desserts will change how you think about plant-based sweets.
Trust me – your taste buds won’t know the difference, but your body definitely will.
1. Raw Chocolate Avocado Mousse Parfait
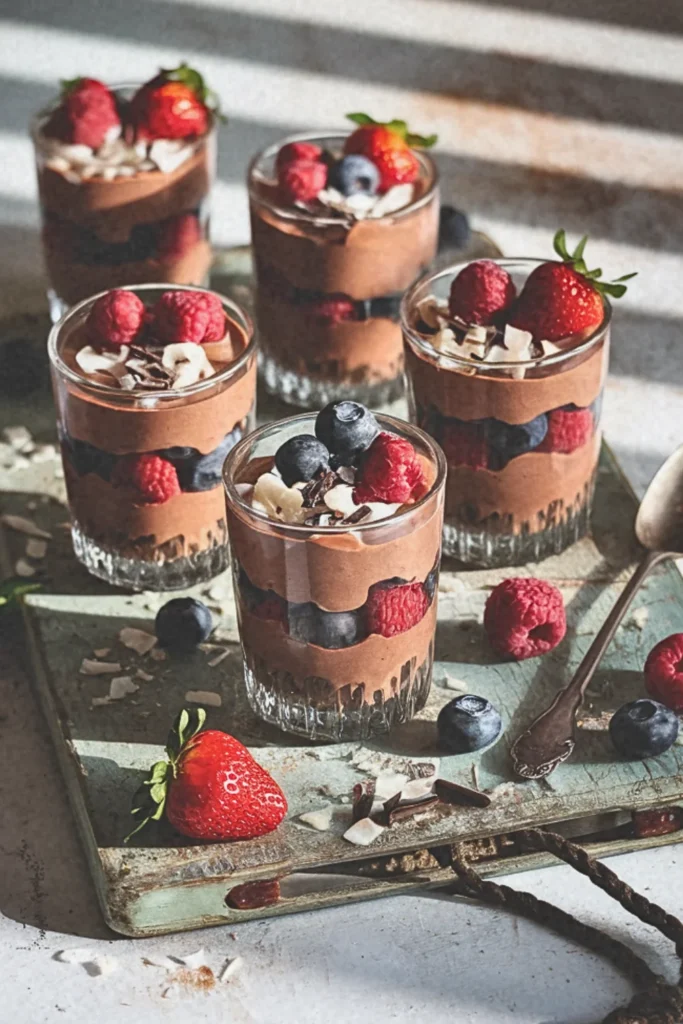
This silky, decadent mousse harnesses the natural creaminess of ripe avocados combined with rich cacao powder to create an incredibly smooth texture that rivals any traditional mousse. The beauty lies in how the avocado’s mild flavor completely disappears, leaving only pure chocolate bliss layered with fresh berries.
Recipe Highlights (Quick Glance Section)
✅ Prep Time: 15 minutes
✅ Cook Time: 0 minutes (raw dessert)
✅ Total Time: 15 minutes (plus 30 minutes chilling)
✅ Servings: 4
✅ Estimated Cost: $8
✅ Calories per Serving: 245
✅ Dietary Info: Vegan, Gluten-Free, Raw, Dairy-Free, Refined Sugar-Free
Category
✅ Courses: Dessert
✅ Cuisines: American, Raw Food
Ingredients
Understanding the role of each ingredient will help you create the perfect mousse consistency and flavor balance.
For the Chocolate Mousse:
- 2 large ripe avocados (about 10 oz total) – provides creamy base texture
- 1/4 cup unsweetened cocoa powder – delivers rich chocolate flavor
- 1/4 cup pure maple syrup – natural sweetener (substitute: agave nectar or dates)
- 2 tablespoons coconut milk (full-fat) – enhances creaminess
- 1 teaspoon vanilla extract – adds depth and rounds out flavors
- 1/8 teaspoon sea salt – balances sweetness and intensifies chocolate
For Layering:
- 1 cup fresh mixed berries (strawberries, raspberries, blueberries)
- 2 tablespoons chopped dark chocolate or cacao nibs
- 1/4 cup toasted coconut flakes
Equipment
- High-speed blender or food processor, 2. Four parfait glasses or mason jars, 3. Rubber spatula, 4. Measuring cups, 5. Measuring spoons, 6. Small spoon for layering
Step-by-Step Instructions
Step 1: Begin by ensuring your avocados are perfectly ripe but not overripe, as this affects both texture and taste. Cut them in half, remove pits, and scoop flesh into your blender.
Step 2: Add cocoa powder, maple syrup, coconut milk, vanilla extract, and sea salt to the blender with avocados. The order matters less than ensuring all ingredients are present before blending.
Step 3: Blend on high speed for sixty to ninety seconds until completely smooth and creamy. Stop occasionally to scrape down sides with your rubber spatula, ensuring no lumps remain.
Step 4: Taste your mousse and adjust sweetness or chocolate intensity as needed. The flavor should be rich and balanced, with no detectable avocado taste.
Step 5: Begin assembling parfaits by spooning two tablespoons of mousse into the bottom of each glass, creating your foundation layer.
Step 6: Add a layer of mixed berries, followed by another layer of mousse, then berries again. This creates beautiful visual contrast and textural variety.
Step 7: Top each parfait with chopped chocolate and toasted coconut flakes for added crunch and visual appeal.
Step 8: Refrigerate parfaits for at least thirty minutes before serving to allow flavors to meld and achieve optimal consistency.
Final Notes
- The secret to undetectable avocado flavor lies in using perfectly ripe fruit and balancing with enough cocoa powder and vanilla to mask any vegetable undertones completely.
2. No-Bake Coconut Lime Energy Balls
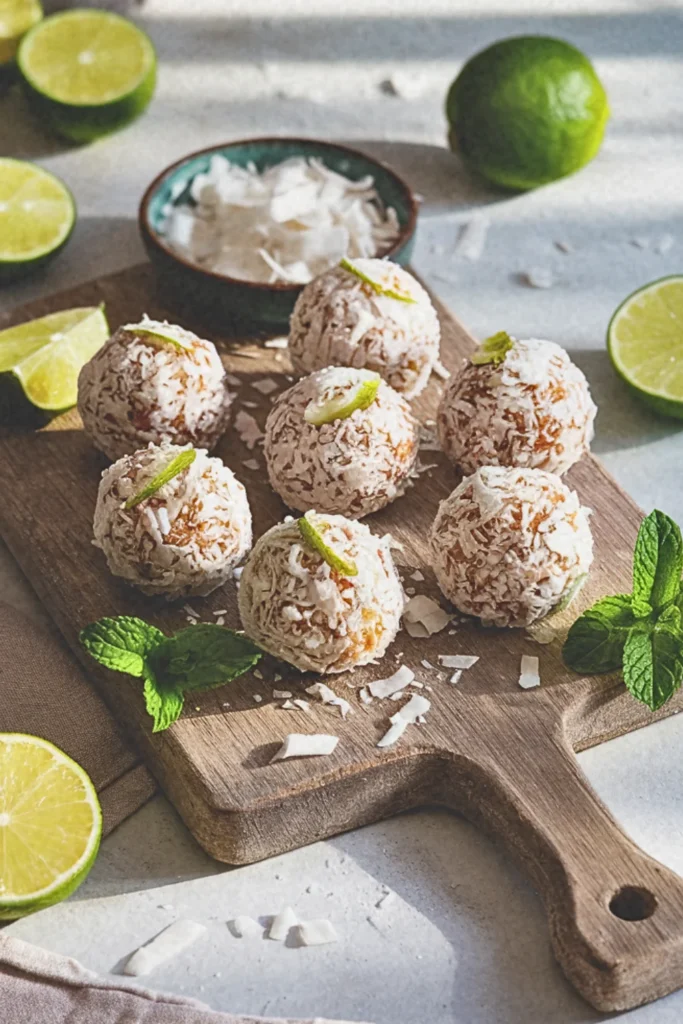
These vibrant, zesty spheres combine the tropical flavors of coconut and lime with protein-packed almonds and dates. They require no cooking whatsoever, making them perfect for hot summer days when you crave something sweet but refreshing without heating up your kitchen.
Recipe Highlights (Quick Glance Section)
✅ Prep Time: 10 minutes
✅ Cook Time: 0 minutes (no-bake recipe)
✅ Total Time: 10 minutes (plus 20 minutes chilling)
✅ Servings: 16 balls (4 servings of 4 balls each)
✅ Estimated Cost: $6
✅ Calories per Serving: 185
✅ Dietary Info: Vegan, Gluten-Free, Raw, Paleo-Friendly, Refined Sugar-Free
Category
✅ Courses: Snack, Dessert, Pre-workout fuel
✅ Cuisines: Tropical, Raw Food, Health-focused
Ingredients
Understanding how each component contributes to both flavor and binding will help you achieve the perfect texture balance in these energy-dense treats.
Base Ingredients:
- 1 cup pitted Medjool dates (about 8-10 dates) – provides natural sweetness and binding power
- 1 cup raw cashews – creates creamy texture and healthy fats (substitute: macadamia nuts or blanched almonds)
- 1/2 cup unsweetened shredded coconut – adds tropical flavor and fiber
- Zest of 2 fresh limes – delivers bright citrus oils and aromatic compounds
- 2 tablespoons fresh lime juice – provides tangy flavor and moisture
- 1 tablespoon coconut oil (melted) – helps binding and adds richness
- 1/4 teaspoon sea salt – enhances all flavors and balances sweetness
For Rolling:
- 1/3 cup additional shredded coconut – creates attractive coating and extra coconut flavor
Equipment
- Food processor, 2. Measuring cups, 3. Measuring spoons, 4. Microplane zester or fine grater, 5. Small bowl for rolling coconut, 6. Baking sheet, 7. Small cookie scoop or tablespoon for portioning
Step-by-Step Instructions
Step 1: Begin by ensuring your dates are soft and pliable, as this dramatically affects the final texture. If your dates feel hard or dry, soak them in warm water for ten minutes, then drain and pat dry completely before proceeding.
Step 2: Add cashews to your food processor first and pulse until they form a coarse meal consistency. This foundation step ensures even processing and prevents over-grinding later when other ingredients are added.
Step 3: Add the softened dates to the cashew meal and process until the mixture begins to clump together and forms a paste-like consistency. This typically takes one to two minutes of continuous processing.
Step 4: Incorporate the shredded coconut, lime zest, lime juice, melted coconut oil, and sea salt into the processor. Pulse in short bursts until everything combines into a cohesive mixture that holds together when pressed between your fingers.
Step 5: Test the mixture consistency by pinching a small amount between your fingers. It should stick together easily without being overly wet or crumbly. If too dry, add coconut oil one teaspoon at a time.
Step 6: Using clean hands or a small cookie scoop, portion the mixture into sixteen equal pieces, each about one tablespoon in size. Roll each portion between your palms to form smooth, compact balls.
Step 7: Roll each energy ball in the additional shredded coconut, pressing gently to ensure the coating adheres well and creates an attractive finish.
Step 8: Place completed balls on a baking sheet and refrigerate for twenty minutes to firm up before serving. This chilling step helps them maintain their shape and enhances the flavors.
Final Notes
- Store these tropical energy balls in the refrigerator for up to one week, though the lime flavor intensifies beautifully after the first day of storage.
3. Baked Cinnamon Apple Crisp Cups

Individual portion-controlled desserts featuring tender baked apples nestled in edible oat-based cups, topped with a naturally sweetened crumble made from nuts and warming spices. This approach gives you all the comfort of traditional apple crisp in a more mindful serving size.
Recipe Highlights (Quick Glance Section)
✅ Prep Time: 20 minutes
✅ Cook Time: 25 minutes
✅ Total Time: 45 minutes
✅ Servings: 6 individual cups
✅ Estimated Cost: $7
✅ Calories per Serving: 220
✅ Dietary Info: Vegan, Gluten-Free Option, Refined Sugar-Free, High-Fiber
Category
✅ Courses: Dessert, Breakfast treat
✅ Cuisines: American, Comfort Food
Ingredients
Understanding how these ingredients work together will help you create perfectly balanced individual desserts that capture all the warmth and comfort of traditional apple crisp in portion-controlled servings.
For the Oat Cup Base:
- 1 1/2 cups old-fashioned rolled oats – creates structure and chewiness (substitute: gluten-free oats for celiac-friendly option)
- 1/2 cup almond flour – adds binding power and nutty richness (substitute: oat flour or whole wheat flour)
- 1/4 cup coconut oil, melted – provides moisture and helps cups hold their shape
- 3 tablespoons pure maple syrup – natural sweetener that caramelizes beautifully during baking
- 1/2 teaspoon ground cinnamon – warming spice that complements apples perfectly
- 1/4 teaspoon sea salt – enhances all flavors and balances sweetness
For the Apple Filling:
- 3 medium Honeycrisp or Granny Smith apples, peeled and diced – provides tender fruit base with balanced sweet-tart flavor
- 2 tablespoons coconut sugar – adds caramel notes and helps apples caramelize (substitute: brown sugar or maple syrup)
- 1 teaspoon ground cinnamon – creates that classic apple pie spice profile
- 1/4 teaspoon ground nutmeg – adds warmth and complexity
- 1 tablespoon lemon juice – prevents browning and brightens flavors
For the Crumble Topping:
- 1/2 cup chopped walnuts or pecans – provides satisfying crunch and healthy fats
- 2 tablespoons rolled oats – adds texture contrast
- 1 tablespoon coconut oil, solid – creates crispy topping when baked
Equipment
- Standard muffin tin (12-cup), 2. Large mixing bowl, 3. Medium mixing bowl, 4. Sharp knife, 5. Cutting board, 6. Measuring cups, 7. Measuring spoons, 8. Wooden spoon, 9. Pastry brush or clean hands for pressing
Step-by-Step Instructions
Step 1: Preheat your oven to 350°F and lightly grease six muffin cups with coconut oil. This temperature ensures even baking without burning the delicate oat cups while allowing proper caramelization of the apple filling.
Step 2: Create the oat cup base by combining rolled oats, almond flour, melted coconut oil, maple syrup, cinnamon, and salt in your large mixing bowl. Mix thoroughly until the mixture holds together when pressed, resembling wet sand that clumps easily.
Step 3: Divide the oat mixture evenly among your six prepared muffin cups, pressing firmly into the bottom and up the sides to create cup shapes. Use your fingers or the back of a spoon to ensure even thickness and well-defined edges that will hold the filling properly.
Step 4: Prepare the apple filling by tossing diced apples with coconut sugar, cinnamon, nutmeg, and lemon juice in your medium bowl. Let this mixture sit for five minutes to allow the apples to release their natural juices and absorb the spices.
Step 5: Distribute the seasoned apple mixture evenly among the oat cups, mounding slightly in the center. The apples will shrink during baking, so don’t worry about overfilling at this stage.
Step 6: Create the crumble topping by combining chopped nuts, oats, and solid coconut oil, mixing until the coconut oil is evenly distributed throughout. Sprinkle this mixture generously over each filled cup.
Step 7: Bake for twenty-five minutes until the cups are golden brown and the apples are tender when pierced with a fork. The topping should be crispy and fragrant.
Step 8: Allow the cups to cool in the muffin tin for ten minutes before carefully removing them. This cooling period helps the cups maintain their shape and makes removal much easier.
Final Notes
- These individual apple crisp cups can be stored covered at room temperature for three days or frozen for up to three months, making them perfect for meal prep.
4. Raw Cashew Vanilla Bean Cheesecake
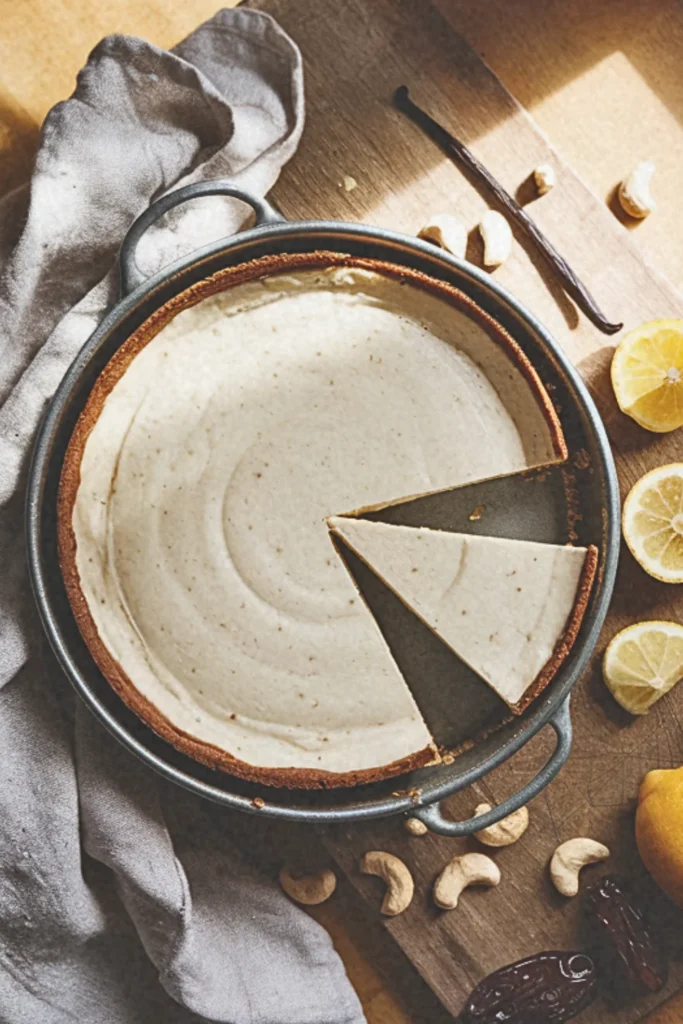
This sophisticated dessert showcases how soaked raw cashews can transform into an incredibly creamy, rich base that perfectly mimics traditional cheesecake texture. Real vanilla bean specks throughout create an elegant appearance while delivering authentic flavor depth.
Recipe Highlights
✅ Prep Time: 25 minutes
✅ Chill Time: 4 hours
✅ Total Time: 4 hours 25 minutes
✅ Servings: 8
✅ Estimated Cost: $18
✅ Calories per Serving: 385
✅ Dietary Info: Vegan, Gluten-Free, Raw, Dairy-Free, Refined Sugar-Free
Category
✅ Course: Dessert
✅ Cuisine: American Contemporary
Ingredients
Crust:
- 1½ cups raw almonds (or walnuts for nuttier flavor)
- 1 cup pitted Medjool dates, softened (or 8-10 regular dates)
- 2 tablespoons coconut oil, melted
- ¼ teaspoon sea salt
Filling:
- 3 cups raw cashews, soaked 4+ hours (or use cashew butter: ¾ cup)
- ⅔ cup full-fat canned coconut milk
- ½ cup maple syrup (or agave nectar)
- ⅓ cup melted coconut oil
- ¼ cup fresh lemon juice
- 1 vanilla bean, scraped (or 2 teaspoons vanilla extract)
- ½ teaspoon sea salt
Equipment
- 9-inch springform pan, 2. Food processor, 3. High-speed blender, 4. Measuring cups, 5. Measuring spoons, 6. Rubber spatula, 7. Medium bowl for soaking
Step-by-Step Instructions
Step 1: Soak cashews in warm water for at least 4 hours or overnight. This softening process is crucial for achieving that silky, cream cheese-like texture that makes this dessert so convincing.
Step 2: Line your springform pan with parchment paper. In your food processor, pulse almonds until they form coarse crumbs. Add dates, melted coconut oil, and salt, processing until the mixture holds together when pressed.
Step 3: Press the crust mixture firmly into the bottom of your prepared pan, creating an even layer. Place in freezer while preparing the filling.
Step 4: Drain and rinse soaked cashews thoroughly. In your high-speed blender, combine cashews, coconut milk, maple syrup, melted coconut oil, lemon juice, vanilla bean seeds, and salt. Blend for 2-3 minutes until completely smooth and creamy.
Step 5: Pour filling over chilled crust, smoothing the top with a spatula. Gently tap the pan to release air bubbles.
Step 6: Refrigerate for at least 4 hours or overnight until set. Run a knife around edges before releasing from springform pan.
Final Notes
• This cheesecake actually improves with time, developing deeper flavors after 24 hours in the refrigerator, making it perfect for advance preparation.
5. Chocolate Chickpea Brownies
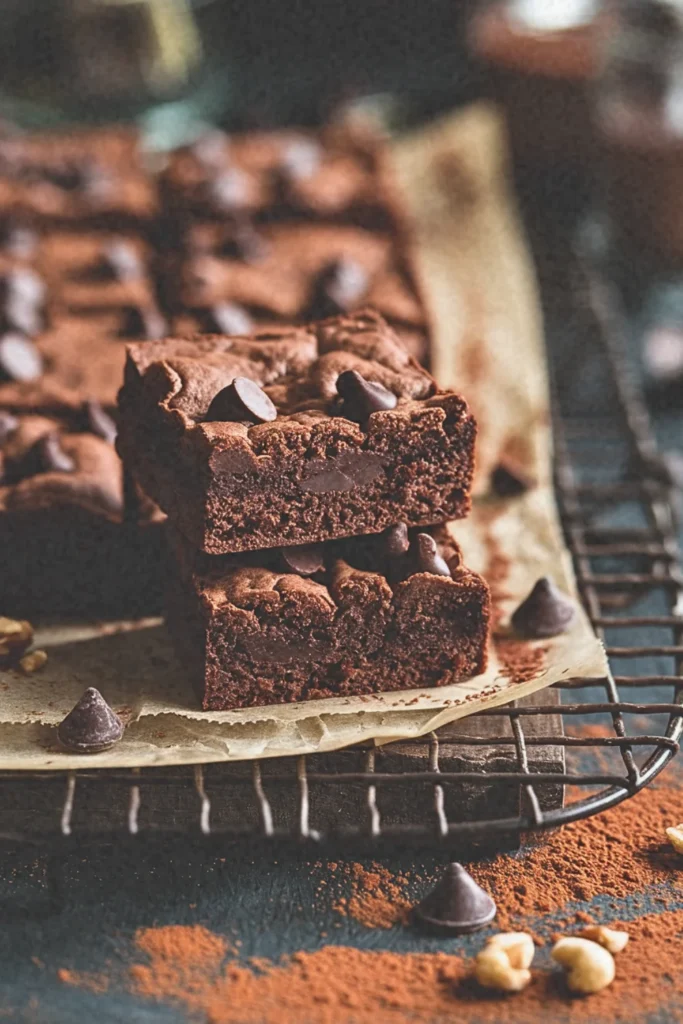
Perhaps the most surprising entry on this list, these fudgy brownies use white beans as their secret ingredient, creating moisture and protein while remaining completely undetectable in the final product. They prove that legumes can create dessert magic.
Recipe Highlights
✅ Prep Time: 15 minutes
✅ Cook Time: 25 minutes
✅ Total Time: 40 minutes
✅ Servings: 12
✅ Estimated Cost: $8
✅ Calories per Serving: 145
✅ Dietary Info: Vegan, Gluten-Free, High-Protein, Refined Sugar-Free
Category
✅ Course: Dessert
✅ Cuisine: American Contemporary
Ingredients
Wet Base:
- 1 can (15 oz) chickpeas, drained and rinsed thoroughly (or 1½ cups cooked chickpeas)
- ¼ cup natural almond butter (or peanut butter for richer flavor)
- ⅓ cup pure maple syrup (or agave nectar)
- 2 tablespoons coconut oil, melted
- 2 teaspoons vanilla extract
Dry Mix:
- ¼ cup unsweetened cocoa powder
- 2 tablespoons coconut flour (or oat flour for budget option)
- 1 teaspoon baking powder
- ½ teaspoon sea salt
- ¼ teaspoon espresso powder (optional, enhances chocolate depth)
Add-ins:
- ⅓ cup dairy-free dark chocolate chips
- ¼ cup chopped walnuts (optional)
Equipment
- Food processor, 2. 8×8-inch baking pan, 3. Measuring cups, 4. Measuring spoons, 5. Rubber spatula, 6. Parchment paper, 7. Wire cooling rack
Step-by-Step Instructions
Step 1: Preheat your oven to 350°F and line your baking pan with parchment paper. This temperature ensures the chickpeas cook through while creating that coveted fudgy texture we’re after in these protein-packed brownies.
Step 2: Pat your drained chickpeas completely dry with paper towels. This step is crucial because excess moisture will create gummy brownies rather than the dense, fudgy consistency we want to achieve.
Step 3: Add chickpeas to your food processor and pulse until they break down into small pieces. Then add almond butter, maple syrup, melted coconut oil, and vanilla extract, processing until the mixture becomes smooth and creamy, about 2-3 minutes.
Step 4: Add cocoa powder, coconut flour, baking powder, salt, and espresso powder to the processor. Pulse just until combined, being careful not to overmix, which can make the brownies tough rather than tender.
Step 5: Fold in chocolate chips and walnuts by hand using your spatula. Transfer the thick batter to your prepared pan, spreading it evenly to ensure uniform baking throughout.
Step 6: Bake for 22-25 minutes until the edges are set but the center still appears slightly underbaked. This timing prevents overbaking, which would result in dry, cake-like brownies instead of our desired fudgy texture.
Step 7: Cool completely in the pan before cutting. The brownies will continue firming up as they cool, developing their perfect chewy-fudgy consistency.
Final Notes
• These brownies taste even better the next day as flavors meld and the texture becomes perfectly dense and fudgy throughout.
6. Frozen Banana Nice Cream Sundae
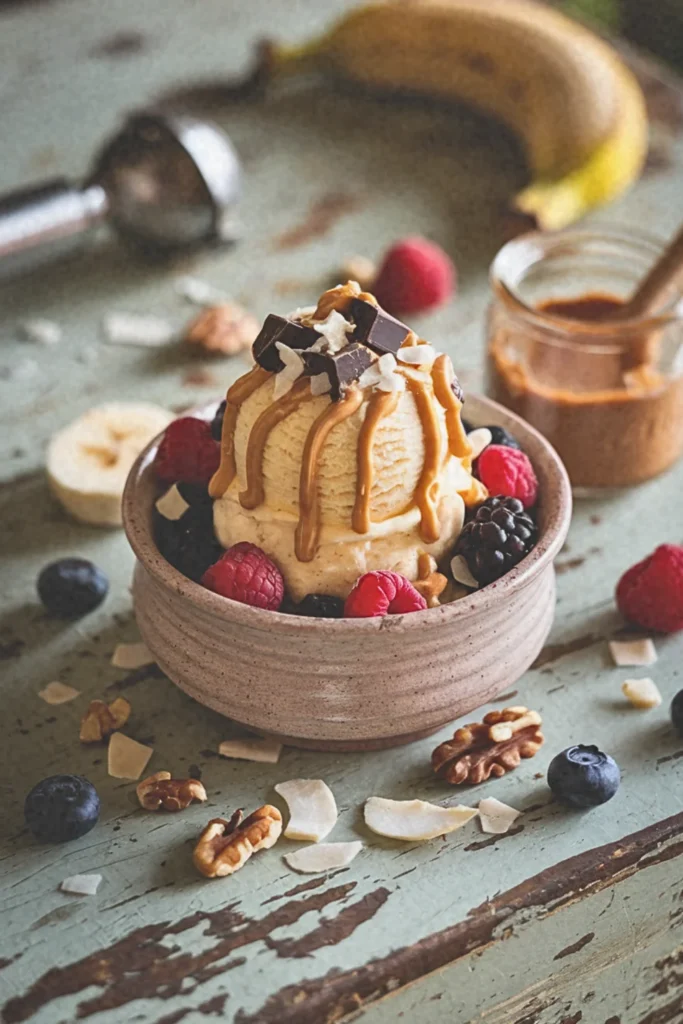
This simple yet versatile concept transforms frozen bananas into creamy, soft-serve-style ice cream through the magic of food processing. The beauty lies in endless flavor combinations and healthy topping possibilities that make each serving unique.
Recipe Highlights
✅ Prep Time: 10 minutes
✅ Freeze Time: 0 minutes (using pre-frozen bananas)
✅ Total Time: 10 minutes
✅ Servings: 2
✅ Estimated Cost: $6
✅ Calories per Serving: 285
✅ Dietary Info: Vegan, Gluten-Free, Raw, Refined Sugar-Free, Oil-Free
Category
✅ Course: Dessert
✅ Cuisine: American Contemporary
Ingredients
Nice Cream Base:
- 3 large ripe bananas, sliced and frozen overnight (or 2 cups frozen banana chunks)
- 2-3 tablespoons plant milk (oat milk for creaminess, or almond milk for lighter texture)
- 1 teaspoon vanilla extract (or ½ teaspoon for subtle flavor)
- Pinch of sea salt to enhance natural sweetness
Sundae Toppings:
- 2 tablespoons chopped dark chocolate or cacao nibs (raw cacao for health boost)
- 2 tablespoons crushed walnuts or almonds (or any preferred nuts)
- 1 tablespoon coconut flakes, toasted (or raw for softer texture)
- 2 tablespoons fresh berries (strawberries, blueberries, or raspberries)
- 1 tablespoon natural almond butter or peanut butter, warmed slightly
- Optional: 1 tablespoon maple syrup for extra sweetness
Equipment
- High-speed blender or food processor, 2. Ice cream scoop, 3. Serving bowls, 4. Measuring spoons, 5. Small saucepan for warming nut butter, 6. Sharp knife for chopping toppings
Step-by-Step Instructions
Step 1: Remove your pre-frozen banana slices from the freezer and let them sit at room temperature for 2-3 minutes. This brief thawing period prevents your blender from working too hard and ensures smoother processing, which is crucial for achieving that perfect ice cream-like consistency.
Step 2: Add the frozen bananas to your high-speed blender or food processor along with the plant milk, vanilla extract, and sea salt. Start blending on low speed, gradually increasing to high. The mixture will initially look crumbly and chunky, which is completely normal during this transformation process.
Step 3: Continue blending for 2-3 minutes, stopping to scrape down the sides as needed. The mixture will gradually transform from chunky pieces into a smooth, creamy consistency that remarkably resembles traditional soft-serve ice cream. The natural sugars and starches in the bananas create this magical texture without any dairy or artificial additives.
Step 4: Once your nice cream reaches the perfect smooth consistency, immediately scoop it into your serving bowls. The beauty of nice cream lies in its immediate serving capability, though you can also freeze it for a firmer texture if preferred.
Step 5: Create your sundae masterpiece by arranging your chosen toppings artfully over the nice cream. Drizzle the warmed nut butter in decorative patterns, sprinkle the nuts and coconut flakes for textural contrast, and finish with fresh berries for color and additional natural sweetness.
Final Notes
• The ripeness of your bananas before freezing determines the sweetness level, so use spotty, very ripe bananas for maximum natural sugar content and flavor development.
7. Chia Seed Chocolate Pudding
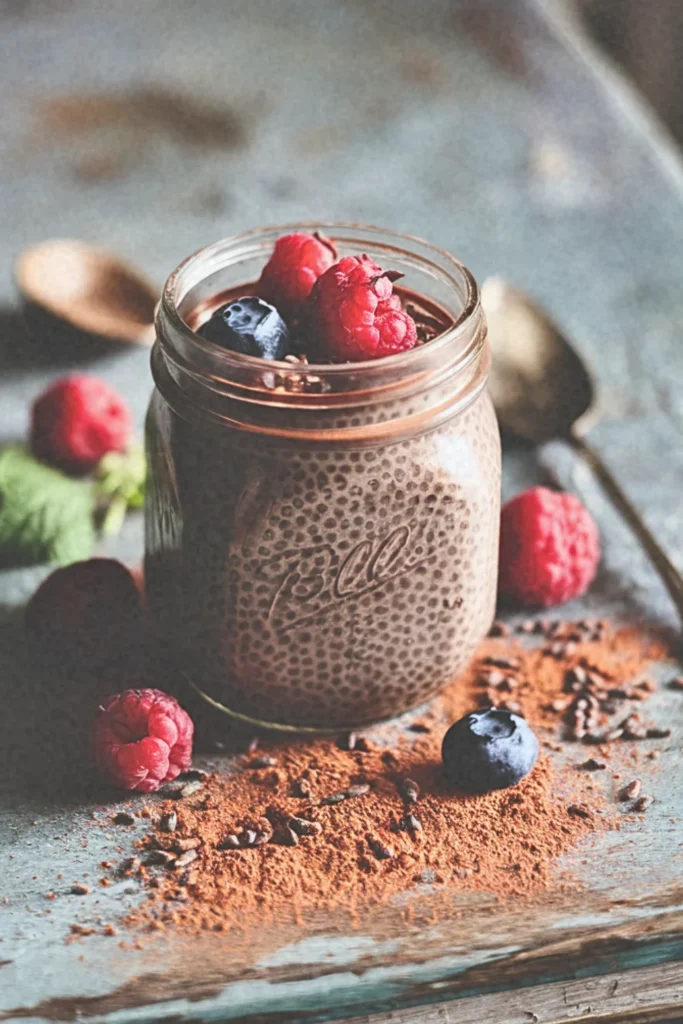
These tiny nutritional powerhouses absorb liquid to create a naturally thick, pudding-like consistency overnight. Combined with cacao and natural sweeteners, they deliver both satisfaction and omega-3 fatty acids in every spoonful.
Recipe Highlights (Quick Glance Section)
✅ Prep Time: 10 min
✅ Cook Time: 0 min (chilling time: 4 hours)
✅ Total Time: 4 hours 10 min
✅ Servings: 4
✅ Estimated Cost: $8
✅ Calories per Serving: 185
✅ Dietary Info: Vegan, Gluten-Free, Dairy-Free, Refined Sugar-Free, High-Fiber
Category
✅ Courses: Dessert, Breakfast, Snacks
✅ Cuisines: Modern American, Health-Conscious
Ingredients
Understanding the magic behind this pudding starts with recognizing how chia seeds transform when exposed to liquid. These tiny powerhouses absorb up to 12 times their weight in liquid, creating a naturally creamy, tapioca-like texture that forms the foundation of our dessert.
- 1/4 cup black chia seeds (white chia seeds work as substitution)
- 1 1/2 cups unsweetened almond milk (coconut milk, oat milk, or soy milk as alternatives)
- 3 tablespoons unsweetened cocoa powder (cacao powder for richer flavor)
- 3 tablespoons pure maple syrup (agave nectar or date syrup as substitutions)
- 1 teaspoon pure vanilla extract
- 1/8 teaspoon sea salt
- 2 tablespoons mini dark chocolate chips (optional, for texture)
Equipment
- Medium mixing bowl, 2. Wire whisk, 3. Measuring cups and spoons, 4. Four small serving glasses or jars, 5. Plastic wrap or lid covers, 6. Refrigerator space
Step-by-Step Instructions
Step 1: Combine your dry ingredients first by whisking together cocoa powder and sea salt in your medium bowl. This prevents cocoa clumping and ensures even distribution throughout the pudding base.
Step 2: Slowly pour in the almond milk while whisking continuously. This gradual incorporation creates a smooth, lump-free chocolate base that will coat the chia seeds evenly.
Step 3: Add maple syrup and vanilla extract, whisking until the mixture achieves complete uniformity. Taste and adjust sweetness if desired, remembering that flavors will meld and intensify during chilling.
Step 4: Sprinkle chia seeds into the mixture while whisking vigorously. Continue whisking for 2 minutes to prevent seeds from clumping together and settling at the bottom.
Step 5: Let the mixture rest for 5 minutes, then whisk again thoroughly. This second whisking breaks up any seed clusters that may have formed during the initial resting period.
Step 6: Divide the pudding evenly among your serving containers. Cover tightly and refrigerate for at least 4 hours or overnight, allowing the chia seeds to fully hydrate and create that signature pudding texture.
Step 7: Before serving, stir gently and top with chocolate chips if desired.
Final Notes
• This pudding keeps beautifully in the refrigerator for up to five days, making it perfect for meal prep breakfast or healthy dessert portions throughout the week.
8. Baked Sweet Potato Chocolate Chip Cookies
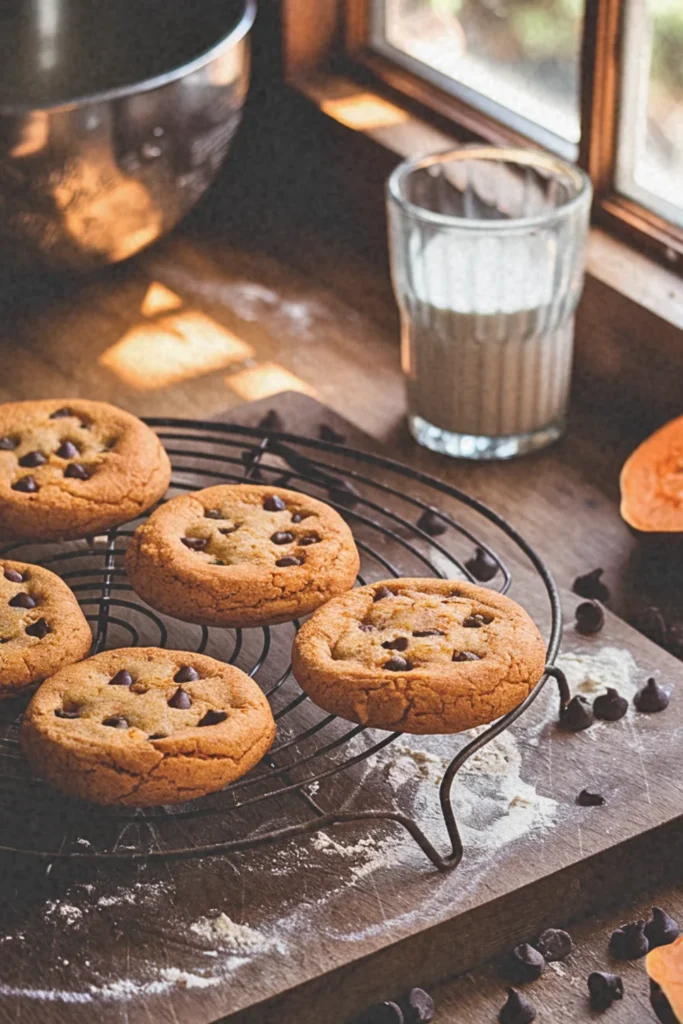
Sweet potatoes provide natural moisture, subtle sweetness, and a beautiful golden color to these soft, chewy cookies. They demonstrate how vegetables can enhance baked goods while adding fiber and vitamins to your dessert experience.
Recipe Highlights (Quick Glance Section)
✅ Prep Time: 20 min
✅ Cook Time: 12 min
✅ Total Time: 32 min
✅ Servings: 24 cookies
✅ Estimated Cost: $10
✅ Calories per Serving: 95
✅ Dietary Info: Vegan, Dairy-Free, Refined Sugar-Free, Naturally Sweetened
Category
✅ Courses: Dessert, Snacks, Afternoon Treats
✅ Cuisines: Modern American, Plant-Based Baking
Ingredients
The secret to these exceptional cookies lies in understanding how sweet potato functions as both a moisture provider and natural sweetener, eliminating the need for excessive oils while creating incredible texture. When you roast sweet potatoes, their starches convert to sugars, intensifying their natural sweetness and creating the perfect cookie base.
- 1 medium roasted sweet potato, peeled and mashed (about 1 cup)
- 1/3 cup coconut oil, melted (avocado oil works as substitution)
- 1/2 cup pure maple syrup (agave nectar alternative)
- 1 teaspoon vanilla extract
- 1 3/4 cups whole wheat flour (all-purpose flour or oat flour substitutions)
- 1/2 teaspoon baking soda
- 1/2 teaspoon ground cinnamon
- 1/4 teaspoon sea salt
- 1/2 cup vegan dark chocolate chips (mini chips distribute better)
Equipment
- Large mixing bowl, 2. Medium mixing bowl, 3. Electric mixer or whisk, 4. Measuring cups and spoons, 5. Baking sheet, 6. Parchment paper, 7. Cookie scoop or spoon, 8. Wire cooling rack
Step-by-Step Instructions
Step 1: Preheat your oven to 350°F and line your baking sheet with parchment paper. This temperature ensures even baking without burning the natural sugars in the sweet potato.
Step 2: In your large bowl, combine the mashed sweet potato with melted coconut oil, creating a smooth base. The oil should be warm but not hot to prevent cooking the sweet potato further.
Step 3: Mix in maple syrup and vanilla extract until completely incorporated. This wet mixture forms the foundation that will keep your cookies moist and chewy.
Step 4: In your medium bowl, whisk together flour, baking soda, cinnamon, and salt. This dry mixture combination ensures even distribution of leavening agents throughout your cookies.
Step 5: Gradually fold the dry ingredients into the sweet potato mixture until just combined. Overmixing develops gluten, creating tough cookies instead of tender ones.
Step 6: Gently fold in chocolate chips, distributing them evenly throughout the dough for consistent chocolate in every bite.
Step 7: Drop rounded tablespoons of dough onto your prepared baking sheet, spacing them 2 inches apart to allow for spreading during baking.
Step 8: Bake for 10-12 minutes until edges are lightly golden but centers remain soft. They’ll continue cooking on the hot pan after removal.
Final Notes
• These cookies achieve optimal texture when slightly underbaked, as the sweet potato continues cooking from residual heat, creating perfectly chewy centers with delicate edges.
9. Raw Lemon Coconut Tart
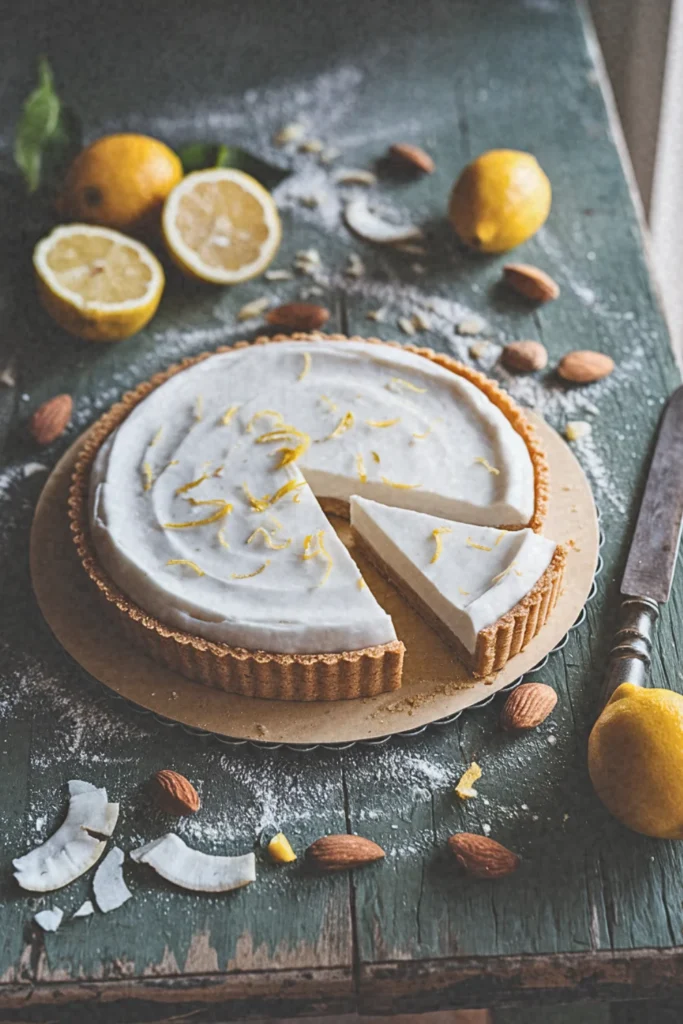
This bright, citrusy creation features a press-in crust made from nuts and dates, filled with a creamy coconut-based filling that’s both tangy and refreshing. The raw preparation preserves maximum nutrients while creating stunning presentation.
Recipe Highlights (Quick Glance Section)
✅ Prep Time: 25 min
✅ Cook Time: 0 min (chilling time: 4 hours)
✅ Total Time: 4 hours 25 min
✅ Servings: 8 slices
✅ Estimated Cost: $15
✅ Calories per Serving: 285
✅ Dietary Info: Raw Vegan, Gluten-Free, Dairy-Free, Refined Sugar-Free, Paleo-Friendly
Category
✅ Courses: Dessert, Special Occasion Treats
✅ Cuisines: Modern Raw Food, Health-Conscious European
Ingredients
Understanding raw tart construction requires recognizing how nuts and dates create structural integrity without baking, while coconut cream provides the luxurious filling base. The key lies in achieving the proper texture balance between your crust foundation and silky filling layers.
For the Crust:
- 1 1/2 cups raw almonds, soaked 2 hours (cashews work as substitution)
- 1 cup pitted Medjool dates (Deglet Noor dates require additional soaking)
- 2 tablespoons coconut oil, melted
- 1/4 teaspoon vanilla extract
- Pinch of sea salt
For the Filling:
- 1 can full-fat coconut milk, chilled overnight (ensures thick cream separation)
- 1/2 cup fresh lemon juice (about 3 large lemons)
- 1/3 cup pure maple syrup (agave nectar alternative)
- 1/4 cup coconut oil, melted
- 2 tablespoons lemon zest
- 2 tablespoons agar powder (ensures proper setting without gelatin)
Equipment
- 9-inch tart pan with removable bottom, 2. Food processor, 3. High-speed blender, 4. Fine mesh strainer, 5. Measuring cups and spoons, 6. Rubber spatula, 7. Microplane zester, 8. Small saucepan
Step-by-Step Instructions
Step 1: Drain and rinse your soaked almonds thoroughly. This soaking process softens the nuts, allowing them to blend into a smooth, cohesive crust base that holds together without traditional binding agents like eggs or flour.
Step 2: Process almonds in your food processor until they form fine crumbs. Add dates gradually, processing until the mixture sticks together when pressed. The natural sugars in dates act as the binding agent, creating structural integrity.
Step 3: Add melted coconut oil, vanilla, and salt to your nut-date mixture. Process briefly until evenly distributed. The coconut oil adds richness while helping the crust maintain its shape during chilling.
Step 4: Press this mixture firmly into your tart pan, creating even thickness on the bottom and up the sides. Use the bottom of a measuring cup to ensure uniform compression, which prevents cracking when sliced.
Step 5: Prepare your agar by whisking it with 1/4 cup water in your saucepan. Heat gently until dissolved completely. Agar powder replaces traditional gelatin, providing the setting power needed for your raw filling.
Step 6: Scoop only the thick coconut cream from your chilled can into the blender. Blend with lemon juice, maple syrup, melted coconut oil, and lemon zest until completely smooth.
Step 7: Add the dissolved agar mixture to your blender and process until fully incorporated. Pour immediately over your prepared crust, as agar begins setting quickly at room temperature.
Step 8: Refrigerate for at least 4 hours until completely set. The filling will transform from liquid to a firm, sliceable consistency that maintains its shape when served.
Final Notes
• This tart improves after overnight chilling, allowing flavors to meld beautifully while achieving the perfect firm texture that slices cleanly without crumbling or weeping.
10. Aquafaba Chocolate Meringue
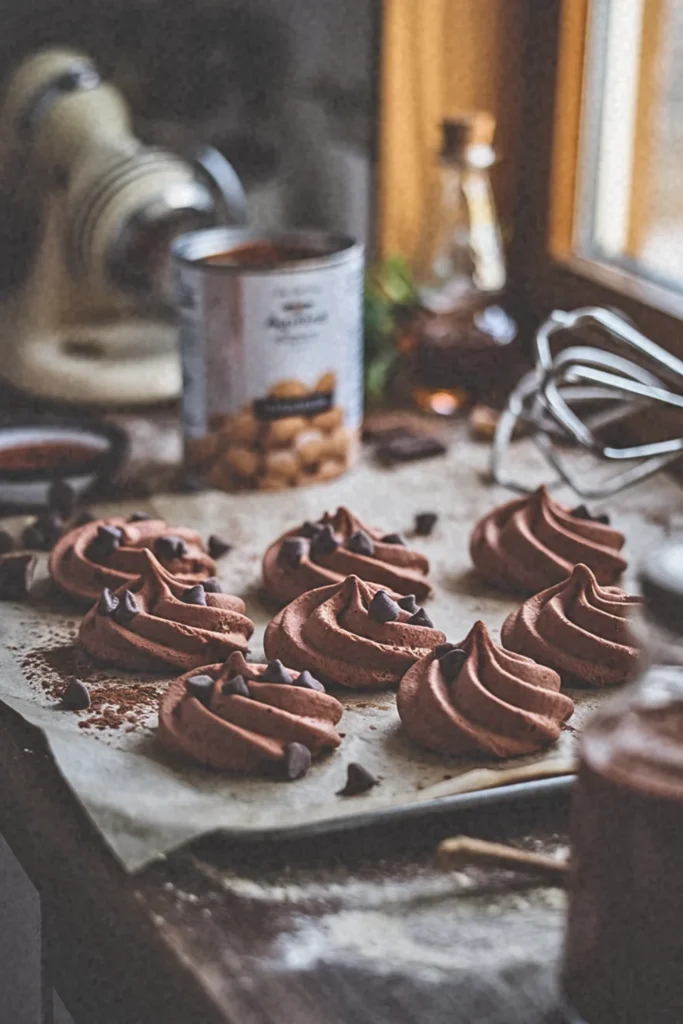
This innovative dessert showcases the remarkable whipping properties of chickpea liquid, creating light, airy meringues that are completely egg-free yet maintain traditional texture and appearance. It’s culinary science at its most delicious.
Recipe Highlights (Quick Glance Section)
✅ Prep Time: 15 min
✅ Cook Time: 2 hours
✅ Total Time: 2 hours 15 min
✅ Servings: 12 meringues
✅ Estimated Cost: $8
✅ Calories per Serving: 45
✅ Dietary Info: Vegan, Gluten-Free, Refined Sugar-Free
Category
✅ Courses: Dessert, Snacks
✅ Cuisines: International, Modern Vegan
Ingredients
- 3/4 cup aquafaba (liquid from 1 can chickpeas, chilled overnight)
- 1/4 teaspoon cream of tartar (substitute: 1/2 teaspoon lemon juice)
- 3/4 cup superfine sugar (substitute: powdered coconut sugar)
- 2 tablespoons unsweetened cocoa powder (substitute: cacao powder)
- 1/2 teaspoon vanilla extract
- Pinch of sea salt
- Optional: 1/4 cup mini dark chocolate chips (vegan)
Equipment
- Stand mixer or hand mixer, 2. Large mixing bowl, 3. Fine-mesh sieve, 4. Measuring cups and spoons, 5. Rubber spatula, 6. Baking sheets, 7. Parchment paper, 8. Piping bag or large spoon
Step-by-Step Instructions
Step 1: Preheat your oven to 200°F (95°C) and line two baking sheets with parchment paper. This low temperature is crucial for achieving the perfect crispy exterior while maintaining a slightly chewy center.
Step 2: Pour the chilled aquafaba into your mixing bowl. The cold temperature helps create more stable foam, which is the foundation of successful vegan meringue.
Step 3: Begin whipping the aquafaba on medium speed for 3-4 minutes until it becomes frothy and doubles in volume. This initial foaming stage prepares the proteins for peak formation.
Step 4: Add cream of tartar and increase speed to high. Continue whipping for 8-12 minutes until soft peaks form. The cream of tartar acts as a stabilizer, helping maintain the meringue’s structure.
Step 5: Gradually add sugar one tablespoon at a time while mixing continuously. This slow incorporation prevents the meringue from deflating and ensures proper sugar dissolution.
Step 6: Sift cocoa powder to remove lumps, then gently fold it into the meringue along with vanilla and salt using a rubber spatula. Use folding motions to preserve the air bubbles you’ve worked so hard to create.
Step 7: Pipe or spoon 12 portions onto prepared baking sheets, leaving space between each meringue. Sprinkle with chocolate chips if using.
Step 8: Bake for 2 hours, then turn off oven and let cool inside with door slightly ajar for 30 minutes.
Final Notes
• Store these delicate meringues in an airtight container for up to one week, though they’re best enjoyed within 2-3 days when the texture remains perfectly crisp outside and tender within.
11. Matcha Coconut Panna Cotta
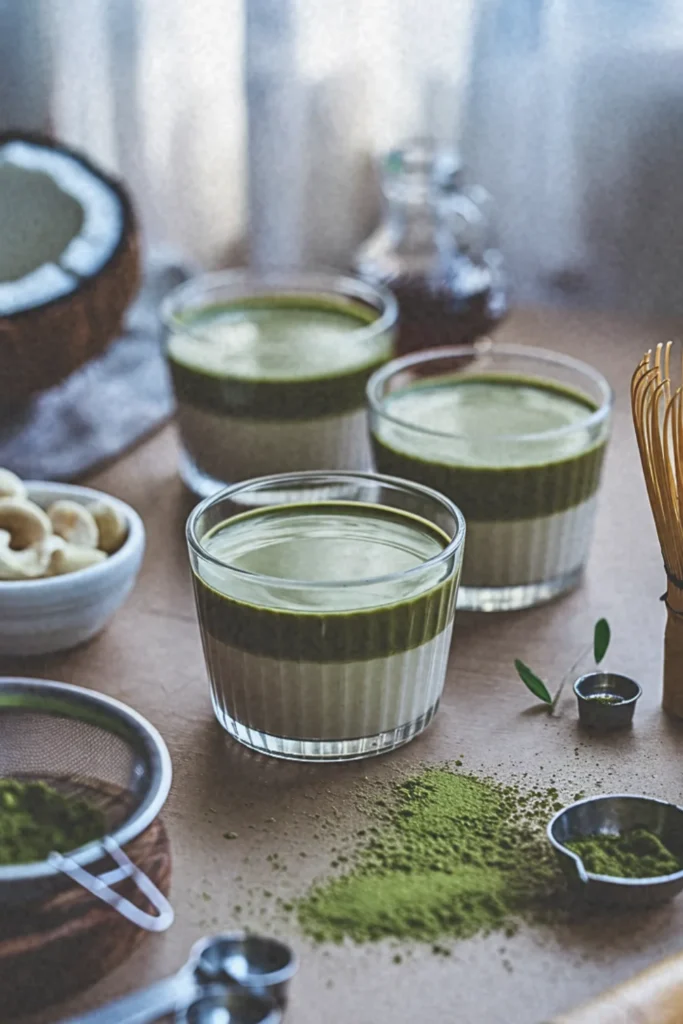
This elegant, silky dessert combines the earthy complexity of matcha green tea with rich coconut cream, set with natural gelling agents. The result is a sophisticated treat that’s both antioxidant-rich and visually stunning with its beautiful jade color.
Recipe Highlights (Quick Glance Section)
✅ Prep Time: 15 min
✅ Cook Time: 10 min
✅ Total Time: 4 hours 25 min (including chilling)
✅ Servings: 6 portions
✅ Estimated Cost: $14
✅ Calories per Serving: 185
✅ Dietary Info: Vegan, Gluten-Free, Refined Sugar-Free
Category
✅ Courses: Dessert, Special Occasion
✅ Cuisines: Japanese-Italian Fusion, Modern Vegan
Ingredients
- 1 can (400ml) full-fat coconut milk, chilled overnight
- 1/2 cup cashew cream (1/2 cup soaked cashews + 1/2 cup water, blended smooth)
- 1/3 cup maple syrup (substitute: agave nectar or coconut nectar)
- 2 tablespoons ceremonial-grade matcha powder (substitute: culinary-grade matcha)
- 2 teaspoons agar powder (substitute: 2 tablespoons agar flakes)
- 1/4 cup hot water (not boiling)
- 1 teaspoon vanilla extract
- Pinch of sea salt
- Optional garnish: coconut whipped cream, matcha powder dusting
Equipment
- High-speed blender, 2. Fine-mesh sieve, 3. Small saucepan, 4. Whisk, 5. Measuring cups and spoons, 6. Six 4-oz ramekins or glasses, 7. Small mixing bowl, 8. Rubber spatula
Step-by-Step Instructions
Step 1: Begin by whisking the matcha powder with hot water in a small bowl until completely smooth and frothy. This process, called “usucha” in Japanese tea ceremony, eliminates lumps and activates the matcha’s complex flavor compounds. Set aside to cool slightly while you prepare the base.
Step 2: Open your chilled coconut milk and scoop out the thick cream that has separated at the top. Reserve any liquid for another use. This thick cream provides the rich, silky texture that makes panna cotta so luxurious.
Step 3: In your blender, combine the coconut cream, cashew cream, maple syrup, vanilla, and salt. Blend on high speed for 60 seconds until completely smooth. The cashew cream adds extra richness while maintaining the dessert’s plant-based integrity.
Step 4: Pour this mixture into a saucepan and heat over medium-low heat until it reaches a gentle simmer. Stir constantly to prevent scorching, as coconut milk can separate when overheated.
Step 5: Sprinkle agar powder over the hot mixture while whisking vigorously. Continue whisking for 2-3 minutes as the agar dissolves completely. Agar, derived from seaweed, acts as our plant-based gelatin, creating that signature wobble.
Step 6: Remove from heat and immediately whisk in the prepared matcha mixture. Strain through a fine-mesh sieve to ensure silky smoothness, pressing any remaining lumps through with your spatula.
Step 7: Divide the mixture evenly among your ramekins or glasses. Cover with plastic wrap, ensuring the wrap doesn’t touch the surface to prevent skin formation.
Step 8: Refrigerate for at least 4 hours or overnight until fully set. The agar will create a firm yet creamy texture that’s distinctly different from gelatin-based desserts.
Final Notes
• For best results, use ceremonial-grade matcha which provides superior color and flavor complexity, though culinary-grade works well for a more budget-friendly version with slightly earthier notes.
Must-Try: 11 Thanksgiving Vegan Dessert Recipes.

Hi, I’m Aldvin Gomes, a passionate vegan and foodie on a mission to make plant-based eating effortless and exciting. I share new vegan recipes every day, so you never have to stress about what to cook. Whether you’re a longtime vegan or just exploring plant-based meals, my goal is to keep your plate full of delicious, wholesome, and easy-to-make dishes. I’m here to help you enjoy every bite. Join me in exploring the endless possibilities of vegan cooking, one delicious recipe at a time!