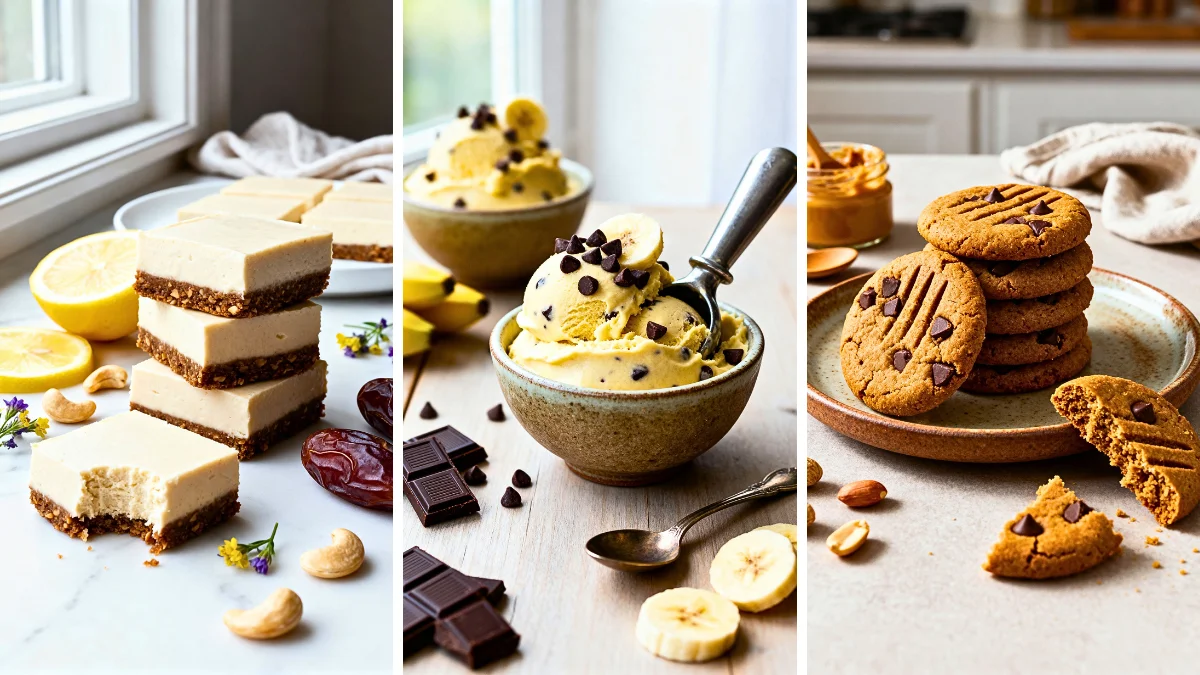
Gluten Free Vegan Desserts aren’t just possible… they’re absolutely decadent, and I’m about to prove it with seven recipes that’ll make you forget any ingredient was ever “missing.”
Here’s the thing: I used to think giving up gluten and animal products meant saying goodbye to real desserts. You know, the kind that make you close your eyes and sigh? I was so wrong.
The first time I bit into a flourless chocolate cake made with just nuts and dates, something clicked. Wait… this is better than the “real” thing.
These seven gluten free vegan desserts are proof that healthy can taste incredible. I’m talking quick easy recipes you can bake on a Wednesday night when you need something sweet.
Some don’t even require baking at all. Whether you’re working with almond flour, coconut, or simple nut butters, each recipe delivers that rich, satisfying experience you’re craving. No weird aftertaste. No compromises.
Why should anyone settle for bland “free-from” treats? You deserve desserts that make people ask for seconds before you mention they’re vegan and gluten free.
Must-Try: 7 Christmas Vegan Dessert Recipes.
7 Gluten Free Vegan Desserts
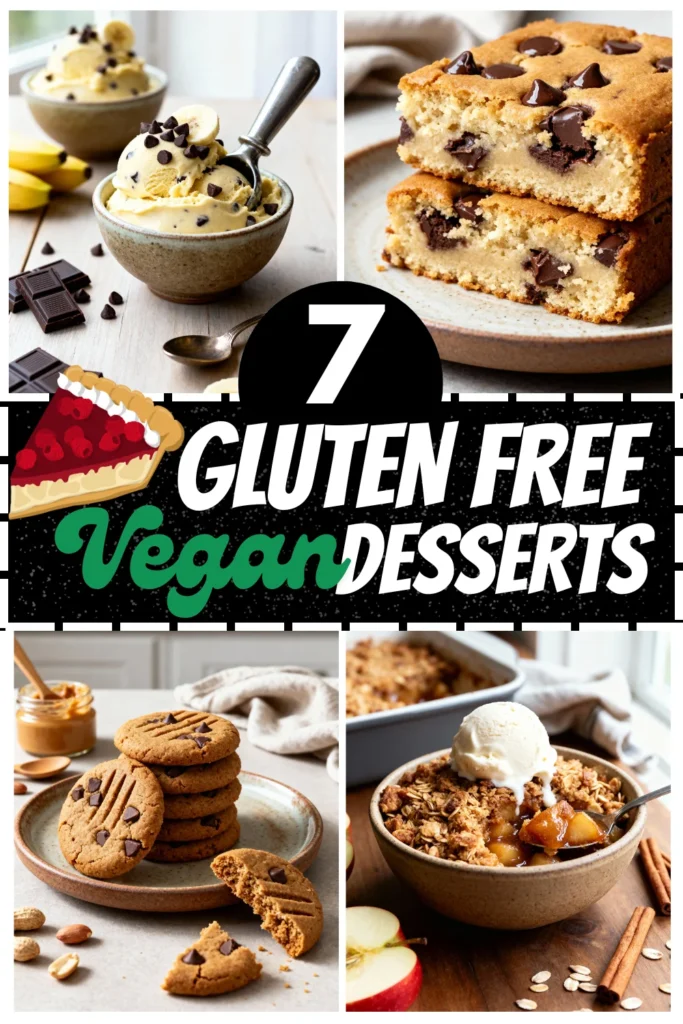
Ready to discover which one becomes your new obsession?
1. No-Bake Almond Butter Energy Bites

Think of these as dessert meets snack. They’re perfect when you need something sweet in under ten minutes, and kids absolutely love rolling them.
Recipe Highlights (Quick Glance Section)
✅ Prep Time: 10 min
✅ Cook Time: 0 min
✅ Total Time: 10 min (plus 30 min chilling)
✅ Servings: 16 bites
✅ Estimated Cost: $8
✅ Calories per Serving: 95
✅ Dietary Info: Vegan, Gluten-Free, No Refined Sugar, Nut-Based
Category
✅ Courses: Dessert, Snacks
✅ Cuisines: American
Ingredients
Understanding your ingredients helps you make smart substitutions. Almond butter acts as both the binder and protein source here, while dates provide natural sweetness and help everything stick together.
- 1 cup creamy almond butter (substitute with peanut butter or cashew butter if needed)
- ½ cup pitted Medjool dates, roughly chopped (about 8-10 dates; use maple syrup if dates aren’t available)
- 1 cup gluten-free rolled oats (certified gluten-free if you’re sensitive)
- 2 tablespoons ground flaxseed (chia seeds work too)
- 2 tablespoons maple syrup (optional, for extra sweetness)
- 1 teaspoon vanilla extract
- ¼ teaspoon sea salt
- 3 tablespoons mini dairy-free chocolate chips (optional but highly recommended)
- 2 tablespoons unsweetened shredded coconut for rolling (optional)
Equipments
- Medium mixing bowl, 2. Food processor or high-speed blender, 3. Measuring cups and spoons, 4. Rubber spatula, 5. Baking sheet or plate, 6. Parchment paper
Step-by-Step Instructions
Step 1: Add your chopped dates to the food processor and pulse until they form a sticky paste. This creates the natural sweetness and helps bind everything together beautifully.
Step 2: Transfer the date paste to your mixing bowl and add the almond butter, oats, flaxseed, maple syrup, vanilla, and salt. Mix everything with your spatula until well combined. The mixture should feel slightly sticky but manageable.
Step 3: Fold in the chocolate chips if you’re using them. Trust me, they make these bites irresistible.
Step 4: Roll the mixture into tablespoon-sized balls using your hands. If the mixture feels too sticky, wet your hands slightly. You should get about sixteen bites.
Step 5: Roll each bite in shredded coconut if desired, then place them on your parchment-lined baking sheet.
Step 6: Refrigerate for at least thirty minutes to firm up. They’ll hold their shape much better once chilled.
Final Notes
• These energy bites keep beautifully in an airtight container in the fridge for up to two weeks, making them perfect for meal prep or grabbing a quick sweet treat whenever cravings hit.
2. Flourless Peanut Butter Cookies
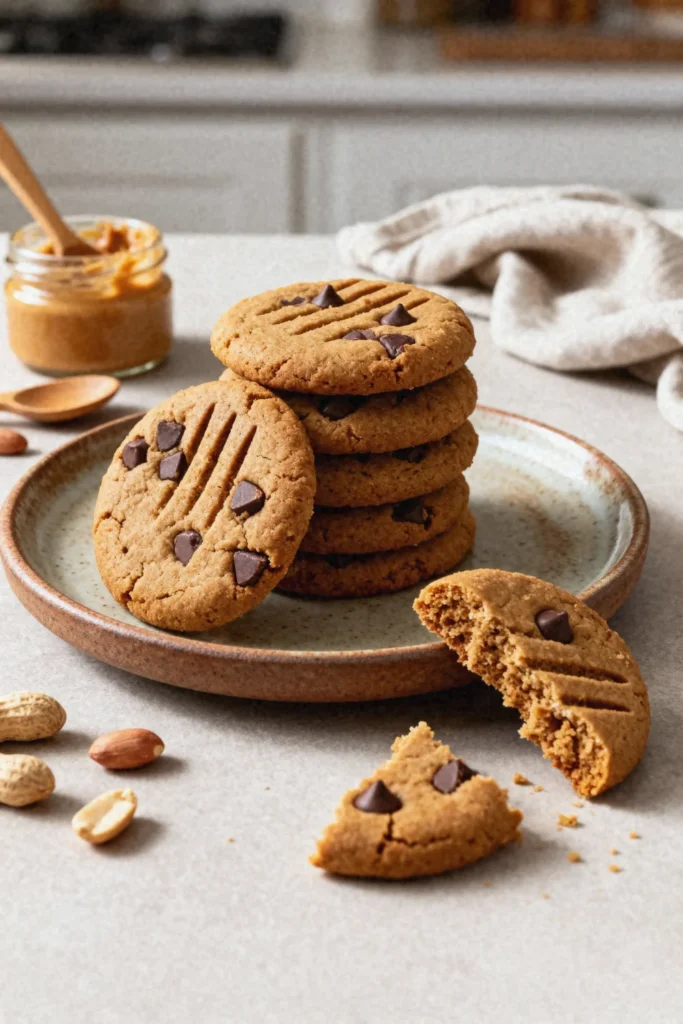
Just three ingredients, and they actually taste like real cookies. The nut butter does all the heavy lifting here.
Recipe Highlights (Quick Glance Section)
✅ Prep Time: 5 min
✅ Cook Time: 12 min
✅ Total Time: 17 min
✅ Servings: 12 cookies
✅ Estimated Cost: $5
✅ Calories per Serving: 110
✅ Dietary Info: Vegan, Gluten-Free, Oil-Free, Grain-Free
Category
✅ Courses: Dessert, Snacks
✅ Cuisines: American
Ingredients
The magic of this recipe lies in its simplicity. Peanut butter provides both the structure and flavor, while the flax egg acts as your binder since we’re working without traditional flour or eggs.
- 1 cup creamy natural peanut butter, unsalted (substitute with almond butter or sunflower seed butter for nut-free)
- ½ cup coconut sugar (light brown sugar or maple sugar work equally well)
- 1 flax egg: 1 tablespoon ground flaxseed mixed with 3 tablespoons water, set aside for 5 minutes
- 1 teaspoon vanilla extract
- ½ teaspoon baking soda
- Pinch of sea salt (omit if your peanut butter is salted)
- 2 tablespoons dairy-free chocolate chips for topping (optional)
Equipments
- Large mixing bowl, 2. Small bowl for flax egg, 3. Measuring cups and spoons, 4. Fork or whisk, 5. Baking sheet, 6. Parchment paper, 7. Wire cooling rack
Step-by-Step Instructions
Step 1: Preheat your oven to 350°F. Line your baking sheet with parchment paper and set it aside. Meanwhile, prepare your flax egg in the small bowl and let it thicken for five minutes.
Step 2: In your large mixing bowl, combine the peanut butter and coconut sugar. Mix them together until they’re smooth and well incorporated. The sugar will start dissolving into the peanut butter as you stir.
Step 3: Add your prepared flax egg, vanilla extract, baking soda, and salt to the bowl. Stir everything together until you have a uniform dough. The mixture should be thick but scoopable.
Step 4: Scoop tablespoon-sized portions of dough and roll them into balls using your hands. Place them on your prepared baking sheet, spacing them about two inches apart since they’ll spread slightly.
Step 5: Use a fork to create that classic crisscross pattern on top of each cookie. Press down gently to flatten them to about half an inch thick. Press a few chocolate chips into the tops if you’re using them.
Step 6: Bake for ten to twelve minutes. The cookies will look slightly underdone when you remove them, but they’ll firm up as they cool. Let them sit on the baking sheet for five minutes before transferring to your cooling rack.
Final Notes
• These cookies develop better texture after cooling completely, becoming chewy with slightly crisp edges, and they actually taste even better the next day once the flavors have melded together overnight.
3. Baked Cinnamon Apple Crumble with Oat Topping
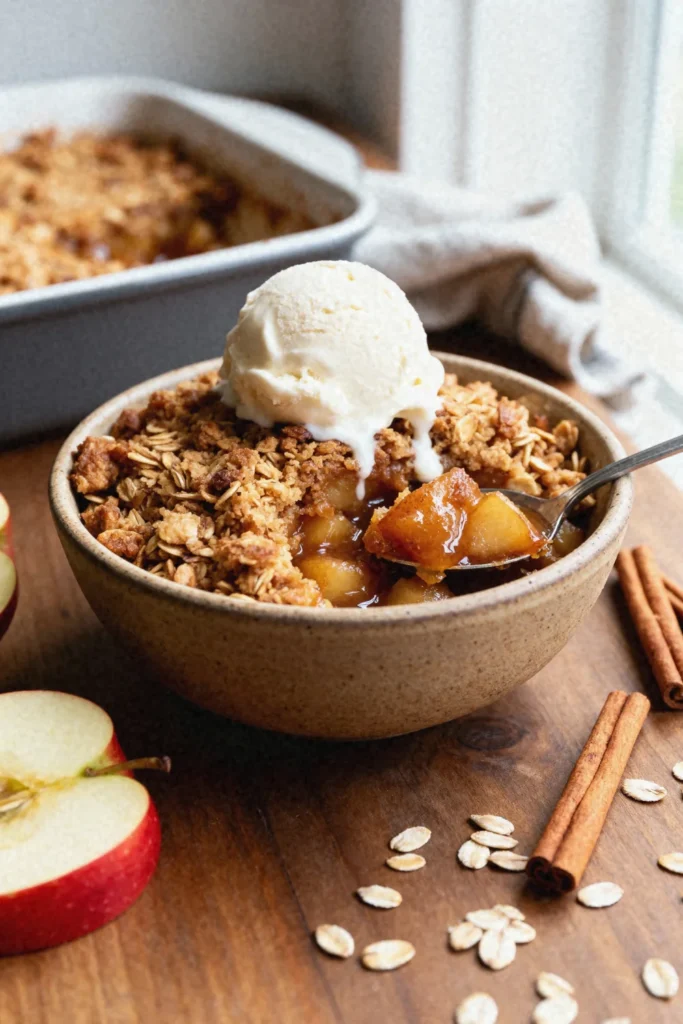
This captures that cozy, warm dessert feeling without any refined sugar. The oats crisp up beautifully and give you that crumble texture everyone craves.
Recipe Highlights (Quick Glance Section)
✅ Prep Time: 15 min
✅ Cook Time: 35 min
✅ Total Time: 50 min
✅ Servings: 6 servings
✅ Estimated Cost: $10
✅ Calories per Serving: 245
✅ Dietary Info: Vegan, Gluten-Free, Refined Sugar-Free, Nut-Free Option
Category
✅ Courses: Dessert
✅ Cuisines: American
Ingredients
The beauty of this crumble lies in how the ingredients work together. The apples release their natural juices while baking, which mingle with the cinnamon and maple syrup to create a sauce. Meanwhile, the oat topping crisps up beautifully thanks to the coconut oil binding everything together.
For the Apple Filling:
- 5 medium apples, peeled and sliced thin (Granny Smith or Honeycrisp work wonderfully; about 6 cups)
- 3 tablespoons maple syrup (substitute with coconut sugar if needed)
- 1 tablespoon lemon juice (prevents browning and adds brightness)
- 2 teaspoons ground cinnamon
- ¼ teaspoon nutmeg
- 1 tablespoon arrowroot powder or cornstarch (helps thicken the juices)
For the Oat Crumble Topping:
- 1 cup gluten-free rolled oats (certified gluten-free)
- ½ cup almond flour (substitute with oat flour for nut-free)
- ⅓ cup coconut sugar
- ¼ cup melted coconut oil (or vegan butter)
- 1 teaspoon ground cinnamon
- ¼ teaspoon sea salt
Equipments
- 8×8 inch baking dish, 2. Large mixing bowl, 3. Medium mixing bowl, 4. Sharp knife and cutting board, 5. Measuring cups and spoons, 6. Wooden spoon or spatula, 7. Aluminum foil
Step-by-Step Instructions
Step 1: Preheat your oven to 350°F. This moderate temperature allows the apples to soften completely while the topping browns without burning.
Step 2: In your large bowl, toss together the sliced apples, maple syrup, lemon juice, cinnamon, nutmeg, and arrowroot powder. Make sure every apple slice gets coated. This coating will transform into that gorgeous syrupy sauce as it bakes. Spread this mixture evenly into your baking dish.
Step 3: In your medium bowl, combine the oats, almond flour, coconut sugar, melted coconut oil, cinnamon, and salt. Use your hands or a fork to mix everything until it resembles coarse crumbs. The mixture should clump together when you squeeze it.
Step 4: Sprinkle the crumble topping evenly over the apples, covering them completely. Don’t press it down—you want that loose, crumbly texture.
Step 5: Cover the dish with aluminum foil and bake for twenty minutes. This steaming phase softens the apples beautifully.
Step 6: Remove the foil and bake for another fifteen minutes uncovered until the topping turns golden brown and the apple juices bubble around the edges. Let it cool for ten minutes before serving.
Final Notes
• This crumble tastes incredible warm with a scoop of dairy-free vanilla ice cream, and any leftovers make an unexpectedly delicious breakfast the next morning when reheated and topped with yogurt.
4. Raw Cashew Cheesecake Bars
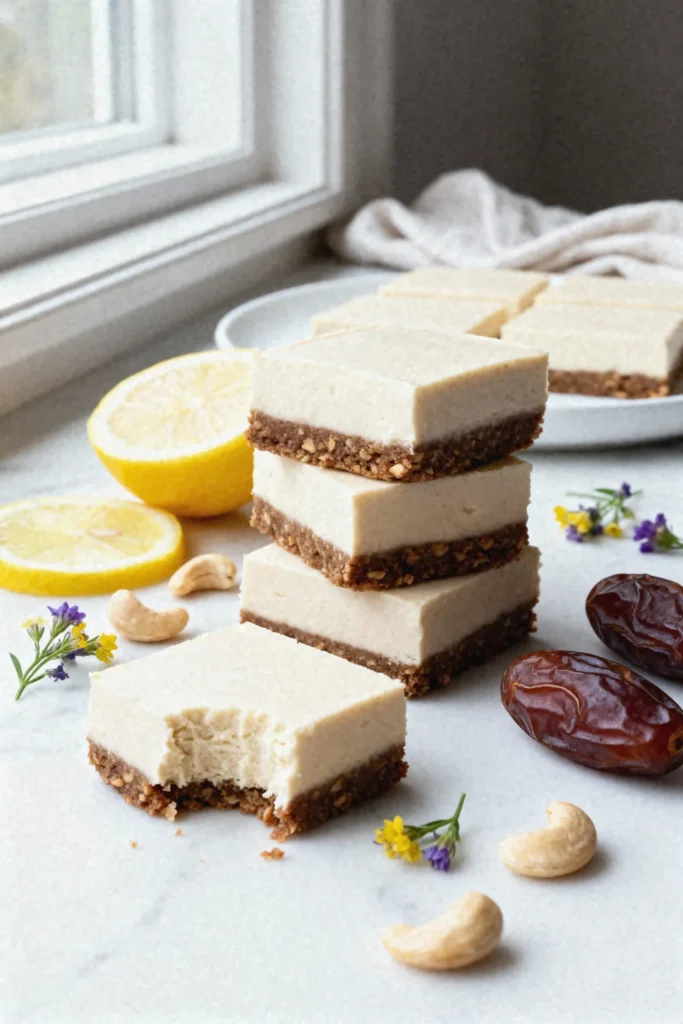
The cashews create an incredibly creamy filling that rivals traditional cheesecake. No baking required, just patience while they set.
Recipe Highlights (Quick Glance Section)
✅ Prep Time: 20 min
✅ Cook Time: 0 min
✅ Total Time: 20 min (plus 4 hours freezing)
✅ Servings: 12 bars
✅ Estimated Cost: $14
✅ Calories per Serving: 280
✅ Dietary Info: Vegan, Gluten-Free, Raw, Refined Sugar-Free, Dairy-Free
Category
✅ Courses: Dessert
✅ Cuisines: American
Ingredients
Let me explain how these ingredients work together to create that authentic cheesecake texture. The soaked cashews become incredibly creamy when blended, mimicking the richness of traditional cream cheese. Meanwhile, the dates and nuts in the crust bind together naturally without any baking required.
For the Crust:
- 1½ cups raw almonds (substitute with walnuts or pecans if you prefer a different flavor profile)
- 1 cup pitted Medjool dates, about ten to twelve dates (they act as both sweetener and natural glue)
- 2 tablespoons melted coconut oil
- Pinch of sea salt
For the Cashew Filling:
- 2½ cups raw cashews, soaked in water for at least four hours or overnight (this softening step is crucial for achieving that silky texture)
- ½ cup full-fat coconut cream, the thick part from the top of a chilled can
- ⅓ cup maple syrup (you can use agave nectar as an alternative)
- ¼ cup fresh lemon juice (this provides that signature cheesecake tang)
- 2 teaspoons vanilla extract
- ¼ cup melted coconut oil (helps the filling set properly)
- Pinch of sea salt
Equipments
- 8×8 inch square baking pan, 2. Parchment paper, 3. High-speed blender or food processor, 4. Measuring cups and spoons, 5. Rubber spatula, 6. Large bowl for soaking cashews
Step-by-Step Instructions
Step 1: Line your baking pan with parchment paper, leaving some overhang on the sides. This creates handles that make lifting the bars out much easier later.
Step 2: Drain your soaked cashews thoroughly and set them aside. The soaking process has softened them considerably, which is essential for creating that smooth, creamy filling texture.
Step 3: For the crust, add almonds, dates, coconut oil, and salt to your food processor. Pulse until the mixture resembles coarse crumbs and sticks together when pressed between your fingers. This usually takes about one minute of processing.
Step 4: Press the crust mixture firmly and evenly into the bottom of your prepared pan. Use the back of a measuring cup to really pack it down. This creates a stable base that won’t crumble when you cut the bars.
Step 5: Add your drained cashews, coconut cream, maple syrup, lemon juice, vanilla, melted coconut oil, and salt to your blender. Blend on high speed for two to three minutes, stopping to scrape down the sides as needed. The filling should be completely smooth and silky with no graininess remaining.
Step 6: Pour the filling over the crust and smooth the top with your spatula. Freeze for at least four hours or until completely firm.
Step 7: Remove the bars using the parchment paper handles and let them sit at room temperature for five minutes before slicing into twelve squares with a sharp knife.
Final Notes
• These cheesecake bars are best stored in the freezer and allowed to thaw for ten minutes before serving, giving them that perfect creamy yet firm texture that melts beautifully on your tongue.
5. Quick Banana Nice Cream with Dark Chocolate Chips
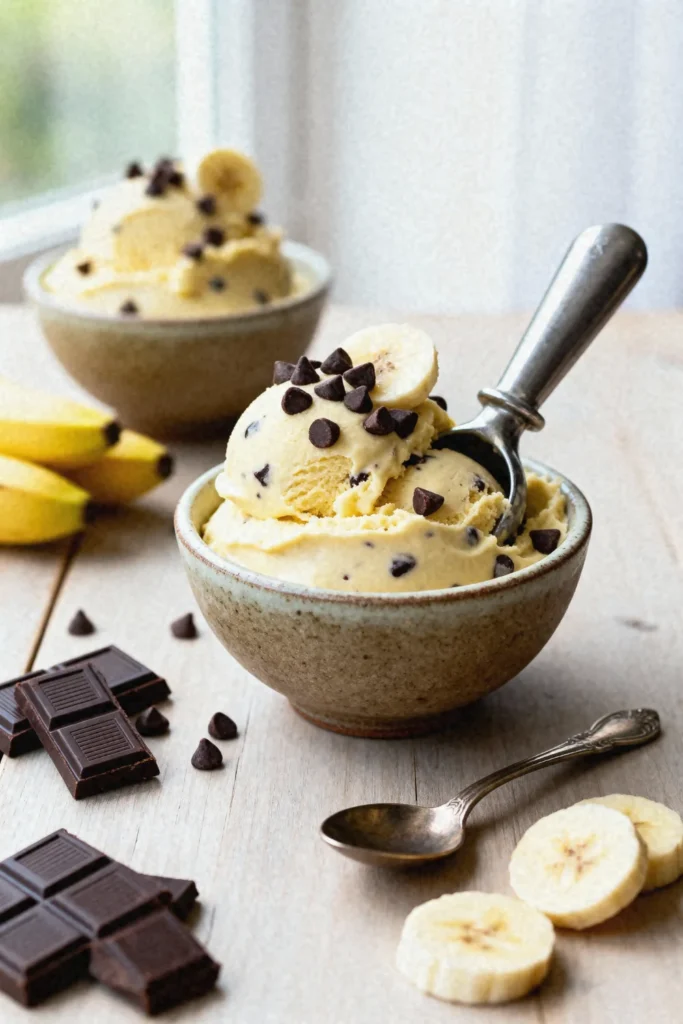
Frozen bananas transform into ice cream magic. It’s genuinely the easiest healthy dessert you’ll ever make.
Recipe Highlights (Quick Glance Section)
✅ Prep Time: 5 min
✅ Cook Time: 0 min
✅ Total Time: 5 min (plus banana freezing time)
✅ Servings: 2 servings
✅ Estimated Cost: $4
✅ Calories per Serving: 180
✅ Dietary Info: Vegan, Gluten-Free, Oil-Free, Refined Sugar-Free, Nut-Free
Category
✅ Courses: Dessert, Snacks
✅ Cuisines: American
Ingredients
Understanding what happens during this recipe helps you appreciate its brilliance. When bananas freeze, their starches convert to sugars, and their cellular structure changes. Once blended, those frozen cells break down into a texture remarkably similar to soft-serve ice cream, creating that creamy consistency without any dairy whatsoever.
- 4 large ripe bananas, peeled, sliced, and frozen solid for at least four hours (the riper they are, the sweeter your nice cream will be; substitute with frozen mango for a tropical twist)
- 2 to 3 tablespoons plant-based milk of your choice, such as almond, oat, or coconut (use only if needed to help blending; start with less and add more gradually)
- 1 teaspoon vanilla extract (this enhances the overall flavor profile beautifully)
- ¼ cup dairy-free dark chocolate chips (choose a brand with at least seventy percent cacao for that rich, deep chocolate flavor)
- Optional toppings: crushed nuts, fresh berries, coconut flakes, or a drizzle of peanut butter
Equipments
- High-speed blender or food processor, 2. Measuring spoons, 3. Rubber spatula, 4. Serving bowls, 5. Ice cream scoop (optional but makes serving prettier)
Step-by-Step Instructions
Step 1: Remove your frozen banana slices from the freezer and let them sit at room temperature for about two minutes. This brief thawing period makes blending significantly easier and reduces strain on your blender motor. The bananas should still feel rock-solid but not completely frozen through.
Step 2: Add the banana slices to your blender or food processor. Start blending on low speed, then gradually increase to high. The bananas will initially break into chunks, then transform into what looks like a crumbly texture. Keep blending through this stage because the magic happens next.
Step 3: As you continue blending, the bananas will suddenly shift from crumbly to smooth and creamy. This transformation usually takes about two to three minutes total. If your machine is struggling, add one tablespoon of plant milk at a time, but use as little as possible to maintain that thick, ice cream-like consistency.
Step 4: Once your nice cream reaches a smooth, soft-serve texture, add the vanilla extract and pulse a few times to incorporate it evenly throughout.
Step 5: Add the dark chocolate chips and pulse just two or three times. You want them distributed throughout but still visible as distinct chips rather than completely blended in.
Step 6: Serve immediately for a soft-serve consistency that’s perfect for eating right away. Alternatively, transfer to a freezer-safe container and freeze for one to two hours for a firmer, scoopable texture similar to traditional ice cream.
Final Notes
• The beauty of banana nice cream lies in its versatility as a base recipe that welcomes endless variations like adding cocoa powder for chocolate, frozen berries for fruit flavors, or nut butters for richness.
6. Date and Nut Truffles

Dates become the natural sweetener and binder. Roll them in cocoa powder and you’ve got elegant little bites.
Recipe Highlights (Quick Glance Section)
✅ Prep Time: 15 min
✅ Cook Time: 0 min
✅ Total Time: 15 min (plus 30 min chilling)
✅ Servings: 18 truffles
✅ Estimated Cost: $9
✅ Calories per Serving: 85
✅ Dietary Info: Vegan, Gluten-Free, Raw, Refined Sugar-Free, Paleo-Friendly
Category
✅ Courses: Dessert, Snacks
✅ Cuisines: Middle Eastern-Inspired
Ingredients
Let me explain the chemistry behind these truffles so you understand why they work so beautifully. Dates contain natural sugars and sticky fibers that act as a binding agent when processed, essentially becoming nature’s caramel. When you combine them with nuts, the healthy fats from the nuts blend with the date’s stickiness to create a truffle texture that holds together perfectly without any additional sweeteners or binders needed.
- 1½ cups pitted Medjool dates, about fifteen to eighteen dates (make sure they’re soft and fresh; if they’re dry, soak them in warm water for ten minutes first)
- 1 cup raw walnuts (substitute with almonds, pecans, or cashews based on your preference)
- ¼ cup unsweetened cocoa powder (this creates that deep, rich chocolate flavor)
- 2 tablespoons almond butter or any nut butter you have (this adds extra creaminess and helps bind everything)
- 1 teaspoon vanilla extract
- Pinch of sea salt (it enhances the chocolate flavor dramatically)
For Rolling and Coating:
- ¼ cup unsweetened cocoa powder, or ¼ cup unsweetened shredded coconut, or ¼ cup finely chopped nuts (choose your favorite or use a combination)
Equipments
- Food processor, 2. Measuring cups and spoons, 3. Rubber spatula, 4. Small shallow bowls for coating options, 5. Baking sheet or plate, 6. Parchment paper
Step-by-Step Instructions
Step 1: Add your walnuts to the food processor first and pulse them about five to seven times until they’re broken down into small pieces but not completely ground into powder. You want some texture remaining because this creates interest in every bite rather than a completely smooth truffle.
Step 2: Add the pitted dates, cocoa powder, almond butter, vanilla extract, and sea salt to the food processor with the chopped walnuts. Process everything together for about one to two minutes, stopping occasionally to scrape down the sides with your spatula. The mixture will first look crumbly, then gradually it’ll start clumping together and forming a sticky ball. When you pinch the mixture between your fingers and it holds together easily without crumbling apart, you know it’s ready.
Step 3: Prepare your coating stations by placing cocoa powder, shredded coconut, or chopped nuts into separate shallow bowls. This gives you options for creating variety in both appearance and flavor.
Step 4: Scoop out about one tablespoon of the truffle mixture and roll it between your palms to form a smooth ball. If the mixture feels too sticky on your hands, you can lightly dampen your palms with water or dust them with a tiny bit of cocoa powder.
Step 5: Roll each truffle in your chosen coating, making sure to cover the entire surface. The coating not only adds visual appeal but also provides a textural contrast against the soft, fudgy interior.
Step 6: Place the finished truffles on your parchment-lined baking sheet and refrigerate them for at least thirty minutes. This chilling time allows them to firm up significantly, making them easier to handle and giving them that perfect truffle texture.
Final Notes
• These truffles store beautifully in an airtight container in the refrigerator for up to two weeks, and they actually develop even richer flavor after a day as the ingredients meld together more completely.
7. Easy Tahini Chocolate Chip Blondies
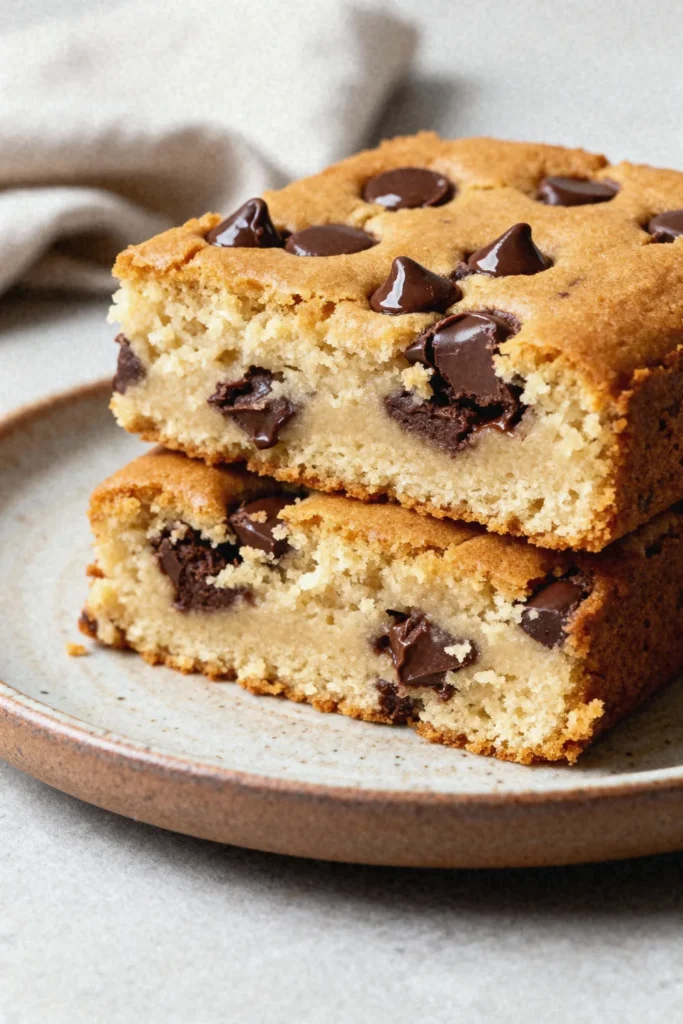
Tahini brings an unexpected nutty depth that makes these addictive. They’re soft, chewy, and ready in thirty minutes.
Recipe Highlights
✅ Prep Time: 10 min
✅ Cook Time: 22 min
✅ Total Time: 32 min
✅ Servings: 12 blondies
✅ Estimated Cost: $14
✅ Calories per Serving: 185
✅ Dietary Info: Vegan, Gluten-Free, Dairy-Free, Refined Sugar-Free
Category
✅ Courses: Dessert, Snacks
✅ Cuisines: American, Middle Eastern-Inspired
Ingredients
- 3/4 cup tahini, well-stirred (substitute: almond butter or sunflower seed butter)
- 1/2 cup coconut sugar (substitute: maple sugar or brown sugar)
- 1/4 cup maple syrup (substitute: agave nectar)
- 2 tablespoons ground flaxseed mixed with 5 tablespoons water (flax eggs)
- 1 teaspoon vanilla extract
- 1/2 cup almond flour (substitute: oat flour for nut-free)
- 1/4 cup coconut flour
- 1/2 teaspoon baking soda
- 1/4 teaspoon sea salt
- 3/4 cup vegan chocolate chips (substitute: chopped dark chocolate or cacao nibs)
Equipments
- 8×8-inch baking pan, 2. Parchment paper, 3. Large mixing bowl, 4. Medium mixing bowl, 5. Whisk, 6. Spatula, 7. Measuring cups and spoons, 8. Cooling rack
Step-by-Step Instructions
Step 1: Preheat your oven to 350°F and line the baking pan with parchment paper, leaving overhang on two sides for easy removal.
Step 2: Prepare your flax eggs by combining ground flaxseed with water in a small bowl and let sit for five minutes until thickened and gel-like.
Step 3: Whisk together tahini, coconut sugar, maple syrup, flax eggs, and vanilla in your large bowl until completely smooth and creamy.
Step 4: Combine almond flour, coconut flour, baking soda, and salt in the medium bowl, whisking to eliminate any clumps.
Step 5: Fold the dry ingredients into the wet mixture using your spatula, stirring just until combined without overmixing.
Step 6: Reserve two tablespoons of chocolate chips, then gently fold the remaining chips into the batter.
Step 7: Spread the thick batter evenly into your prepared pan, smoothing the top with your spatula, then sprinkle with reserved chocolate chips.
Step 8: Bake for 20-22 minutes until edges are golden and the center appears slightly underdone with a toothpick coming out with moist crumbs.
Step 9: Cool completely in the pan on a wire rack before lifting out and slicing into twelve squares.
Final Notes
• These blondies develop deeper flavor and fudgier texture after resting overnight at room temperature in an airtight container, making them perfect for advance preparation before gatherings or meal prep desserts.
Must-Try: Chocolate Vegan Dessert Recipes.

Hi, I’m Aldvin Gomes, a passionate vegan and foodie on a mission to make plant-based eating effortless and exciting. I share new vegan recipes every day, so you never have to stress about what to cook. Whether you’re a longtime vegan or just exploring plant-based meals, my goal is to keep your plate full of delicious, wholesome, and easy-to-make dishes. I’m here to help you enjoy every bite. Join me in exploring the endless possibilities of vegan cooking, one delicious recipe at a time!