
Chocolate Vegan Desserts aren’t just about giving up dairy… they’re about discovering something better, richer, and honestly? More fun to make than I ever imagined possible.
I’ll be real with you. When I first went vegan, I thought chocolate desserts were over for me. Like, genuinely mourned them. But then something clicked.
I started playing around in my kitchen… tossing peanut butter into brownie batter, experimenting with dark chocolate and coconut cream, trying raw cacao in everything.
And you know what? These dairy free creations started tasting better than anything I remembered. The best part? Most of these recipes are ridiculously easy.
We’re talking chocolate chip cookies that happen to be gluten free, healthy fudge that takes five minutes, and Christmas treats that make non-vegans ask for seconds.
Some need baking, some don’t. Some are fancy, others are throw-it-together-Tuesday kind of desserts.
Must-Try: Gluten Free Vegan Desserts.
7 Chocolate Vegan Desserts
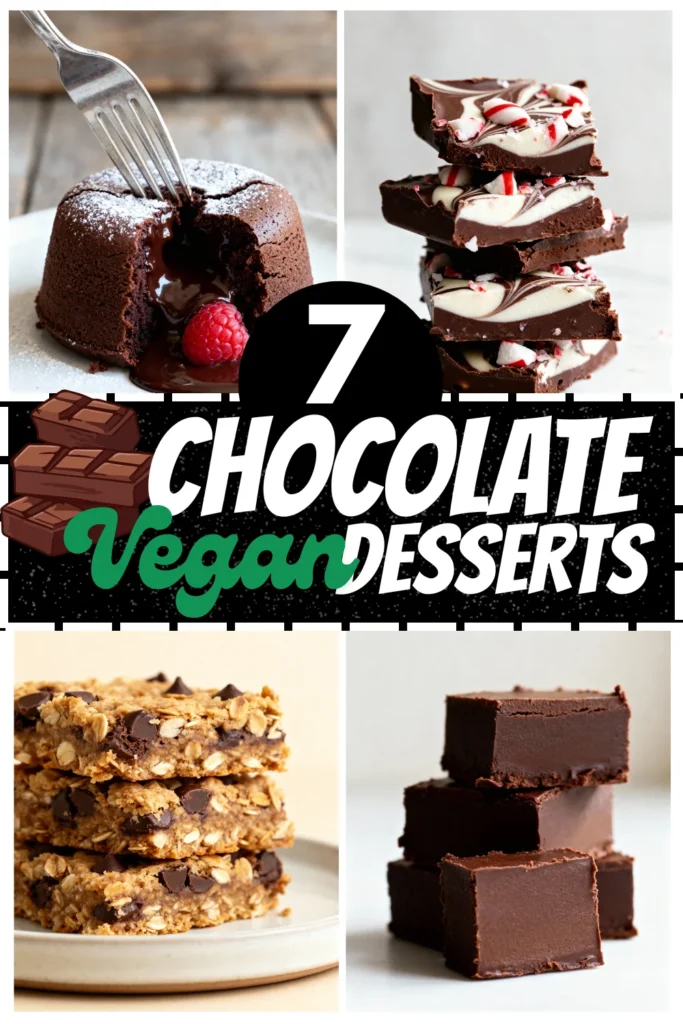
I’ve gathered seven of my absolute favorites here… the ones I actually make on repeat, not just the ones that photograph well.
Whether you need something impressive for the holidays or just want to face-plant into a bowl of chocolate mousse on a random Wednesday, I’ve got you covered. Ready to dive in?
1. Peanut Butter Chocolate Swirl Brownies
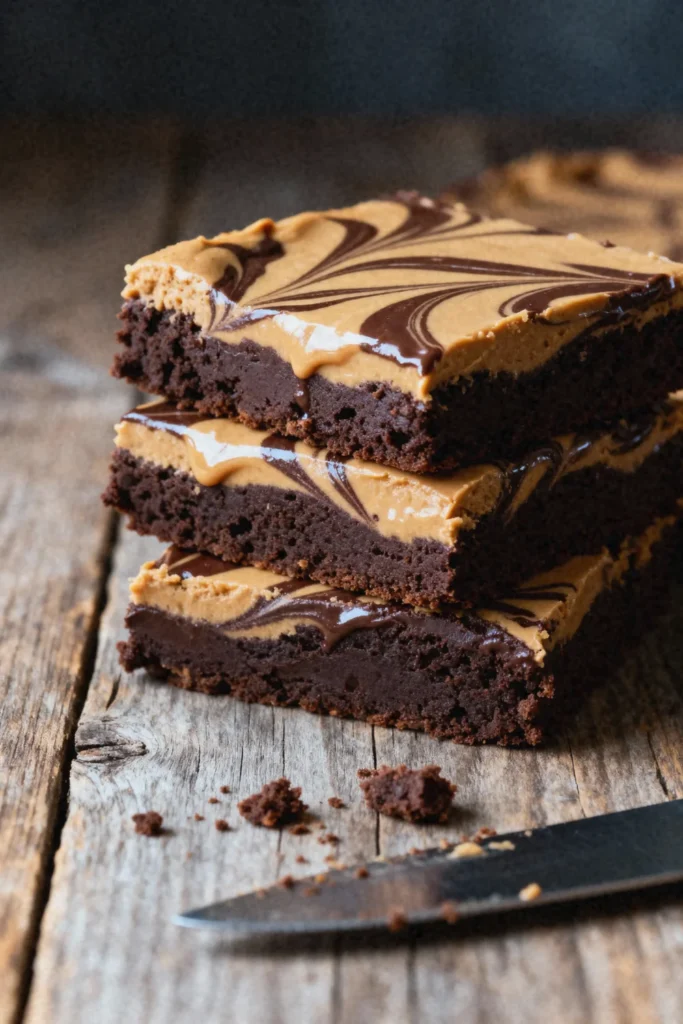
These are the kind of brownies that make people stop mid-conversation. Rich, fudgy chocolate base with ribbons of creamy peanut butter swirled throughout.
Recipe Highlights
✅ Prep Time: 15 min
✅ Cook Time: 25 min
✅ Total Time: 40 min
✅ Servings: 9 brownies
✅ Estimated Cost: $8
✅ Calories per Serving: 245
✅ Dietary Info: Vegan, Dairy-Free, Egg-Free
Category
✅ Courses: Dessert
✅ Cuisines: American
Ingredients
- 1 cup all-purpose flour (substitute: whole wheat flour for added fiber)
- ¾ cup granulated sugar
- ⅓ cup cocoa powder
- ½ teaspoon baking powder
- ¼ teaspoon salt
- ½ cup plant-based milk (almond, soy, or oat work beautifully)
- ⅓ cup melted coconut oil (substitute: vegetable oil)
- 1 teaspoon vanilla extract
- ½ cup vegan chocolate chips
- ⅓ cup creamy peanut butter (substitute: almond or sunflower seed butter)
Equipments
- 8×8-inch baking pan, 2. Mixing bowls (two), 3. Whisk, 4. Spatula, 5. Measuring cups and spoons, 6. Parchment paper, 7. Toothpick
Step-by-Step Instructions
Step 1: Preheat your oven to 350°F and line your baking pan with parchment paper, allowing overhang on the sides for easy removal later.
Step 2: Combine the flour, sugar, cocoa powder, baking powder, and salt in your larger mixing bowl, whisking thoroughly to eliminate any lumps and ensure even distribution.
Step 3: Pour in the plant-based milk, melted coconut oil, and vanilla extract, stirring until you achieve a smooth, glossy batter without any dry pockets remaining.
Step 4: Fold in the chocolate chips gently using your spatula, distributing them evenly throughout the mixture.
Step 5: Transfer the brownie batter into your prepared pan, spreading it evenly to reach all corners.
Step 6: Warm the peanut butter in the microwave for 15-20 seconds until it becomes pourable and easy to drizzle.
Step 7: Drop spoonfuls of peanut butter across the brownie surface, then use a knife or toothpick to create beautiful swirl patterns by dragging through both layers.
Step 8: Bake for 25 minutes until the edges appear set but the center remains slightly soft when tested with a toothpick.
Step 9: Allow the brownies to cool completely in the pan before lifting them out using the parchment overhang and slicing into nine squares.
Final Notes
• These fudgy brownies achieve their incredible texture through the perfect balance of coconut oil and plant milk, creating moisture without eggs while the peanut butter swirl adds protein and rich, nutty contrast to the deep chocolate base.
2. Chocolate Chip Oatmeal Breakfast Bars
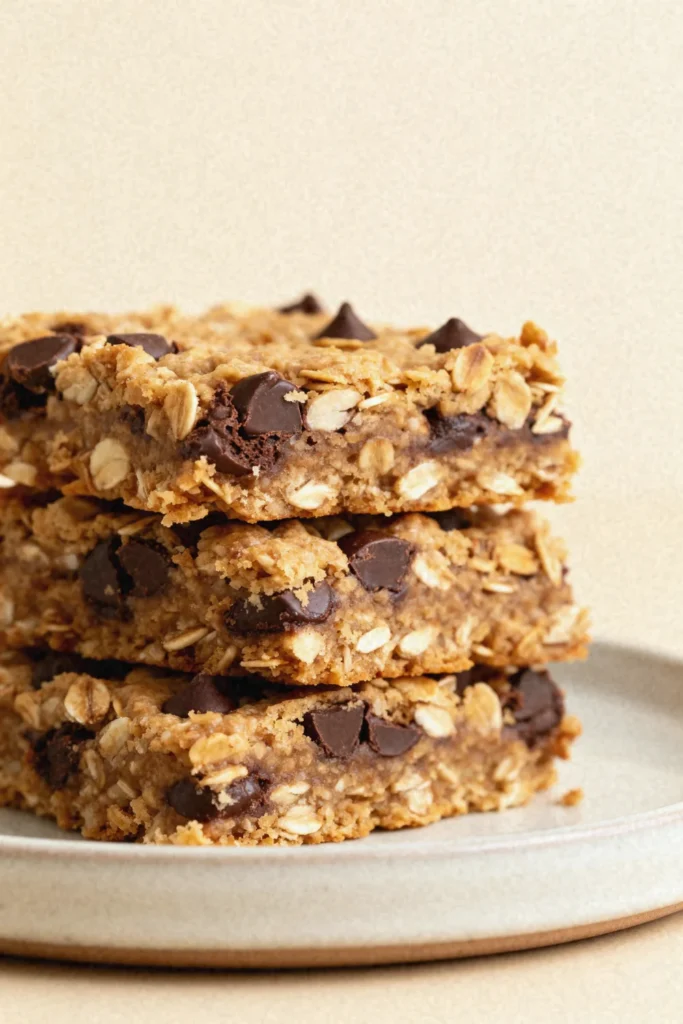
These bars changed my morning routine completely. They’re like if a chocolate chip cookie and a granola bar had the most delicious baby ever.
Recipe Highlights
✅ Prep Time: 15 min
✅ Cook Time: 25 min
✅ Total Time: 40 min
✅ Servings: 12 bars
✅ Estimated Cost: $10
✅ Calories per Serving: 195
✅ Dietary Info: Vegan, Refined Sugar-Free, High-Fiber
Category
✅ Courses: Breakfast, Snacks, Dessert
✅ Cuisines: American
Ingredients
Dry Ingredients:
- 2 cups rolled oats (substitute: quick oats for softer texture)
- 1 cup whole wheat flour (substitute: all-purpose or gluten-free flour blend)
- ½ cup vegan chocolate chips
- 1 teaspoon baking powder
- ½ teaspoon cinnamon
- ¼ teaspoon sea salt
Wet Ingredients:
- ⅓ cup maple syrup (substitute: agave nectar or date syrup)
- ¼ cup coconut oil, melted (substitute: vegetable oil)
- ¼ cup unsweetened applesauce
- 2 tablespoons almond milk (substitute: any plant-based milk)
- 1 teaspoon vanilla extract
Equipments
- 9×9-inch baking pan, 2. Parchment paper, 3. Large mixing bowl, 4. Medium mixing bowl, 5. Measuring cups and spoons, 6. Whisk, 7. Spatula, 8. Wire cooling rack
Step-by-Step Instructions
Step 1: Begin by preheating your oven to 350°F and lining your baking pan with parchment paper, ensuring it overhangs the edges for easy removal later.
Step 2: In your large mixing bowl, combine the rolled oats, whole wheat flour, baking powder, cinnamon, and sea salt, whisking them together to distribute the leavening agent evenly throughout.
Step 3: Take your medium bowl and whisk together the maple syrup, melted coconut oil, applesauce, almond milk, and vanilla extract until they form a smooth, unified mixture.
Step 4: Pour the wet ingredients into the dry ingredients and stir gently with your spatula until everything is just combined and no dry flour pockets remain visible.
Step 5: Fold in the vegan chocolate chips, distributing them throughout the batter so every bar will have those delightful chocolate pockets.
Step 6: Transfer the thick batter into your prepared pan and use your spatula to spread it evenly, pressing down firmly to create a compact, uniform layer.
Step 7: Bake for twenty-five minutes until the edges turn golden brown and a toothpick inserted in the center comes out mostly clean with just a few moist crumbs.
Step 8: Allow the bars to cool completely in the pan on a wire rack before lifting them out using the parchment overhang and slicing into twelve equal portions.
Final Notes
• These wholesome breakfast bars demonstrate how oats create the perfect chewy base when combined with natural sweeteners and binding agents, offering sustained energy throughout your morning while satisfying chocolate cravings in a nutritionally balanced way.
3. Easy Vegan Chocolate Fudge (5 Ingredients)
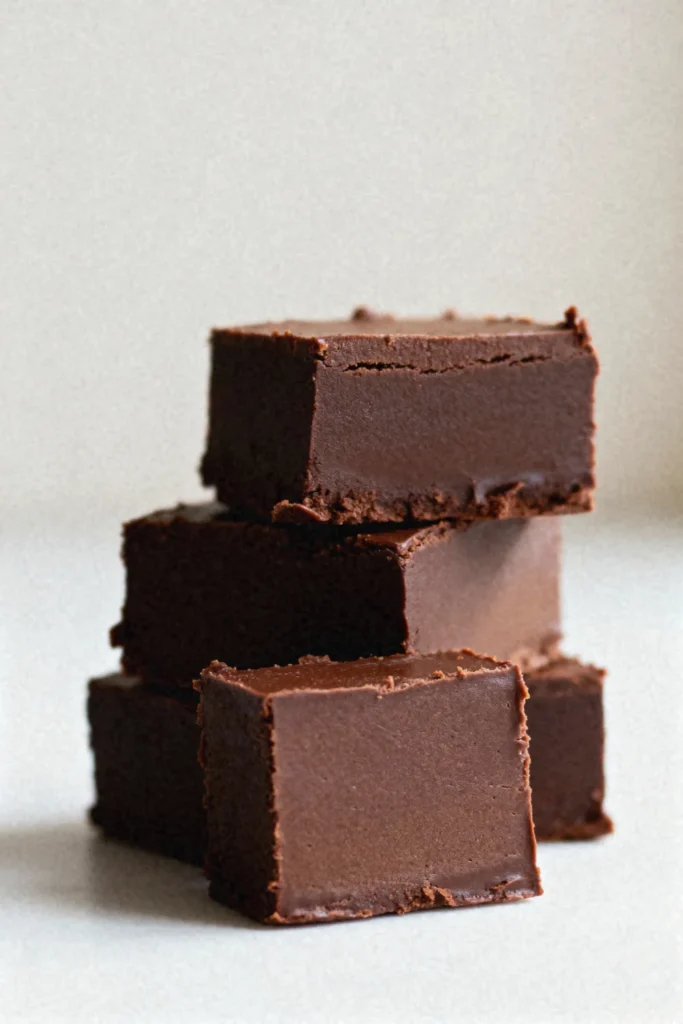
This is my go-to when I need something impressive but have zero energy. Five ingredients, no candy thermometer, no stress. Just smooth, rich, melt-in-your-mouth fudge that sets up perfectly in the fridge.
Recipe Highlights
✅ Prep Time: 10 min
✅ Cook Time: 5 min
✅ Total Time: 15 min (plus 2 hours chilling)
✅ Servings: 16 pieces
✅ Estimated Cost: $8
✅ Calories per Serving: 145
✅ Dietary Info: Vegan, Gluten-Free, Dairy-Free
Category
✅ Courses: Dessert, Snacks
✅ Cuisines: American
Ingredients
- 2 cups vegan chocolate chips (substitute: chopped dark chocolate for a more intense flavor)
- 1 can (14 oz) full-fat coconut milk (substitute: coconut cream for extra richness)
- ¼ cup maple syrup (substitute: agave nectar or coconut sugar dissolved in water)
- 2 teaspoons vanilla extract
- ¼ teaspoon sea salt
Equipments
- 8×8-inch baking pan, 2. Parchment paper, 3. Medium saucepan, 4. Wooden spoon or silicone spatula, 5. Measuring cups and spoons, 6. Knife for cutting
Step-by-Step Instructions
Step 1: Start by lining your baking pan with parchment paper, making sure the paper extends over the sides so you can easily lift the finished fudge out once it has set completely.
Step 2: Pour the full-fat coconut milk into your saucepan and place it over medium heat, allowing it to warm gently until you see small bubbles forming around the edges, which typically takes about three minutes.
Step 3: Add the vegan chocolate chips to the warm coconut milk and reduce the heat to low, stirring continuously with your wooden spoon as the chocolate melts into the liquid and creates a smooth, glossy mixture.
Step 4: Once the chocolate has completely melted and incorporated with the coconut milk, remove the saucepan from heat and stir in the maple syrup, vanilla extract, and sea salt until everything blends together seamlessly.
Step 5: Pour this silky chocolate mixture into your prepared pan, using your spatula to spread it evenly into all corners and create a level surface that will set uniformly.
Step 6: Transfer the pan to your refrigerator and let the fudge chill for at least two hours until it becomes firm enough to slice cleanly without losing its shape.
Step 7: Lift the fudge from the pan using the parchment overhang, place it on a cutting board, and slice it into sixteen equal squares using a sharp knife wiped clean between cuts for neat edges.
Final Notes
• This incredibly simple fudge recipe works because coconut milk’s natural fats bind with chocolate to create that classic creamy texture, while the minimal ingredient list proves that sophisticated desserts don’t require complexity when you understand how fat and cocoa interact.
4. Christmas Peppermint Chocolate Bark
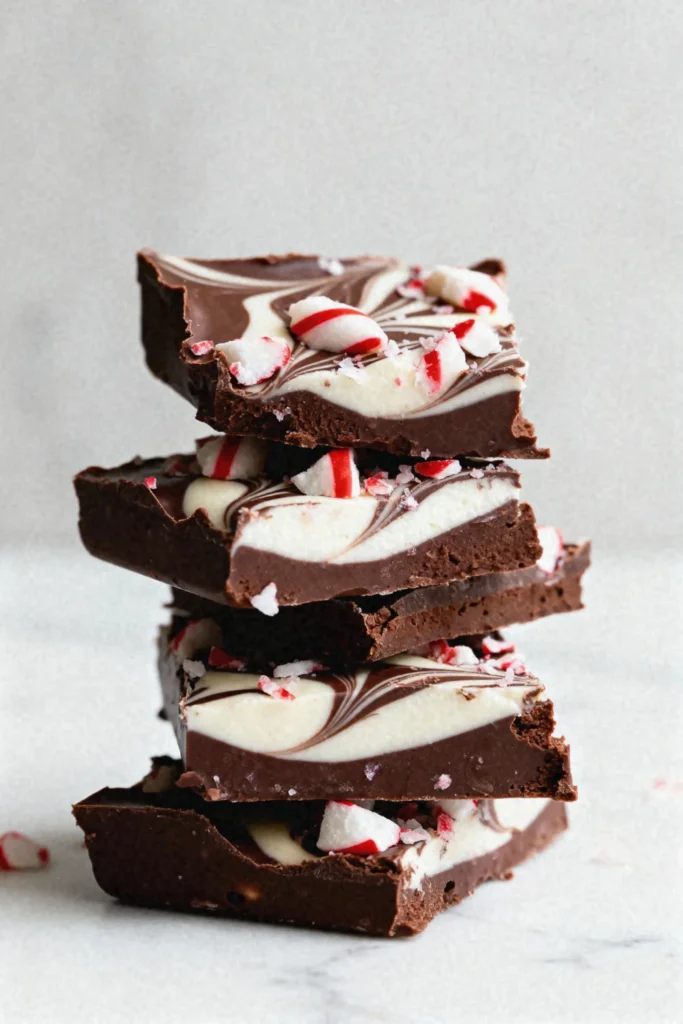
Holiday magic in bark form. Dark chocolate loaded with crushed candy canes and a hint of peppermint extract. It looks fancy, makes great gifts, and takes about fifteen minutes of actual work.
Recipe Highlights
✅ Prep Time: 15 min
✅ Cook Time: 5 min
✅ Total Time: 20 min (plus 1 hour chilling)
✅ Servings: 20 pieces
✅ Estimated Cost: $11
✅ Calories per Serving: 125
✅ Dietary Info: Vegan, Gluten-Free, Refined Sugar-Free Option
Category
✅ Courses: Dessert, Holiday Treats, Snacks
✅ Cuisines: American
Ingredients
For the Dark Chocolate Layer:
- 12 oz vegan dark chocolate (substitute: semi-sweet chocolate chips for milder sweetness)
- 1 tablespoon coconut oil
For the White Chocolate Layer:
- 8 oz vegan white chocolate (substitute: additional dark chocolate with cocoa butter for single-layer bark)
- 1 tablespoon coconut oil
For Topping:
- ½ cup crushed candy canes or peppermint candies (ensure they’re vegan)
- ½ teaspoon peppermint extract (optional for extra minty flavor)
Equipments
- Baking sheet (10×15-inch), 2. Parchment paper or silicone baking mat, 3. Two microwave-safe bowls or double boiler setup, 4. Spatula or offset spatula, 5. Measuring cups and spoons, 6. Butter knife or toothpick for swirling
Step-by-Step Instructions
Step 1: Begin by lining your baking sheet with parchment paper, smoothing it out completely so the chocolate will spread evenly and create a uniform thickness across the entire surface when you pour it later.
Step 2: Break the dark chocolate into small pieces and place them in your first bowl along with one tablespoon of coconut oil, then melt using thirty-second microwave intervals, stirring between each burst until the mixture becomes completely smooth and glossy.
Step 3: Pour the melted dark chocolate onto your prepared baking sheet and use your spatula to spread it into a rectangle roughly nine by twelve inches, creating an even layer about one-quarter inch thick.
Step 4: Repeat the melting process with your vegan white chocolate and remaining coconut oil, stirring in the peppermint extract if you’re using it to intensify that cool minty flavor throughout the bark.
Step 5: Drizzle the white chocolate over the dark chocolate layer in random patterns, then take your butter knife or toothpick and gently swirl the two chocolates together, creating those beautiful marbled patterns that make this bark so visually stunning.
Step 6: Immediately sprinkle the crushed candy canes evenly across the surface while the chocolate is still wet, pressing them down very gently so they’ll adhere properly when the chocolate sets.
Step 7: Transfer your baking sheet to the refrigerator and let it chill for at least one hour until the chocolate becomes completely firm and breaks cleanly when you apply pressure.
Step 8: Remove the bark from the refrigerator, break it into irregular pieces by hand for that rustic homemade look, and store the pieces in an airtight container in a cool place.
Final Notes
• This festive bark works beautifully because the coconut oil helps temper the chocolate for that satisfying snap, while the peppermint creates a refreshing contrast that cuts through the richness, making each piece feel both indulgent and surprisingly light on the palate.
5. Vegan Chocolate Tiramisu
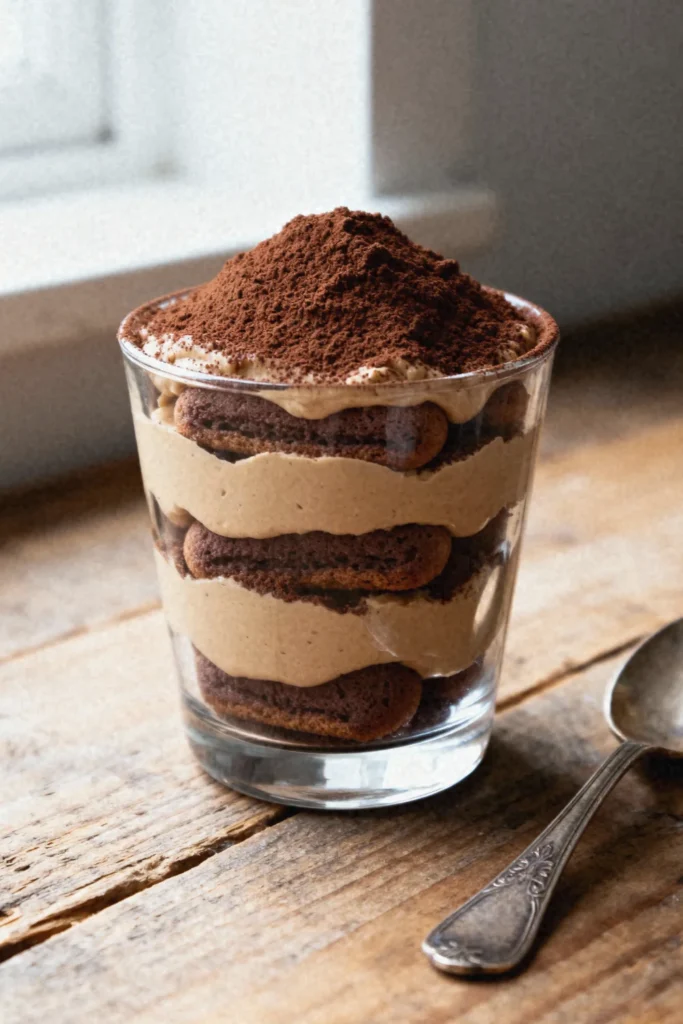
This one surprised me more than any other dessert I’ve ever veganized. The result is this impossibly silky, luxurious filling that tastes even richer than the traditional version I remember.
Recipe Highlights
✅ Prep Time: 25 min
✅ Cook Time: 5 min
✅ Total Time: 4 hours 30 min (includes chilling)
✅ Servings: 6
✅ Estimated Cost: $18
✅ Calories per Serving: 385
✅ Dietary Info: Vegan, Refined Sugar-Free Option, Nut-Based
Category
✅ Courses: Dessert
✅ Cuisines: Italian-Inspired
Ingredients
For the Vegan Mascarpone Cream:
- 1½ cups raw cashews (soaked in hot water for 30 minutes, then drained)
- ¾ cup full-fat coconut cream (the thick part from a chilled can)
- ¼ cup maple syrup (substitute: agave nectar for milder sweetness)
- 2 tablespoons fresh lemon juice
- 1 teaspoon vanilla extract
For the Chocolate Coffee Mixture:
- 1½ cups strong brewed espresso (cooled to room temperature)
- 3 tablespoons unsweetened cocoa powder
- 2 tablespoons maple syrup
- 1 tablespoon coffee liqueur (optional; substitute: additional espresso)
For Assembly:
- 24 vegan ladyfinger cookies (ensure egg-free)
- 2 tablespoons cocoa powder (for dusting)
Substitution note: If cashews aren’t available, use 14 oz silken tofu blended with 2 tablespoons melted coconut oil.
Equipments
- High-speed blender, 2. Mixing bowls (medium and large), 3. Whisk, 4. 8×8-inch baking dish or individual serving glasses, 5. Measuring cups and spoons, 6. Spatula, 7. Fine-mesh sieve for dusting
Step-by-Step Instructions
Step 1: Blend your soaked, drained cashews with coconut cream, maple syrup, lemon juice, and vanilla until completely smooth and silky, scraping down sides as needed. This creates your vegan mascarpone cream.
Step 2: Whisk together the cooled espresso, cocoa powder, maple syrup, and coffee liqueur in a shallow bowl until the cocoa dissolves completely.
Step 3: Quickly dip each ladyfinger into the chocolate coffee mixture for just two seconds per side… they should be moistened but not soggy… then arrange half of them in a single layer in your baking dish.
Step 4: Spread half of the cashew cream mixture evenly over the cookie layer using your spatula, smoothing it to the edges.
Step 5: Repeat the layering process with remaining dipped ladyfingers and cream, creating two complete layers.
Step 6: Cover and refrigerate for at least 4 hours or overnight. Before serving, dust generously with cocoa powder through a fine-mesh sieve.
Final Notes
• This decadent vegan tiramisu develops deeper flavors overnight, allowing the cashew cream to firm beautifully while the ladyfingers absorb the rich espresso-chocolate essence, creating an authentic Italian dessert experience that rivals traditional versions without compromising on creamy, indulgent texture.
6. Dairy-Free Chocolate Lava Cakes
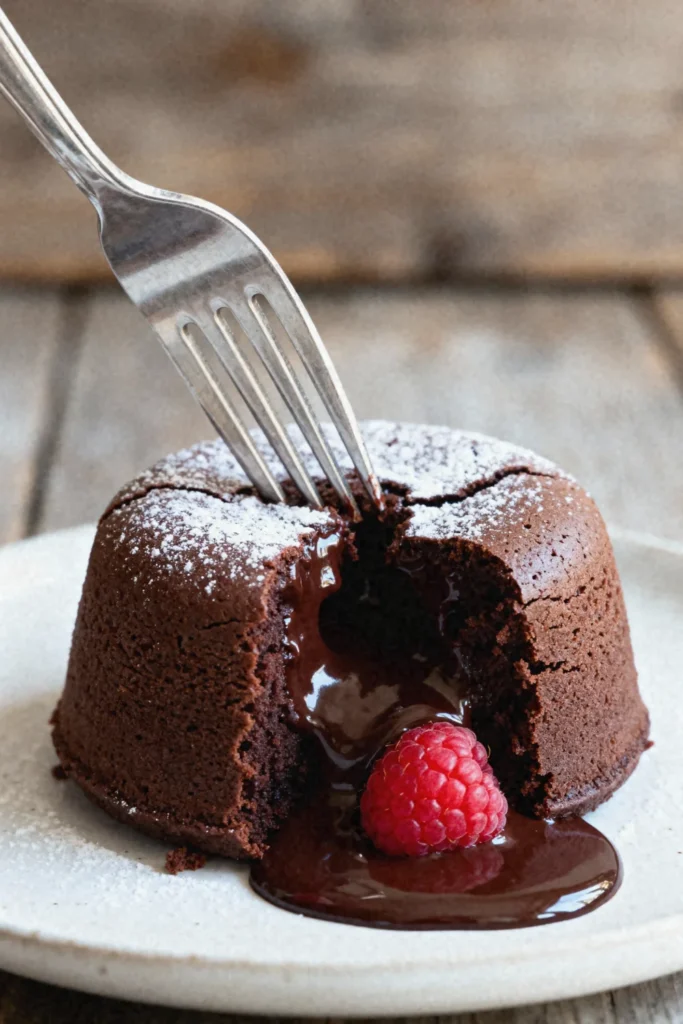
Okay, these require turning on the oven, but they’re still pretty easy. That molten chocolate center though? Absolutely worth it. Perfect for impressing dinner guests or just treating yourself on a Friday night.
Recipe Highlights
✅ Prep Time: 15 min
✅ Cook Time: 12 min
✅ Total Time: 27 min
✅ Servings: 4
✅ Estimated Cost: $10
✅ Calories per Serving: 340
✅ Dietary Info: Vegan, Dairy-Free, Nut-Free Option
Category
✅ Courses: Dessert
✅ Cuisines: French-Inspired
Ingredients
For the Lava Cakes:
- ½ cup dairy-free dark chocolate chips (at least 60% cacao, substitute: chopped vegan chocolate bar)
- ¼ cup vegan butter (substitute: coconut oil for nut-free option)
- ½ cup all-purpose flour (substitute: gluten-free 1:1 baking flour)
- ¼ cup unsweetened cocoa powder
- ½ cup granulated sugar (substitute: coconut sugar for deeper flavor)
- ¼ cup unsweetened almond milk (substitute: oat milk or soy milk for nut-free)
- 2 tablespoons aquafaba (liquid from canned chickpeas)
- 1 teaspoon vanilla extract
- ¼ teaspoon salt
- ¼ teaspoon instant espresso powder (optional, enhances chocolate depth)
For Serving:
- Powdered sugar for dusting (optional)
- Fresh raspberries or vegan vanilla ice cream
Equipments
- Four 6-ounce ramekins, 2. Medium microwave-safe bowl, 3. Large mixing bowl, 4. Whisk, 5. Measuring cups and spoons, 6. Baking sheet, 7. Cooking spray or coconut oil for greasing, 8. Small sifter or fine-mesh strainer
Step-by-Step Instructions
Step 1: Preheat your oven to 425°F and generously grease all four ramekins with vegan butter or coconut oil, then lightly dust with cocoa powder to prevent sticking.
Step 2: Melt the chocolate chips and vegan butter together in a microwave-safe bowl in 20-second intervals, stirring between each until completely smooth and glossy.
Step 3: Whisk together the flour, cocoa powder, sugar, salt, and espresso powder in your large mixing bowl until no lumps remain and everything is evenly distributed.
Step 4: Pour the melted chocolate mixture into the dry ingredients, then add the almond milk, aquafaba, and vanilla extract, whisking vigorously until you achieve a smooth, silky batter.
Step 5: Divide the batter evenly among your prepared ramekins, filling each about three-quarters full, then place them on a baking sheet for easier handling.
Step 6: Bake for exactly 11 to 12 minutes until the edges are set but the centers still jiggle slightly when gently shaken—this creates that signature molten center.
Step 7: Remove from the oven and let rest for one minute, then carefully run a knife around the edges and invert each cake onto serving plates, tapping gently to release.
Final Notes
• The secret to perfect molten centers lies in precise timing and temperature; underbaking slightly ensures that luxurious flowing chocolate core, while the aquafaba provides structure without eggs, creating an indulgent restaurant-quality dessert that proves vegan baking can be absolutely spectacular and impressively elegant.
7. Dark Chocolate Orange Tart (Gluten-Free Crust)
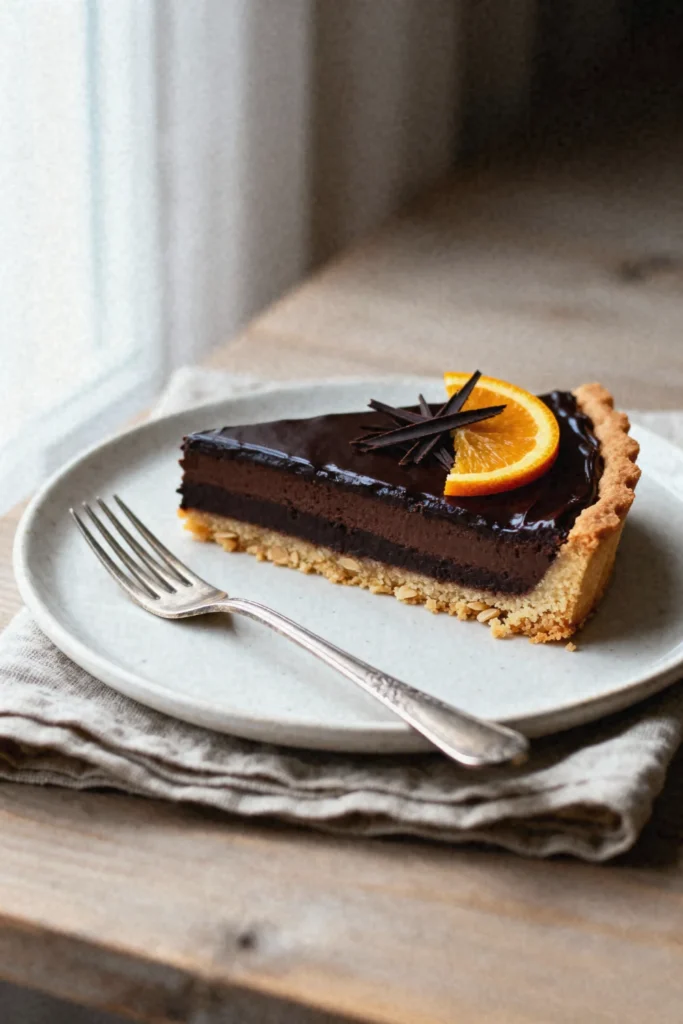
This one’s my showstopper. The combination of dark chocolate and orange is sophisticated and festive. The gluten-free almond crust adds this amazing nutty flavor. It looks like you spent hours but it’s surprisingly straightforward.
Recipe Highlights
✅ Prep Time: 20 min
✅ Cook Time: 25 min
✅ Total Time: 3 hours 45 min (includes chilling)
✅ Servings: 8
✅ Estimated Cost: $16
✅ Calories per Serving: 395
✅ Dietary Info: Vegan, Gluten-Free, Refined Sugar-Free Option
Category
✅ Courses: Dessert
✅ Cuisines: French-Inspired
Ingredients
For the Gluten-Free Crust:
- 1½ cups almond flour (substitute: oat flour for nut-free, though texture will differ)
- ½ cup gluten-free oat flour
- ¼ cup coconut oil, melted (substitute: vegan butter for richer flavor)
- 3 tablespoons maple syrup (substitute: agave nectar)
- 2 tablespoons cocoa powder
- ¼ teaspoon salt
- 1 teaspoon vanilla extract
For the Dark Chocolate Orange Filling:
- 1½ cups full-fat coconut cream (the thick part from two chilled cans)
- 10 ounces dairy-free dark chocolate, finely chopped (70% cacao recommended)
- Zest of 2 large oranges
- 3 tablespoons fresh orange juice
- 2 tablespoons maple syrup
- 1 teaspoon vanilla extract
- Pinch of sea salt
For Garnish:
- Orange slices, candied or fresh
- Dark chocolate shavings
Equipments
- 9-inch tart pan with removable bottom, 2. Food processor or large mixing bowl, 3. Medium saucepan, 4. Whisk, 5. Microplane or fine zester, 6. Measuring cups and spoons, 7. Spatula, 8. Parchment paper
Step-by-Step Instructions
Step 1: Begin by preheating your oven to 350°F, which ensures the crust will bake evenly. In your food processor, pulse together the almond flour, oat flour, cocoa powder, and salt until everything is uniformly combined and any clumps have disappeared.
Step 2: Add the melted coconut oil, maple syrup, and vanilla extract to your dry ingredients, then pulse until the mixture resembles wet sand and holds together when you press it between your fingers. This texture is crucial because it means the crust will bind properly during baking.
Step 3: Press this mixture firmly and evenly into your tart pan, working from the center outward and up the sides, making sure the thickness is consistent throughout. Use the bottom of a measuring cup to create a smooth, compact surface that will hold its shape beautifully.
Step 4: Bake the crust for fifteen minutes until it becomes fragrant and feels set to the touch, then allow it to cool completely on a wire rack while you prepare the filling.
Step 5: Heat the coconut cream in your saucepan over medium heat until it just begins to simmer with tiny bubbles around the edges, then remove from heat immediately and add the chopped chocolate, stirring patiently until it melts into a glossy ganache.
Step 6: Whisk in the orange zest, orange juice, maple syrup, vanilla, and sea salt, combining everything until the filling becomes silky and aromatic with that distinctive citrus perfection.
Step 7: Pour this luscious filling into your cooled crust, smoothing the top gently with your spatula, then refrigerate for at least three hours until the chocolate sets to a firm yet creamy consistency that slices beautifully.
Final Notes
• The marriage of dark chocolate and orange creates a sophisticated flavor profile that has captivated dessert lovers for centuries, while the gluten-free almond crust adds a delicate nuttiness that complements rather than competes, making this tart an elegant centerpiece for celebrations or a luxurious everyday indulgence.

Hi, I’m Aldvin Gomes, a passionate vegan and foodie on a mission to make plant-based eating effortless and exciting. I share new vegan recipes every day, so you never have to stress about what to cook. Whether you’re a longtime vegan or just exploring plant-based meals, my goal is to keep your plate full of delicious, wholesome, and easy-to-make dishes. I’m here to help you enjoy every bite. Join me in exploring the endless possibilities of vegan cooking, one delicious recipe at a time!