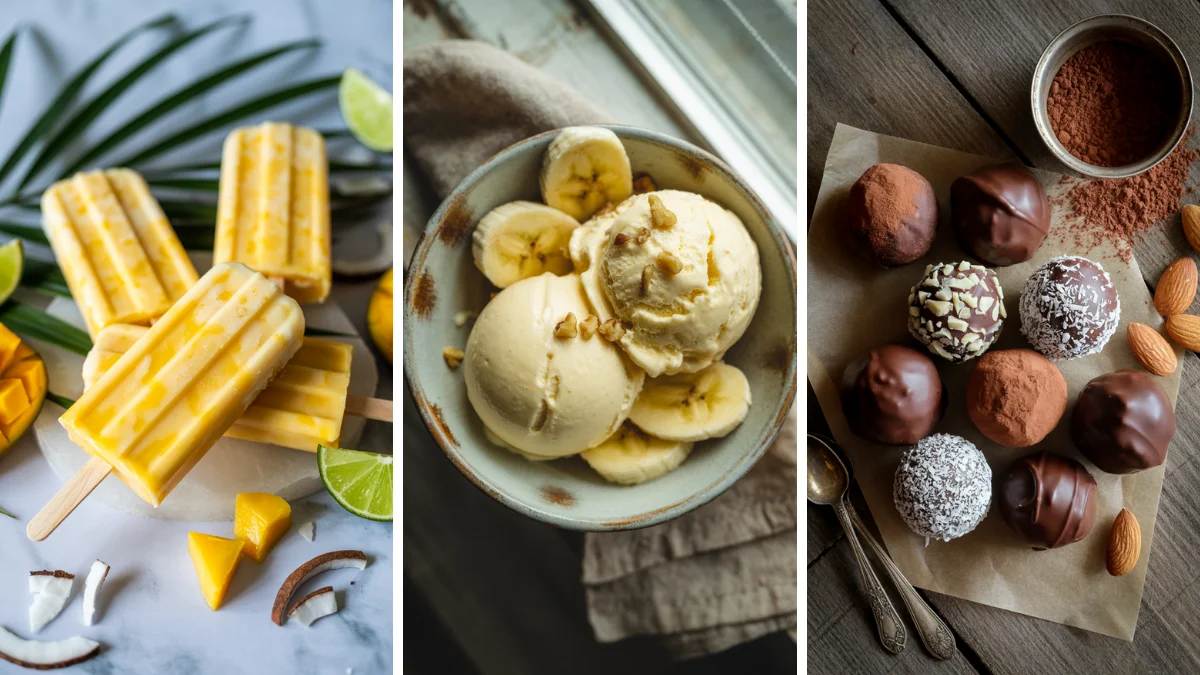
Easy vegan desserts aren’t just possible – they’re absolutely divine, and I’m about to prove every sweet tooth skeptic wrong with these incredible recipes.
I’ll be honest with you. Five years ago, I thought “vegan dessert” was basically an oxymoron. How wrong I was!
My journey into plant-based baking started when my sister went vegan and I desperately wanted to make her birthday cake special. That first attempt? Let’s just say the frosting looked more like cement than cream.
But here’s the thing about vegan desserts – once you crack the code, they’re often easier than traditional recipes. No eggs to worry about. No butter to soften perfectly. Just pure, simple ingredients creating magic.
These eleven recipes changed everything for me. From rich chocolate avocado mousse that’ll fool any dairy lover to banana ice cream that’s creamier than the real deal, each dessert tells a story of discovery.
Some use aquafaba (that mysterious chickpea liquid). Others rely on dates for natural sweetness. All of them prove that plant-based treats can be indulgent, satisfying, and surprisingly simple.
Must-See: Unique Vegan Dessert Recipes.
11 Easy Vegan Desserts
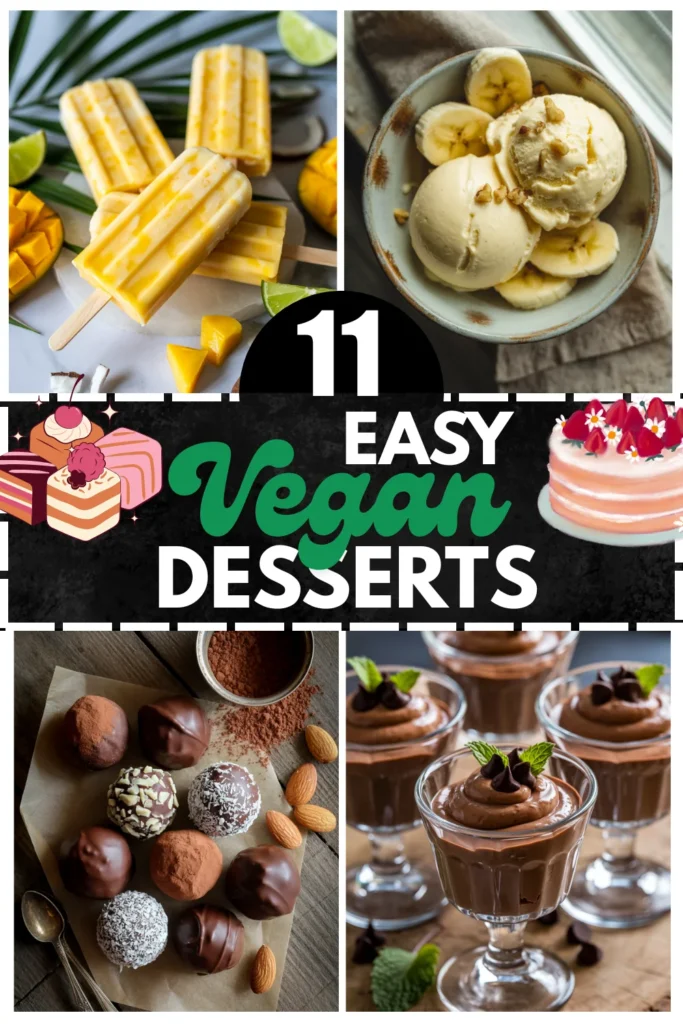
Ready to transform your dessert game? Let’s dive into these foolproof vegan sweets that’ll have everyone asking for seconds – and the recipes.
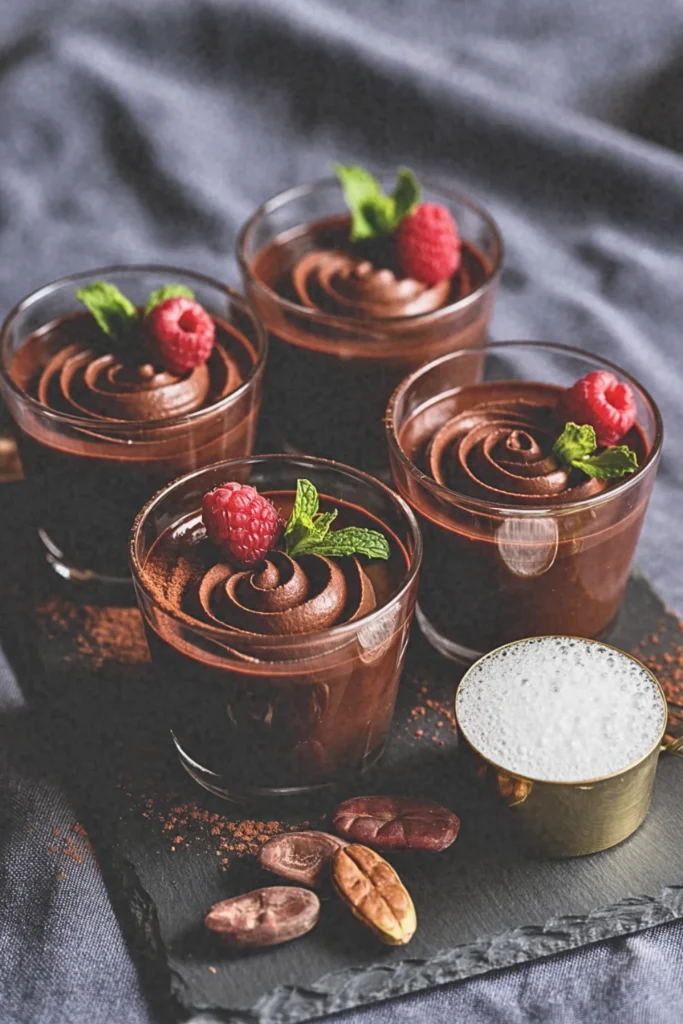
1. Creamy Chocolate Avocado Mousse
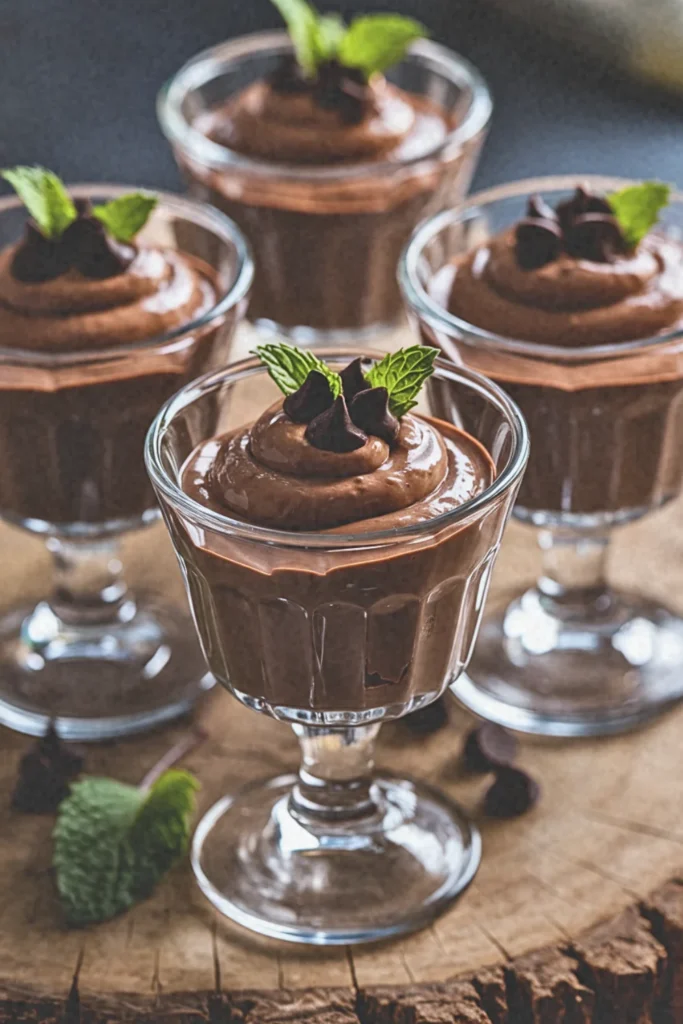
This silky dessert transforms ripe avocados into an incredibly rich, pudding-like treat. The natural fats create that luxurious mouthfeel while cocoa powder provides deep chocolate intensity. It’s secretly packed with healthy monounsaturated fats and fiber.
Recipe Highlights (Quick Glance Section)
✅ Prep Time: 10 min
✅ Cook Time: 0 min
✅ Total Time: 10 min
✅ Servings: 4
✅ Estimated Cost: $8
✅ Calories per Serving: 185
✅ Dietary Info: Vegan, Gluten-Free, Raw, Dairy-Free
Category
✅ Courses: Dessert
✅ Cuisines: American
Ingredients
Understanding the science behind these ingredients helps explain why this mousse works so beautifully. The avocados provide natural fats that create that signature creamy texture, while dates contribute fiber and natural sweetness that balances the cocoa’s slight bitterness.
- 2 large ripe avocados (about 8 oz total) substitute: silken tofu for nut-free option
- 4 Medjool dates, pitted and soaked substitute: 3 tablespoons maple syrup
- 3 tablespoons unsweetened cocoa powder substitute: cacao powder for richer flavor
- 3 tablespoons almond milk substitute: any plant milk of choice
- 1 teaspoon vanilla extract
- 1/4 teaspoon sea salt
- 2 tablespoons dark chocolate chips for garnish optional
Equipment
- High-speed blender or food processor, 2. Measuring cups and spoons, 3. Four serving glasses or bowls, 4. Rubber spatula for scraping
Step-by-Step Instructions
Step 1: If your dates feel hard, soak them in warm water for 10 minutes to soften completely. This ensures they’ll blend smoothly without leaving any chunks in your finished mousse.
Step 2: Cut avocados in half, remove pits, and scoop flesh into your blender. The avocados should yield easily to gentle pressure when ripe, indicating they’ll create that silky texture we’re after.
Step 3: Add drained dates, cocoa powder, almond milk, vanilla extract, and sea salt to the blender with your avocados.
Step 4: Blend on high speed for 60-90 seconds until the mixture becomes completely smooth and creamy. Stop occasionally to scrape down sides with your spatula.
Step 5: Taste and adjust sweetness or chocolate intensity as needed by adding more dates or cocoa powder.
Step 6: Divide mousse evenly between four serving glasses and chill for at least 30 minutes before serving.
Step 7: Garnish with chocolate chips or fresh berries just before serving for added texture contrast.
Final Notes
• This mousse actually improves in flavor after refrigerating overnight, allowing the cocoa and vanilla notes to meld beautifully while the texture becomes even more luxurious.
2. No-Bake Peanut Butter Energy Balls
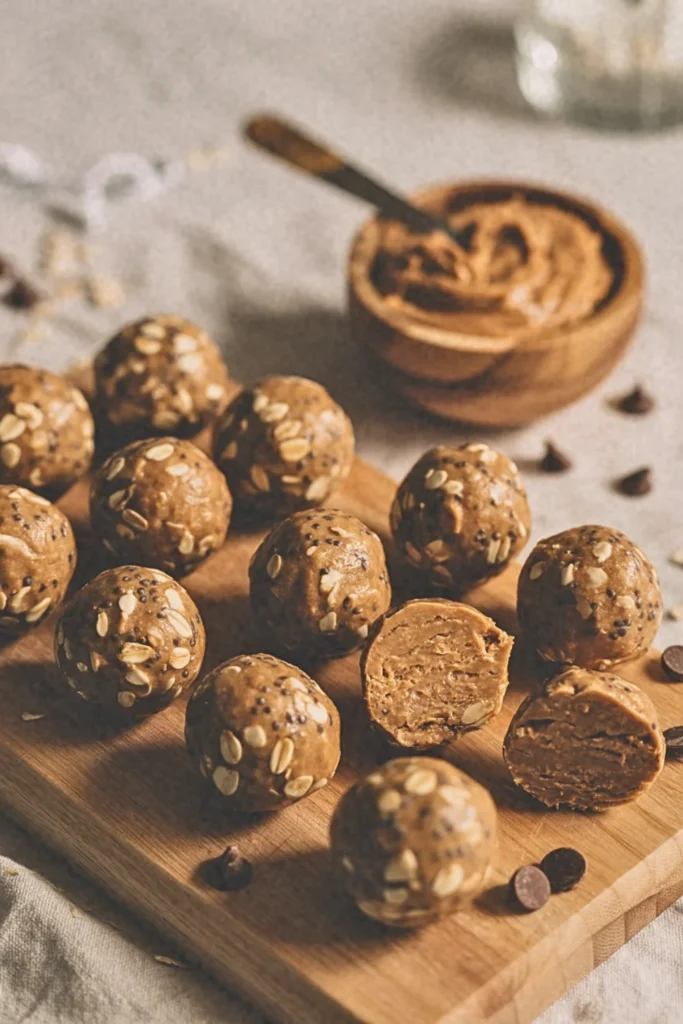
These bite-sized gems combine the protein power of natural peanut butter with the natural sweetness of dates. They satisfy sugar cravings while providing sustained energy, making them perfect for afternoon snacking or post-workout treats.
Recipe Highlights (Quick Glance Section)
✅ Prep Time: 15 min
✅ Cook Time: 0 min
✅ Total Time: 15 min
✅ Servings: 12 balls
✅ Estimated Cost: $6
✅ Calories per Serving: 145
✅ Dietary Info: Vegan, Gluten-Free, High-Protein, No-Bake
Category
✅ Courses: Snack
✅ Cuisines: American
Ingredients
These energy balls work through the natural binding properties of dates and nut butter. The dates contain natural sugars and pectin that help hold everything together, while the peanut butter provides both protein and healthy fats that create sustained energy release.
- 1 cup pitted Medjool dates (about 12 dates) substitute: dried figs for lower sugar option
- 1/2 cup natural peanut butter substitute: almond butter or sunflower seed butter
- 1/3 cup old-fashioned rolled oats substitute: quinoa flakes for grain-free version
- 2 tablespoons chia seeds substitute: ground flaxseed for omega-3 boost
- 2 tablespoons unsweetened cocoa powder substitute: protein powder for extra protein
- 1 teaspoon vanilla extract
- 1/4 teaspoon sea salt
- 2 tablespoons mini dark chocolate chips optional
Equipment
- Food processor or high-speed blender, 2. Large mixing bowl, 3. Cookie scoop or tablespoon for portioning, 4. Airtight storage container
Step-by-Step Instructions
Step 1: Check that your dates feel soft and pliable. If they seem dry or hard, soak them in warm water for ten minutes to rehydrate their natural moisture, which is essential for proper binding.
Step 2: Add dates to your food processor and pulse until they form a thick, sticky paste. This paste becomes the foundation that holds your energy balls together naturally.
Step 3: Add peanut butter, oats, chia seeds, cocoa powder, vanilla, and salt to the date paste. Process until the mixture combines into a cohesive dough that holds together when pressed.
Step 4: Transfer the mixture to your mixing bowl and fold in chocolate chips if using. The dough should feel slightly sticky but manageable.
Step 5: Using damp hands to prevent sticking, roll the mixture into twelve evenly-sized balls, each about one tablespoon of dough.
Step 6: Place finished balls on a plate and refrigerate for thirty minutes to firm up their texture before serving or storing.
Final Notes
• Store these energy balls in the refrigerator for up to one week, where they’ll maintain their perfect chewy texture and concentrated flavors.
3. Banana Ice Cream (Nice Cream)
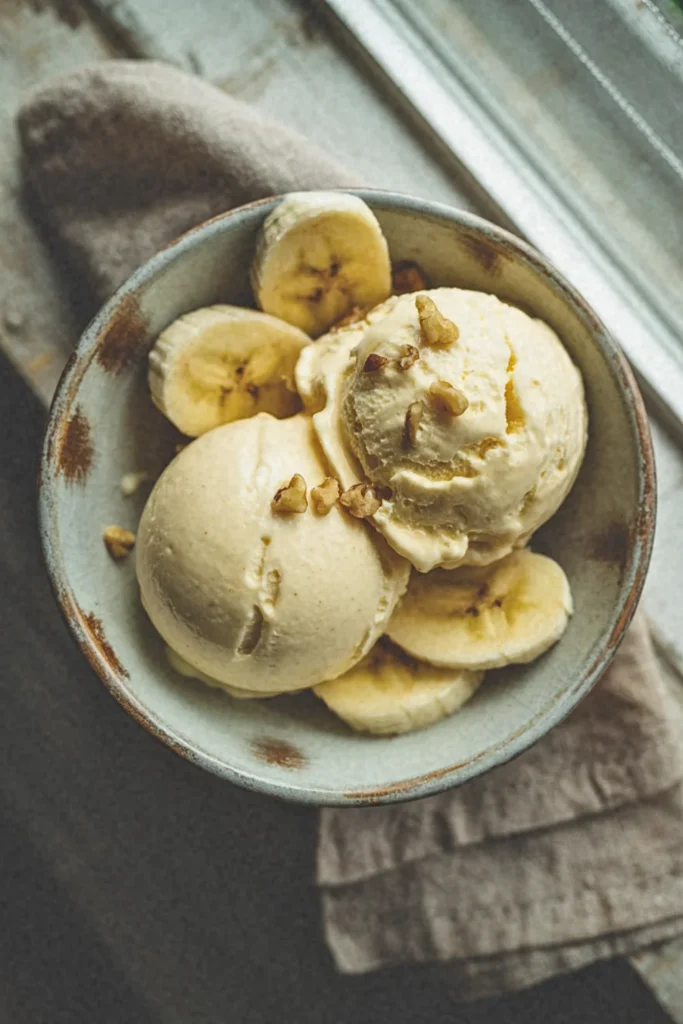
Frozen bananas whip into creamy, soft-serve consistency with just a food processor. This one-ingredient wonder proves that nature’s sweetness often surpasses artificial alternatives. The potassium and fiber are welcome bonuses.
Recipe Highlights (Quick Glance Section)
✅ Prep Time: 5 min
✅ Cook Time: 0 min
✅ Total Time: 5 min (plus freezing time)
✅ Servings: 2
✅ Estimated Cost: $3
✅ Calories per Serving: 105
✅ Dietary Info: Vegan, Gluten-Free, Raw, Sugar-Free, One-Ingredient
Category
✅ Courses: Dessert
✅ Cuisines: American
Ingredients
The magic behind nice cream lies in understanding how frozen bananas behave when processed. When bananas freeze, their cell walls break down, and the natural starches convert to sugars. During blending, these broken cells release their creamy interior, creating a texture that remarkably mimics traditional ice cream without any dairy or added sugars.
- 3 large ripe bananas, sliced and frozen overnight substitute: frozen mango chunks for tropical variation
- 1-3 tablespoons plant milk, as needed substitute: coconut milk for extra richness
Optional flavor variations:
- 1 tablespoon cocoa powder for chocolate version
- 1/2 teaspoon vanilla extract for enhanced sweetness
- 2 tablespoons peanut butter for nutty richness
Equipment
- High-powered food processor or blender, 2. Sharp knife for slicing bananas, 3. Freezer-safe container or bag, 4. Ice cream scoop for serving, 5. Serving bowls
Step-by-Step Instructions
Step 1: Begin by selecting bananas that have developed brown spots, which indicates their starches have converted to natural sugars. Peel and slice them into coin-sized pieces, then freeze for at least four hours or overnight. This freezing process is crucial because it breaks down the banana’s cellular structure.
Step 2: Remove frozen banana slices from the freezer and let them sit for two to three minutes. This slight thawing prevents your food processor from overworking and helps achieve smoother blending.
Step 3: Add frozen banana pieces to your food processor and begin pulsing. Initially, the mixture will look crumbly and chunky, resembling coarse breadcrumbs. This is completely normal and expected.
Step 4: Continue processing, stopping occasionally to scrape down the sides. Gradually, the bananas will transform from crumbs to a thick paste, then finally into smooth, creamy ice cream consistency.
Step 5: If the mixture seems too thick to process smoothly, add plant milk one tablespoon at a time until it reaches your desired consistency. The goal is soft-serve texture.
Step 6: For immediate consumption, serve directly from the food processor. For firmer ice cream, transfer to a container and freeze for thirty minutes before scooping.
Final Notes
• Nice cream tastes best when consumed fresh, as refreezing creates ice crystals that compromise the smooth, creamy texture that makes this dessert so remarkable.
4. Coconut Chia Pudding Parfait
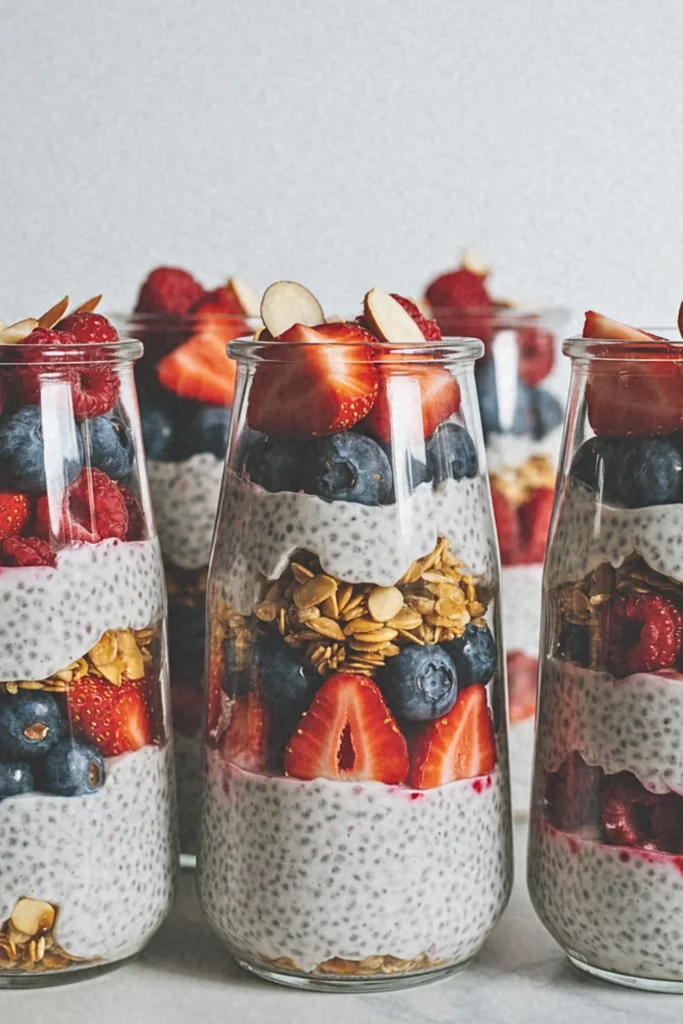
Chia seeds expand overnight in coconut milk, creating a tapioca-like texture that’s surprisingly indulgent. These tiny seeds pack omega-3 fatty acids, protein, and fiber into every spoonful while the coconut adds tropical richness.
Recipe Highlights (Quick Glance Section)
✅ Prep Time: 10 min
✅ Cook Time: 0 min
✅ Total Time: 4 hours (including chilling time)
✅ Servings: 4
✅ Estimated Cost: $9
✅ Calories per Serving: 220
✅ Dietary Info: Vegan, Gluten-Free, High-Fiber, Omega-3 Rich
Category
✅ Courses: Breakfast, Dessert
✅ Cuisines: Modern American
Ingredients
Understanding chia seeds helps explain why this pudding works so beautifully. When chia seeds come into contact with liquid, their outer coating becomes gelatinous, absorbing up to twelve times their weight in liquid. This natural thickening property transforms simple coconut milk into a luxurious pudding without requiring any cooking or artificial thickeners.
- 1/3 cup chia seeds substitute: ground flaxseed for similar nutritional benefits, though texture will differ
- 1 1/2 cups full-fat canned coconut milk substitute: cashew milk for lighter option
- 3 tablespoons maple syrup substitute: agave nectar or date syrup
- 1 teaspoon vanilla extract
- 1/4 teaspoon sea salt
For layering:
- 1 cup fresh mixed berries substitute: frozen berries, thawed and drained
- 1/2 cup granola or toasted coconut flakes
- 2 tablespoons sliced almonds
Equipment
- Large mixing bowl for combining ingredients, 2. Whisk for thorough blending, 3. Four tall glasses or mason jars for layering, 4. Measuring cups and spoons, 5. Refrigerator space for overnight chilling
Step-by-Step Instructions
Step 1: Begin by whisking together coconut milk, maple syrup, vanilla extract, and sea salt in your mixing bowl. This initial blending ensures that the sweetener dissolves completely and creates an even flavor base throughout your pudding. The coconut milk should be at room temperature to prevent the maple syrup from crystallizing.
Step 2: Add chia seeds to your coconut milk mixture and whisk vigorously for at least two minutes. This thorough mixing prevents the seeds from clumping together, which would create an uneven texture in your finished pudding. The seeds should be evenly distributed throughout the liquid.
Step 3: Continue whisking every ten minutes for the first hour, then refrigerate the mixture for at least three hours or overnight. During this time, the chia seeds will absorb the coconut milk and swell to create that characteristic tapioca-like texture that makes this pudding so satisfying.
Step 4: Once your pudding has reached the proper consistency, give it a final stir to break up any remaining clumps. The texture should be thick and creamy, similar to traditional tapioca pudding.
Step 5: Create your parfait layers by spooning pudding into glasses, followed by berries, then granola, and repeating until glasses are filled. This layering technique creates visual appeal while providing textural contrast between creamy pudding, juicy fruit, and crunchy toppings.
Step 6: Top each parfait with sliced almonds and serve immediately, or refrigerate for up to two days for meal prep convenience.
Final Notes
• The pudding continues thickening over time, so add a splash of coconut milk before serving if the consistency becomes too dense after extended refrigeration.
5. Raw Cashew Cheesecake Bites
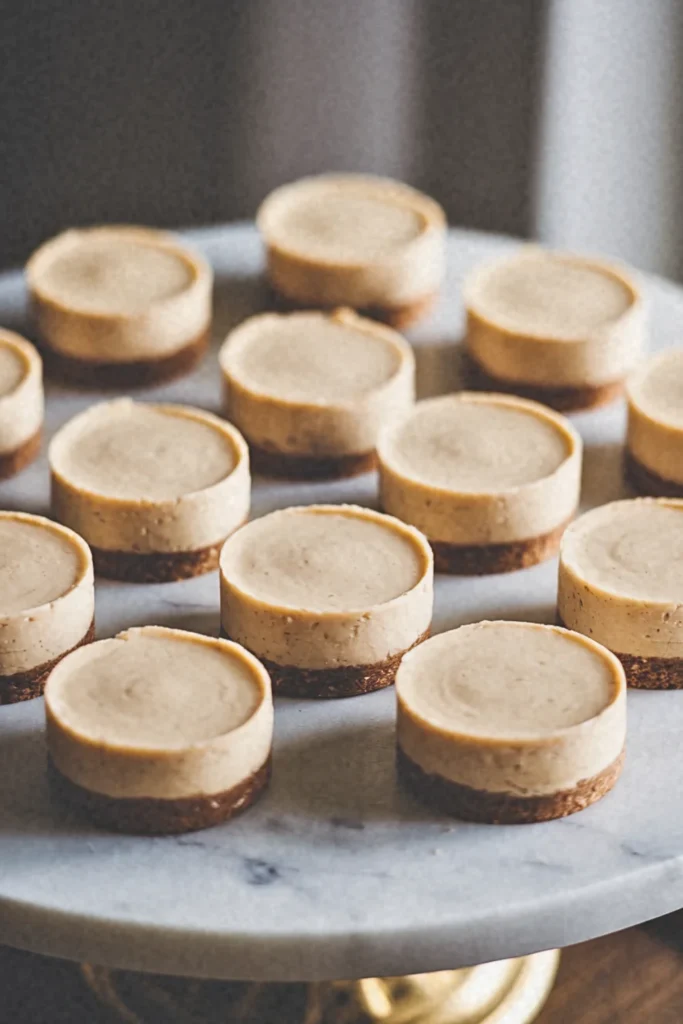
Soaked cashews blend into incredibly smooth, cream cheese-like consistency. These no-bake treats offer plant-based protein and healthy fats while satisfying that classic cheesecake craving without any dairy or refined sugars.
Recipe Highlights (Quick Glance Section)
✅ Prep Time: 20 min
✅ Cook Time: 0 min
✅ Total Time: 4 hours (including chilling time)
✅ Servings: 12 bites
✅ Estimated Cost: $14
✅ Calories per Serving: 165
✅ Dietary Info: Vegan, Raw, Gluten-Free, Dairy-Free, No-Bake
Category
✅ Courses: Dessert
✅ Cuisines: Modern American
Ingredients
The science behind these cheesecake bites lies in understanding how cashews transform when soaked and blended. Raw cashews contain natural starches and proteins that, when hydrated and processed with acidic ingredients like lemon juice, create an incredibly smooth, cream cheese-like consistency. The coconut oil acts as a binding agent that solidifies when chilled, giving these bites their firm yet creamy texture that rivals traditional dairy cheesecake.
For the crust:
- 1 cup pitted Medjool dates substitute: dried figs for lower sugar content
- 1 cup raw almonds substitute: pecans or walnuts for different flavor profiles
- 2 tablespoons coconut oil, melted
- 1/4 teaspoon sea salt
For the filling:
- 2 cups raw cashews, soaked 4 hours substitute: soaked macadamia nuts for ultra-rich texture
- 1/3 cup fresh lemon juice substitute: lime juice for tropical variation
- 1/4 cup coconut oil, melted
- 1/4 cup maple syrup substitute: agave nectar for neutral sweetness
- 1 teaspoon vanilla extract
- 1/4 teaspoon sea salt
Equipment
- High-speed blender or food processor, 2. Mini muffin tin (12-cup capacity), 3. Paper liners or silicone molds, 4. Measuring cups and spoons, 5. Fine-mesh strainer for soaking cashews
Step-by-Step Instructions
Step 1: Begin by soaking your cashews in filtered water for at least four hours or overnight. This soaking process softens the nuts completely, allowing them to blend into that signature silky smooth texture that makes raw cheesecake so remarkable. Properly soaked cashews should yield easily when pressed between your fingers.
Step 2: Create your crust by processing dates and almonds in your food processor until they form a sticky, cohesive mixture that holds together when pressed. The dates provide natural sweetness while acting as a binding agent, and the almonds contribute healthy fats and a satisfying crunch that contrasts beautifully with the creamy filling.
Step 3: Add melted coconut oil and salt to your crust mixture, pulsing just until combined. Press this mixture firmly into the bottom of your lined mini muffin cups, creating an even layer that will support the creamy filling above.
Step 4: Drain and rinse your soaked cashews thoroughly, then add them to your clean food processor along with lemon juice, melted coconut oil, maple syrup, vanilla extract, and salt. Process for several minutes until the mixture becomes completely smooth and creamy, stopping to scrape down sides as needed.
Step 5: Divide the cashew filling evenly among your prepared muffin cups, smoothing the tops with a spoon. The filling should completely cover the crust layer while leaving a small border at the top of each cup.
Step 6: Freeze the cheesecake bites for at least three hours until they become firm enough to remove from the molds easily and hold their shape when served.
Final Notes
- These cheesecake bites develop deeper flavors after overnight chilling, as the lemon juice continues to brighten the cashew base while the vanilla notes become more pronounced throughout the creamy filling.
6. Oat Flour Chocolate Chip Cookies
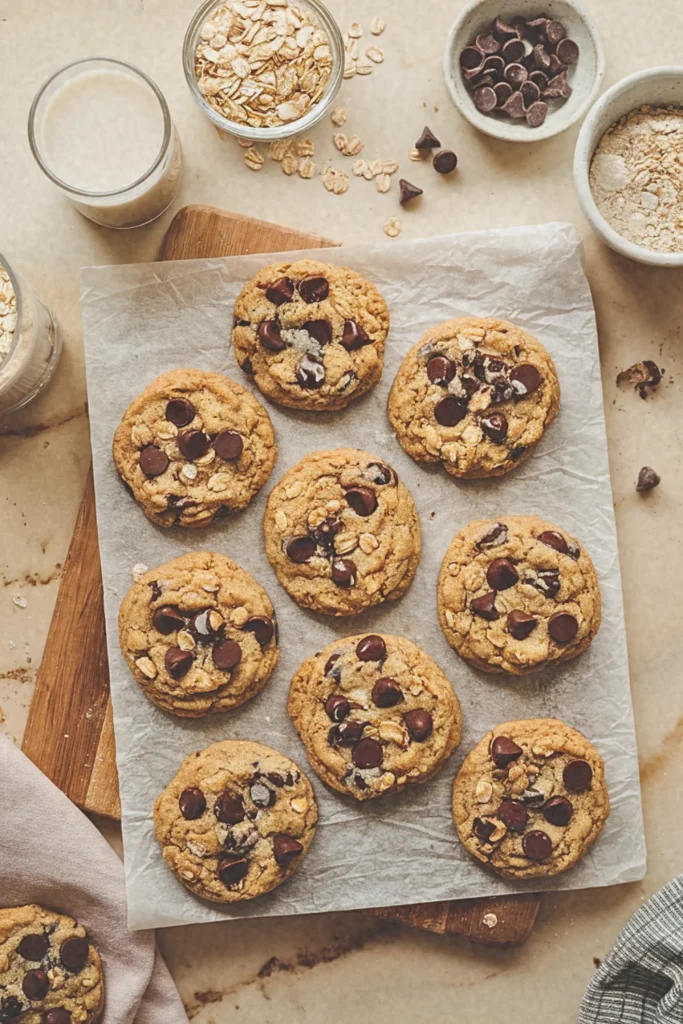
Ground oats create naturally gluten-free flour that produces tender, chewy cookies. The soluble fiber helps regulate blood sugar while still delivering that nostalgic cookie experience everyone craves.
Recipe Highlights (Quick Glance Section)
✅ Prep Time: 15 min
✅ Cook Time: 12 min
✅ Total Time: 27 min
✅ Servings: 18 cookies
✅ Estimated Cost: $8
✅ Calories per Serving: 145
✅ Dietary Info: Vegan, Naturally Gluten-Free, Refined Sugar-Free
Category
✅ Courses: Dessert, Snacks
✅ Cuisines: American
Ingredients
- 2 cups oat flour (or blend 2½ cups rolled oats until fine; substitute: almond flour)
- ½ cup coconut sugar (substitute: brown sugar or maple syrup)
- ½ teaspoon baking soda
- ½ teaspoon salt
- ½ teaspoon vanilla extract
- ⅓ cup melted coconut oil (substitute: vegan butter)
- 3 tablespoons non-dairy milk (almond or oat milk work best)
- ¾ cup vegan dark chocolate chips (substitute: cacao nibs or chopped dark chocolate)
Equipment
- Large mixing bowl, 2. Medium bowl, 3. Whisk, 4. Measuring cups and spoons, 5. Baking sheet, 6. Parchment paper, 7. Cookie scoop or tablespoon, 8. Food processor (if making oat flour from scratch), 9. Wire cooling rack
Step-by-Step Instructions
Step 1: Preheat your oven to 350°F (175°C) and line a baking sheet with parchment paper. This temperature creates the perfect balance between crispy edges and chewy centers.
Step 2: If making oat flour from scratch, pulse rolled oats in a food processor for 30-60 seconds until they form a fine flour consistency. Sift to remove any large pieces.
Step 3: In your large bowl, whisk together oat flour, coconut sugar, baking soda, and salt. This dry mixture forms the foundation that gives structure to your cookies.
Step 4: In the medium bowl, combine melted coconut oil, non-dairy milk, and vanilla extract. The coconut oil should be liquid but not hot, as extreme heat can affect the flour’s binding properties.
Step 5: Pour the wet ingredients into the dry mixture and stir until just combined. The dough should hold together without being overly sticky.
Step 6: Fold in chocolate chips gently, ensuring even distribution throughout the dough for consistent flavor in every bite.
Step 7: Using a cookie scoop, drop rounded tablespoons of dough onto the prepared baking sheet, spacing them 2 inches apart to allow for spreading.
Step 8: Bake for 10-12 minutes until edges are lightly golden. Centers may appear slightly underdone, but they’ll continue cooking on the hot pan.
Step 9: Cool on the baking sheet for 5 minutes before transferring to a wire rack to prevent breaking.
Final Notes
• These cookies develop better texture and flavor after cooling completely, as oat flour continues absorbing moisture and the flavors meld together beautifully.
7. Aquafaba Chocolate Mousse
The liquid from canned chickpeas whips into surprising peaks, creating an airy mousse base. This innovative technique proves that plant-based cooking can be both scientifically fascinating and deliciously satisfying.
Recipe Highlights (Quick Glance Section)
✅ Prep Time: 25 min
✅ Cook Time: 0 min
✅ Total Time: 3 hours 25 min (includes chilling)
✅ Servings: 4
✅ Estimated Cost: $6
✅ Calories per Serving: 220
✅ Dietary Info: Vegan, Gluten-Free, Dairy-Free, Refined Sugar-Free
Category
✅ Courses: Dessert
✅ Cuisines: French
Ingredients
- ½ cup aquafaba (liquid from one 15-oz can of chickpeas; must be thick and viscous; substitute: commercial aquafaba powder reconstituted)
- ¼ teaspoon cream of tartar (substitute: 1 teaspoon lemon juice for stability)
- 6 oz dark chocolate (70% cocoa), melted and cooled slightly (substitute: vegan chocolate chips)
- 3 tablespoons maple syrup (substitute: agave or coconut nectar)
- 1 teaspoon vanilla extract
- Pinch of sea salt
- 2 tablespoons coconut cream, chilled (substitute: cashew cream for richness)
Equipment
- Stand mixer or hand mixer with whisk attachment, 2. Large mixing bowl, 3. Medium microwave-safe bowl, 4. Fine-mesh strainer, 5. Rubber spatula, 6. Four serving glasses or ramekins, 7. Measuring cups and spoons, 8. Double boiler or microwave, 9. Refrigerator space for chilling
Step-by-Step Instructions
Step 1: Chill your mixing bowl and whisk attachment in the freezer for 15 minutes. Cold equipment helps aquafaba whip more effectively, creating better volume and stability in your mousse base.
Step 2: Strain aquafaba through a fine-mesh strainer to remove any chickpea particles. The liquid should be thick and slightly viscous, resembling raw egg whites in consistency for optimal whipping results.
Step 3: Melt chocolate using a double boiler or microwave in 30-second intervals, stirring between each interval until smooth. Allow to cool for 5 minutes, as hot chocolate will deflate your whipped aquafaba.
Step 4: In your chilled bowl, whip aquafaba with cream of tartar using high speed for 8-12 minutes until stiff peaks form. The mixture should triple in volume and hold its shape when the whisk is lifted.
Step 5: While continuing to whip on medium speed, slowly drizzle in maple syrup and vanilla extract. This gradual addition prevents deflating the delicate foam structure you’ve created.
Step 6: Reduce mixer speed to low and carefully stream in the cooled melted chocolate. Mix just until combined, as overmixing will break down the airy texture that makes mousse special.
Step 7: Gently fold in chilled coconut cream and sea salt using a rubber spatula, using lifting motions rather than stirring to preserve maximum volume in your mousse.
Step 8: Divide mixture evenly among four serving glasses or ramekins, creating elegant individual portions for presentation.
Step 9: Refrigerate for at least 3 hours or overnight until completely set. The mousse will firm up significantly during chilling, developing its characteristic creamy yet airy texture.
Final Notes
• Aquafaba quality varies by brand; choose thick, viscous liquid from chickpeas for best whipping results and most stable mousse texture.
8. Date and Walnut Brownies
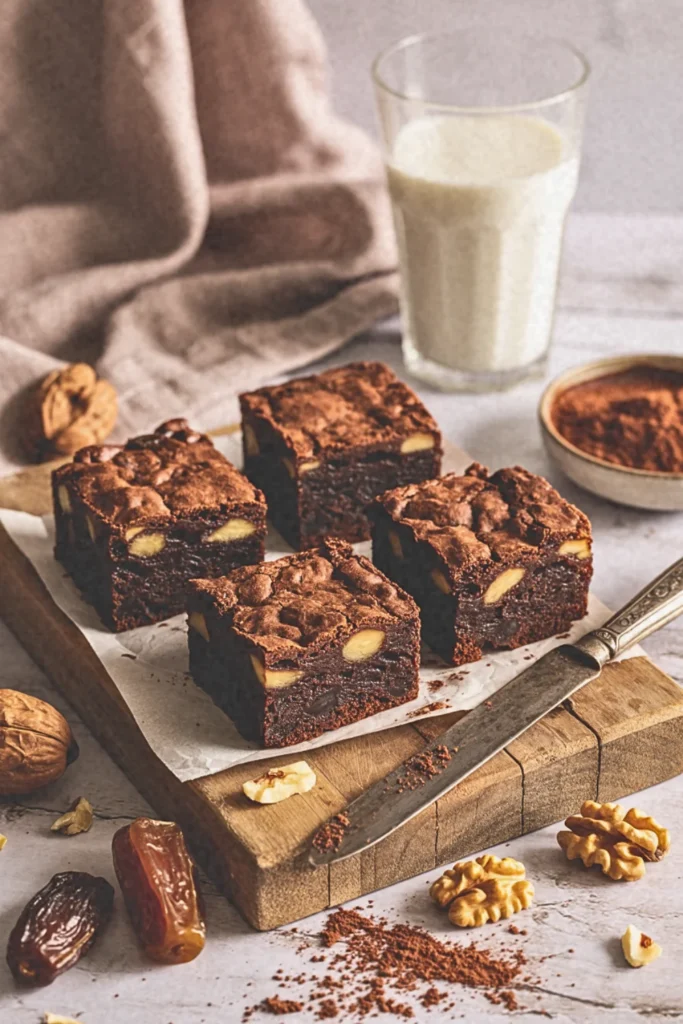
Medjool dates provide intense sweetness and binding properties while walnuts contribute healthy omega-3s and satisfying crunch. These fudgy squares prove that whole food ingredients can create decadent results.
Recipe Highlights (Quick Glance Section)
✅ Prep Time: 20 min
✅ Cook Time: 28 min
✅ Total Time: 48 min
✅ Servings: 16 squares
✅ Estimated Cost: $10
✅ Calories per Serving: 185
✅ Dietary Info: Vegan, Refined Sugar-Free, High-Fiber, Naturally Sweetened
Category
✅ Courses: Dessert, Snacks
✅ Cuisines: American
Ingredients
- 1½ cups pitted Medjool dates, soaked in warm water for 15 minutes (substitute: dried figs or prunes for different flavor profiles)
- 1 cup raw walnuts, roughly chopped (substitute: pecans or almonds for varied texture)
- ½ cup unsweetened cocoa powder (substitute: cacao powder for more intense chocolate flavor)
- 1 cup whole wheat flour (substitute: oat flour for gluten-free option)
- ½ teaspoon baking powder
- ½ teaspoon salt
- ⅓ cup unsweetened applesauce (substitute: mashed banana for binding)
- ¼ cup melted coconut oil (substitute: avocado oil for neutral taste)
- 1 teaspoon vanilla extract
- ½ cup non-dairy milk (almond or oat work best)
Equipment
- 8×8 inch baking pan, 2. Parchment paper, 3. Food processor, 4. Large mixing bowl, 5. Medium bowl, 6. Wire whisk, 7. Rubber spatula, 8. Measuring cups and spoons, 9. Fine-mesh strainer, 10. Wire cooling rack
Step-by-Step Instructions
Step 1: Begin by preheating your oven to 350°F (175°C) and line your baking pan with parchment paper, leaving some overhang for easy removal. This temperature creates the ideal environment for fudgy brownies without burning the natural sugars from dates.
Step 2: Drain your soaked dates thoroughly and process them in the food processor until they form a smooth, thick paste. This natural sweetener provides not only sweetness but also acts as a binding agent, replacing eggs in traditional brownie recipes.
Step 3: In your large mixing bowl, whisk together cocoa powder, flour, baking powder, and salt. Understanding this step is crucial because properly combining dry ingredients ensures even distribution and prevents pockets of concentrated flavors or textures.
Step 4: Create your wet mixture by combining the date paste, applesauce, melted coconut oil, vanilla extract, and non-dairy milk in the medium bowl. The applesauce works synergistically with the dates to provide moisture and structure that eggs would typically provide.
Step 5: Pour the wet ingredients into the dry mixture and stir just until combined, being careful not to overmix. Overmixing develops gluten in the flour, which would create tough, chewy brownies rather than the tender, fudgy texture we desire.
Step 6: Fold in the chopped walnuts using gentle lifting motions with your spatula. This technique preserves the nuts’ integrity while ensuring even distribution throughout the batter for consistent texture in every bite.
Step 7: Spread the thick batter evenly in your prepared pan, using the back of your spatula to smooth the surface. The batter will be notably thicker than conventional brownies due to the date paste’s density.
Step 8: Bake for 25-28 minutes until a toothpick inserted in the center comes out with a few moist crumbs clinging to it. This indicates perfect doneness while maintaining the fudgy interior that makes these brownies special.
Step 9: Allow the brownies to cool completely in the pan before cutting, as this cooling period allows the natural sugars to set properly and creates clean, neat squares.
Final Notes
• These brownies improve significantly after 24 hours as the date sweetness intensifies and melds with chocolate flavors, creating deeper complexity throughout.
9. Frozen Mango Coconut Popsicles
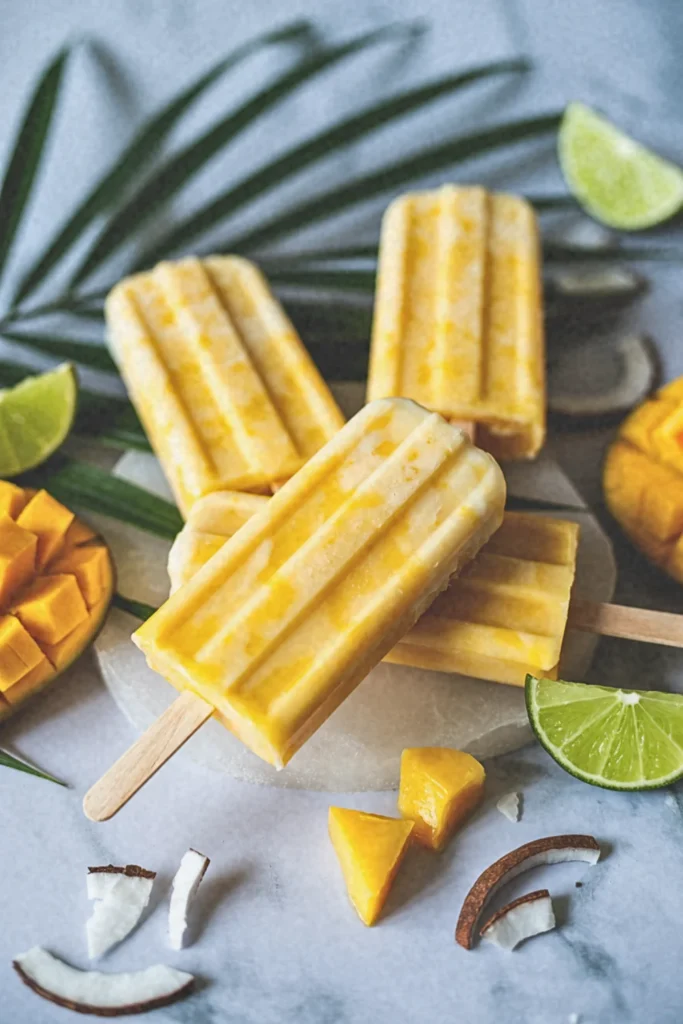
Pure mango puree combined with coconut cream creates tropical popsicles that taste like vacation. The vitamin C and natural enzymes make these treats as nourishing as they are refreshing.
Recipe Highlights (Quick Glance)
✅ Prep Time: 15 min
✅ Freeze Time: 4-6 hours
✅ Total Time: 4 hours 15 min
✅ Servings: 8 popsicles
✅ Estimated Cost: $8
✅ Calories per Serving: 95 calories
✅ Dietary Info: Vegan, Gluten-Free, Dairy-Free, Refined Sugar-Free
Category
✅ Course: Dessert, Snacks
✅ Cuisine: Tropical, International
Ingredients
Understanding the foundation of this recipe begins with selecting perfectly ripe ingredients that will create natural sweetness and creamy texture without any dairy products.
- 2 cups fresh mango chunks (or frozen, thawed) – substitute with peaches or pineapple
- 1 cup full-fat coconut milk – substitute with cashew cream for nut-based richness
- 3 tablespoons maple syrup – substitute with agave or date syrup
- 2 tablespoons fresh lime juice – substitute with lemon juice
- 1/4 teaspoon vanilla extract
- Pinch of sea salt
- 2 tablespoons unsweetened shredded coconut (optional)
Equipment
- High-speed blender or food processor, 2. Popsicle molds (8-count), 3. Popsicle sticks, 4. Fine-mesh strainer, 5. Measuring cups and spoons, 6. Rubber spatula
Step-by-Step Instructions
Step 1: Begin by ensuring your mango is perfectly ripe, which creates the natural sweetness foundation. Add mango chunks, coconut milk, maple syrup, lime juice, vanilla, and salt to your blender.
Step 2: Blend the mixture on high speed for 60-90 seconds until completely smooth and creamy. The goal is achieving a silky texture that will freeze evenly.
Step 3: Taste and adjust sweetness or acidity as needed. Pour the mixture through a fine-mesh strainer to remove any remaining fibrous pieces, ensuring perfectly smooth popsicles.
Step 4: Stir in shredded coconut if using, then divide the mixture evenly among popsicle molds, leaving 1/4-inch space at the top for expansion during freezing.
Step 5: Insert popsicle sticks and freeze for 4-6 hours until completely solid.
Step 6: To remove, run warm water over the outside of molds for 10-15 seconds until popsicles release easily.
Final Notes
• These tropical popsicles develop their best flavor after 24 hours of freezing, allowing the coconut and mango flavors to meld beautifully together.
10. Almond Butter Chocolate Truffles
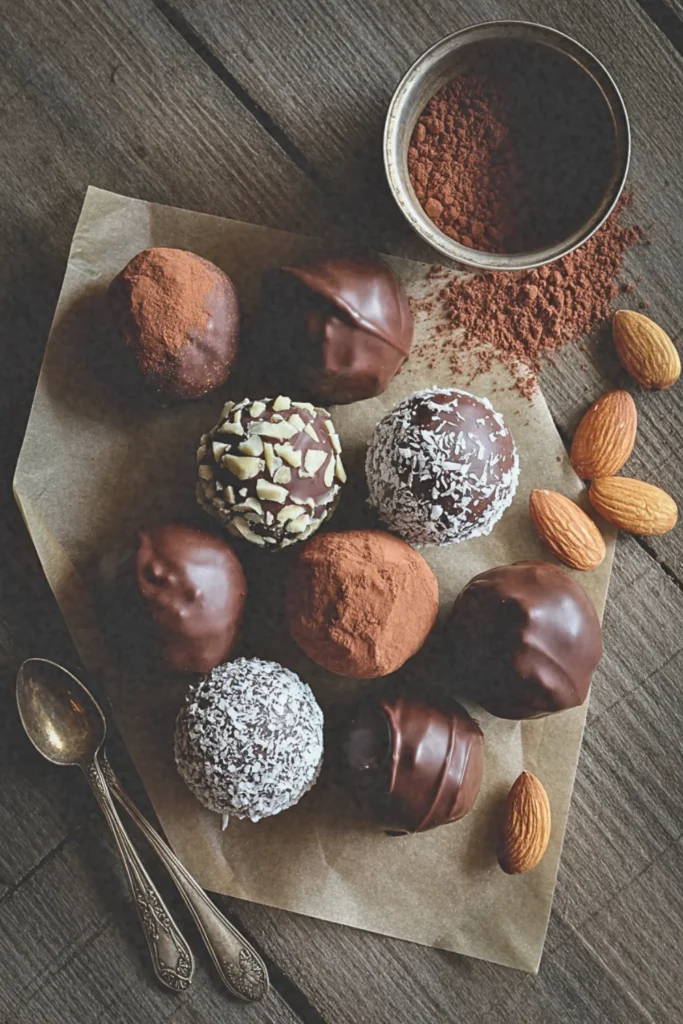
These rich, ganache-like spheres combine the protein benefits of almond butter with antioxidant-rich dark chocolate. They’re sophisticated enough for entertaining yet simple enough for everyday indulgence.
Recipe Highlights (Quick Glance)
✅ Prep Time: 20 min
✅ Chill Time: 2 hours
✅ Total Time: 2 hours 20 min
✅ Servings: 16 truffles
✅ Estimated Cost: $10
✅ Calories per Serving: 85 calories
✅ Dietary Info: Vegan, Gluten-Free, Refined Sugar-Free, High-Protein
Category
✅ Course: Dessert, Confections
✅ Cuisine: International, Contemporary
Ingredients
The beauty of these truffles lies in understanding how natural oils and fats create silky ganache textures without dairy. This requires balancing the richness of nuts with the intensity of chocolate.
- 1/2 cup natural almond butter (smooth, no sugar added) – substitute with cashew or sunflower seed butter
- 1/4 cup coconut oil, melted – substitute with cacao butter for firmer texture
- 1/3 cup maple syrup – substitute with agave nectar or brown rice syrup
- 1/4 cup unsweetened cocoa powder – substitute with cacao powder for deeper flavor
- 1 teaspoon vanilla extract
- 1/4 teaspoon sea salt
- 2 tablespoons coconut flour – substitute with almond flour or oat flour
- 1/2 cup dark chocolate chips (70% cacao, vegan) – for coating
- Optional toppings: chopped almonds, coconut flakes, cocoa powder
Equipment
- Large mixing bowl, 2. Whisk or electric mixer, 3. Small saucepan, 4. Measuring cups and spoons, 5. Cookie scoop or tablespoon, 6. Baking sheet, 7. Parchment paper, 8. Double boiler or microwave-safe bowl
Step-by-Step Instructions
Understanding the science behind truffle-making begins with creating a stable emulsion between fats and liquids, which creates that melt-in-your-mouth texture we associate with premium chocolates.
Step 1: Begin by whisking together almond butter, melted coconut oil, and maple syrup in your large bowl until the mixture becomes completely smooth and unified. This creates your base emulsion.
Step 2: Gradually incorporate cocoa powder, vanilla, and salt, whisking continuously to prevent lumps from forming. The mixture should develop a rich, glossy appearance as the cocoa fully integrates.
Step 3: Add coconut flour one tablespoon at a time, mixing thoroughly after each addition. This binding agent will transform your liquid mixture into a moldable consistency that holds its shape when chilled.
Step 4: Refrigerate the mixture for 45 minutes until firm enough to handle. Using a cookie scoop or tablespoon, portion the mixture into 16 equal pieces and roll each into smooth balls using your palms.
Step 5: Place formed truffles on parchment-lined baking sheet and chill for another hour until completely set.
Step 6: Melt chocolate chips using double boiler method or microwave in 30-second intervals, stirring between each heating. Dip each truffle in melted chocolate, allowing excess to drip off, then roll in desired toppings.
Final Notes
- These truffles achieve optimal texture and flavor development after 24 hours of refrigeration, allowing the almond butter oils to fully integrate with chocolate coating.
11. Apple Cinnamon Crisp Cups
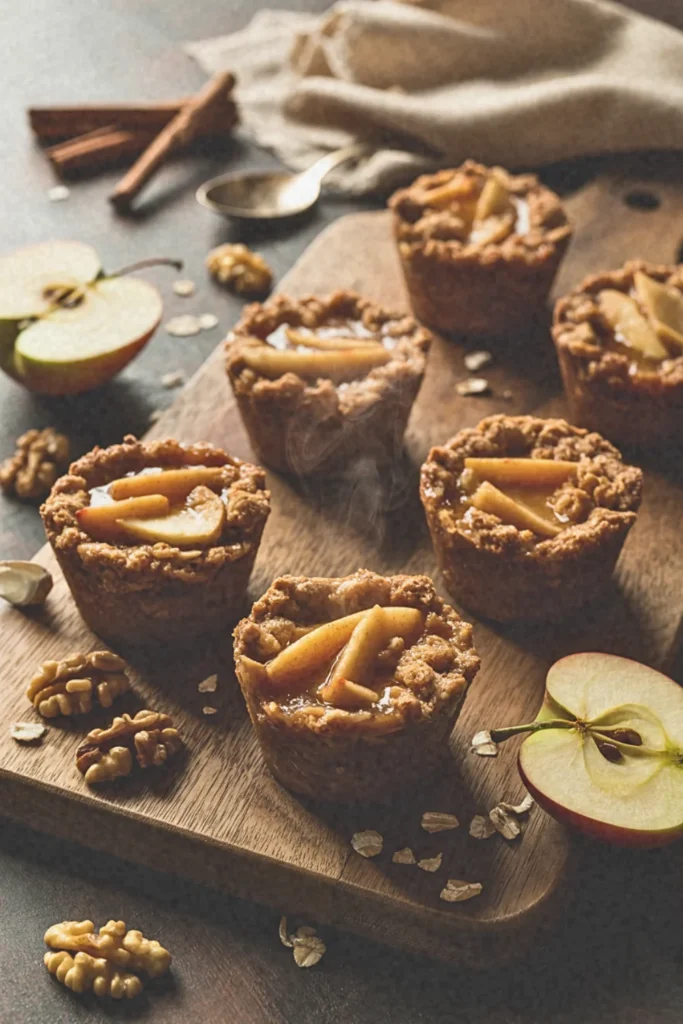
Individual portions of tender, spiced apples topped with oat-based crumble offer all the comfort of traditional apple crisp. The fiber from apples and oats creates lasting satisfaction while cinnamon provides natural sweetness enhancement.
Recipe Highlights (Quick Glance)
✅ Prep Time: 15 min
✅ Cook Time: 25 min
✅ Total Time: 40 min
✅ Servings: 12 cups
✅ Estimated Cost: $7
✅ Calories per Serving: 120 calories
✅ Dietary Info: Vegan, Gluten-Free Option, Refined Sugar-Free
Category
✅ Course: Dessert, Breakfast
✅ Cuisine: American, Comfort Food
Ingredients
The foundation of exceptional apple crisp cups lies in understanding how different apple varieties behave under heat and how natural sweeteners interact with spices to create depth of flavor without refined sugars.
For Apple Filling:
- 4 medium Honeycrisp apples, peeled and diced (substitute with Granny Smith for tartness or Gala for extra sweetness)
- 3 tablespoons maple syrup (substitute with coconut nectar or date syrup)
- 1 tablespoon lemon juice (prevents browning and adds brightness)
- 1 teaspoon ground cinnamon
- 1/4 teaspoon nutmeg
- 2 tablespoons cornstarch (substitute with arrowroot powder for grain-free option)
For Crisp Topping:
- 1 cup rolled oats (use certified gluten-free oats if needed)
- 1/2 cup almond flour (substitute with oat flour or coconut flour)
- 1/3 cup coconut oil, melted (substitute with vegan butter)
- 1/4 cup maple syrup
- 1/2 teaspoon cinnamon
- 1/4 teaspoon salt
- 1/3 cup chopped walnuts (substitute with pecans or omit for nut-free)
Equipment
- Muffin tin (12-cup standard size), 2. Large mixing bowl, 3. Medium mixing bowl, 4. Sharp knife and cutting board, 5. Measuring cups and spoons, 6. Wooden spoon, 7. Apple peeler or vegetable peeler, 8. Cooking spray or coconut oil for greasing
Step-by-Step Instructions
Understanding the science behind this recipe involves recognizing how cornstarch creates the perfect gel-like consistency when heated with fruit juices, while the oat topping provides textural contrast through proper fat distribution.
Step 1: Preheat your oven to 350°F and generously grease your muffin tin. This temperature ensures the apples soften properly while the topping achieves golden crispness without burning.
Step 2: Combine diced apples with maple syrup, lemon juice, cinnamon, nutmeg, and cornstarch in your large bowl. The cornstarch acts as a thickening agent that will absorb the natural apple juices during baking, preventing soggy bottoms while creating a luscious filling consistency.
Step 3: In your medium bowl, create the crisp topping by combining oats, almond flour, melted coconut oil, maple syrup, cinnamon, salt, and walnuts. Mix thoroughly until the mixture resembles coarse crumbs that hold together when squeezed, which indicates proper fat distribution for optimal crispness.
Step 4: Divide the seasoned apple mixture evenly among muffin cups, filling each about three-quarters full to allow room for expansion during baking.
Step 5: Generously top each cup with the oat mixture, pressing lightly to ensure it adheres to the apples and creates an even layer for consistent browning.
Step 6: Bake for 22-25 minutes until the tops are golden brown and the apple filling bubbles around the edges, indicating the cornstarch has properly activated and thickened the natural juices.
Final Notes
- These cups develop optimal flavor after cooling for 10 minutes, allowing the filling to set properly while maintaining the perfect temperature contrast between warm apples and crisp topping.
Must-Try: 11 Healthy Vegan Desserts.

Hi, I’m Aldvin Gomes, a passionate vegan and foodie on a mission to make plant-based eating effortless and exciting. I share new vegan recipes every day, so you never have to stress about what to cook. Whether you’re a longtime vegan or just exploring plant-based meals, my goal is to keep your plate full of delicious, wholesome, and easy-to-make dishes. I’m here to help you enjoy every bite. Join me in exploring the endless possibilities of vegan cooking, one delicious recipe at a time!